We can play with a ton of scenarios for the need to create a download page on a website. It is a great way easily share and track file downloads.
In practice, we have built a number of these for companies that provide a resource center on their websites; typically, they have how-to manuals, product manuals, presales documents, and more.
Although one can just upload the files either to their host or through the WordPress media manager and then link to them in their posts or pages, there sure is an easier way around that.
Besides the ability to upload files and manually create download links, one can gain more insight if they were able to track and intuitively manage their downloads, for instance, restricting access to downloads to say only paid users or logged in members.
The truth is you can achieve this without a download manager tool, but, it will be a hell of a job.
So we, draw from the WordPress repo for plugins that can help us complete the task.
For this article, we shall use Download Monitor

Download Monitor, like most other WordPress download managers; provides you an easy way to create and manage downloads on your website.
Here are some of its advertised features. You can also find them on their WordPress plugin page.
- Add, edit, and remove downloads with a familiar interface; your downloads are just like posts.
- 100% Gutenberg compatible
- Sell your downloads from within your WordPress website!
- Track downloads counts and logs user download attempts.
- Member, only downloads, requires users to be logged in to download your files.
- Quick-add panel for adding downloads/files while editing posts.
- Add multiple file versions to your downloads each with their data like download count and file links.
- Define alternative links (mirrors) per download version.
- Categorize, tag, or add other meta to your downloads.
- Display download links on the frontend using shortcodes.
- Change the way download links get displayed via template files.
- Customisable endpoints for showing pretty download links.
As you can see, you cannot achieve this kind of download management with native WordPress.
So, let us dive in and create a download page
Step by Step: How to Create A Download Page in WordPress
Step 1: Install and Activate Download Monitor
In your admin area go to Plugins and then click Add New.
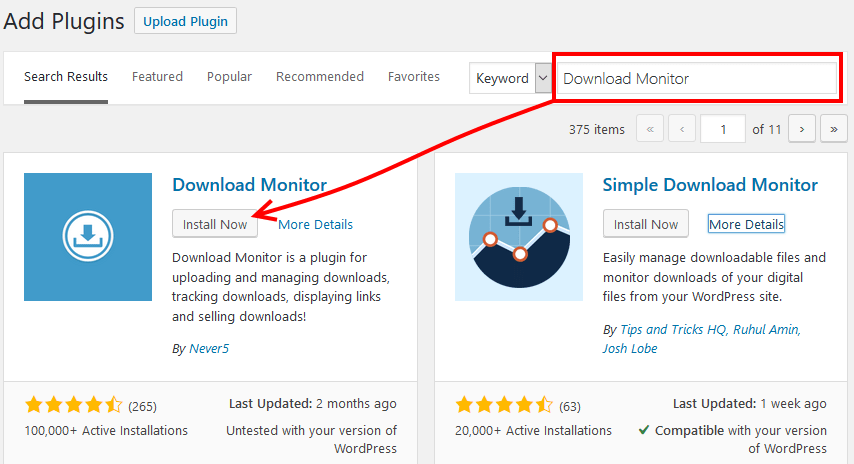
You are taken to a page from where you will search for Download Monitor. When the results are populated click Install Now, once it is installed, the Activate button appears – click it.
Step 2: Configure Download Manager
On activation, on the plugin page, you will see a notice like one below, click the link to finish the installation process.

You can also get to this page from your menu under Downloads > Extensions.
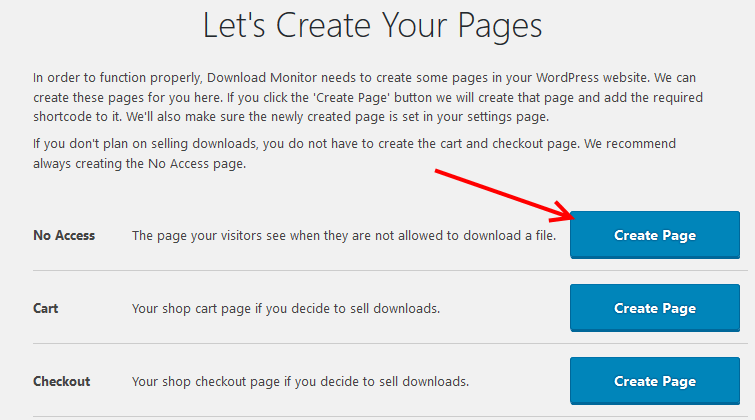
You are guided through the creation of the necessary pages – the No Access page is recommended – it is the page unauthorized visitors will see.
If you do not intend to sell your downloads, then you can skip the Cart and Checkout pages.
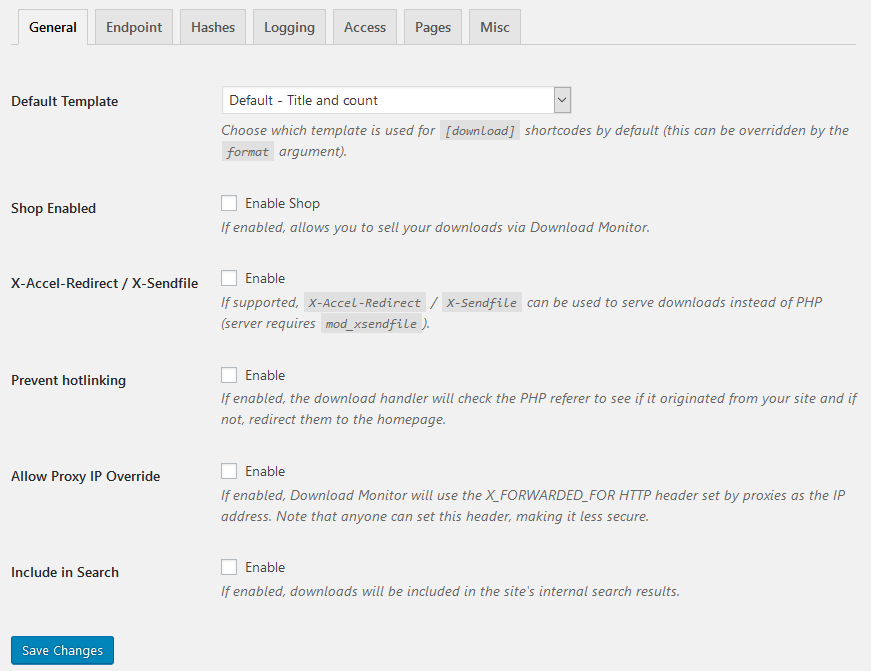
Under the Settings from the menu are some other configuration options that you may want to experiment with – we shall not get into them in this article.
We will work with the default settings.
Step 3: Create downloads
We are now ready to add downloads to our WordPress posts and pages.
Click Add New under Downloads.

In the next page, you will need to add a bunch of information.
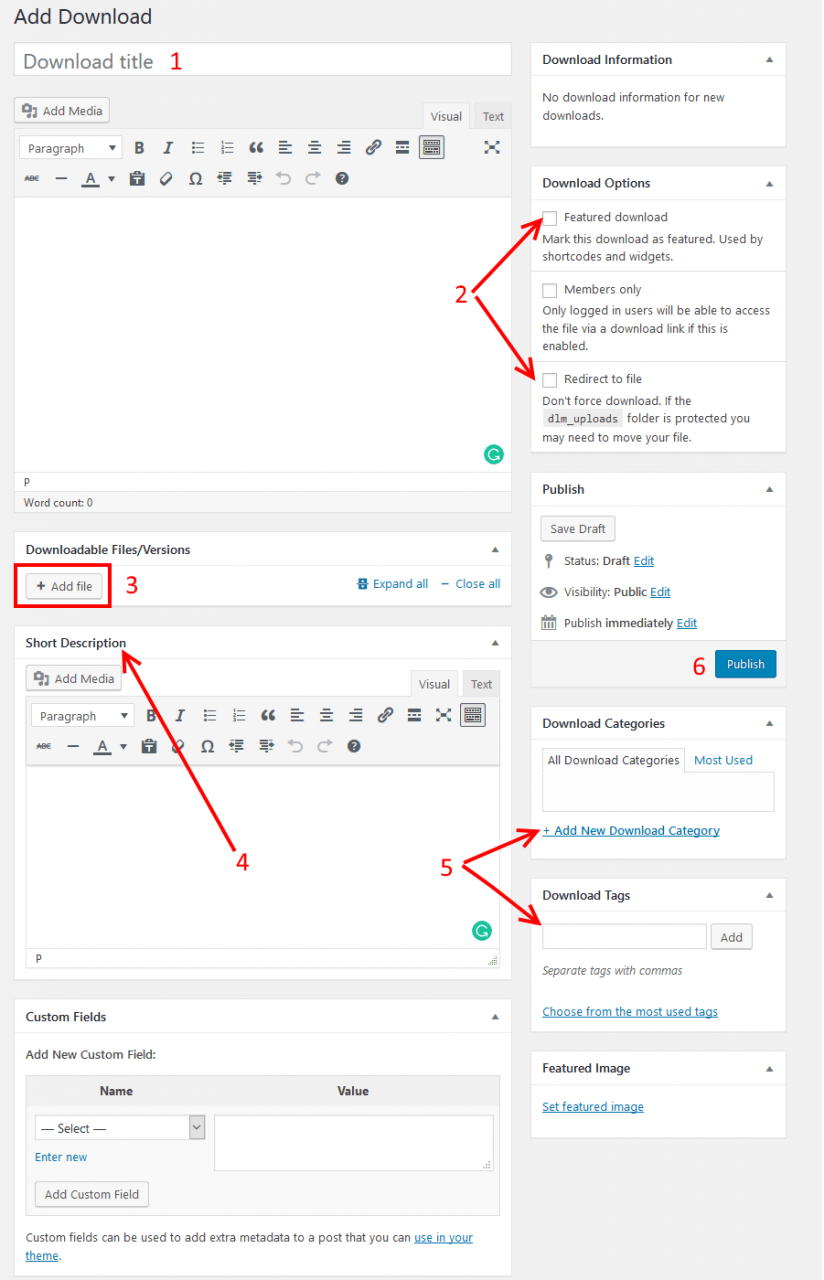
- Supply a title for your download.
- Set your download options
- Add the file(s) to your download page.
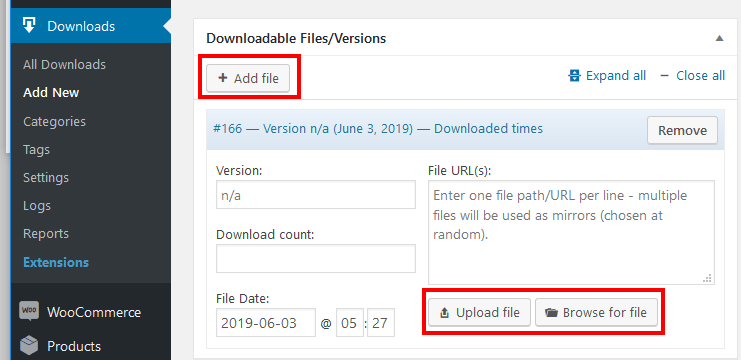
Click the Add file button, then add your files. Under the File URL(s) you can paste links to different file servers that will act as mirrors.
If you are uploading the files to your site with this plugin click Upload file for the WordPress Media Manager or Browse for File to use existing files.
- Add a short description for your file.
- Add your download to a relevant category and tag it right.
- Publish your page when you are done.
When a download is published, you a shortcode is created; something like this:
[download id=”165″]
You can add that shortcode to any page or widget on your website.
Step 4: Create a download page
If you need a single page to list all related downloads – a typical scenario is resource page – then create a new page. Else edit any page or post you want to add your downloads to.
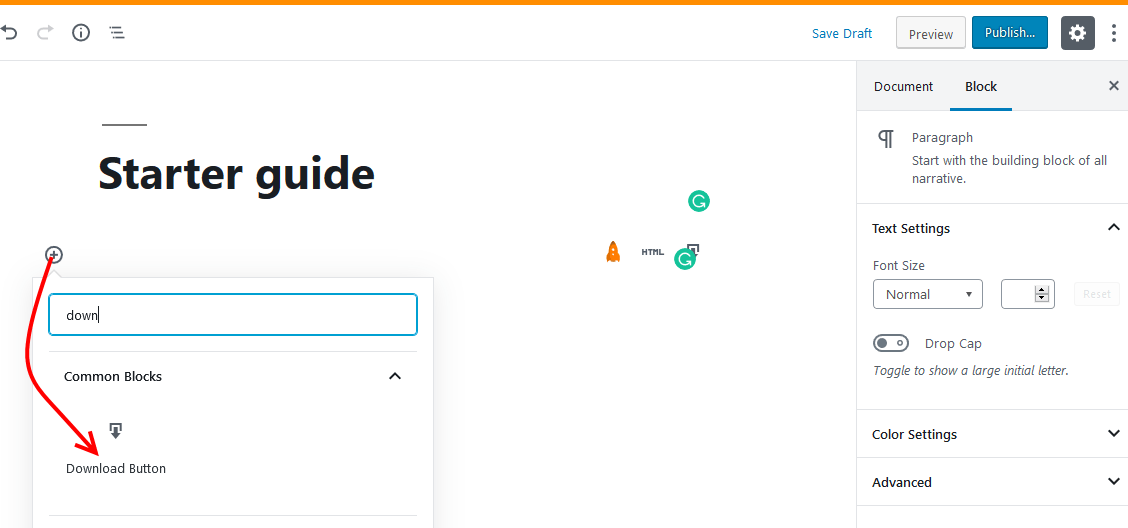
Click the Add Blocks icon – search for or under Common Blocks find Download Button.
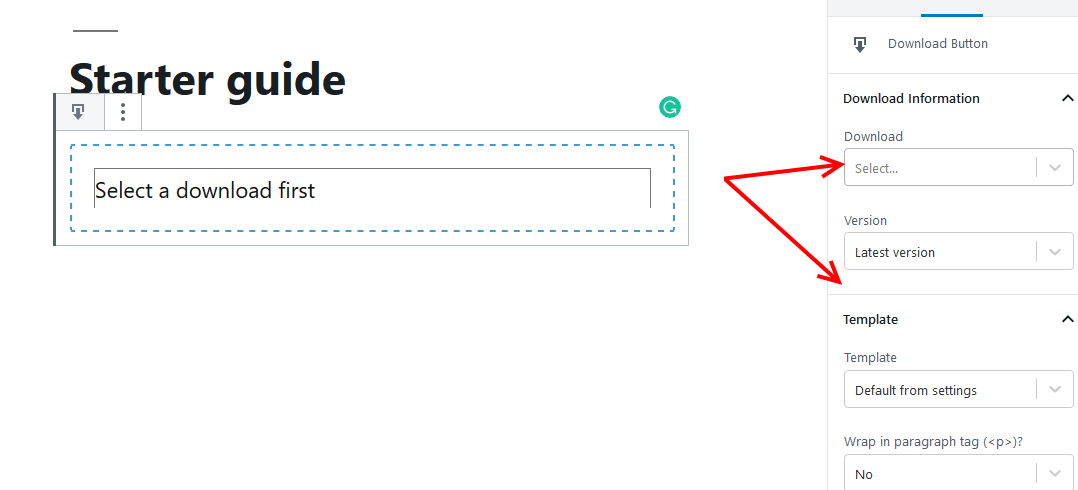
On the right pane, Select the download file, version, and template.
When you are done, you can now Publish your page.
View the page to see your download.

You can experiment with the different templates above for an appealing layout and display of your downloads.
For instance, you can use a button instead of a link, list all download versions in an unordered list; you can also choose to show only the title, or add a box with a title plus the description, and much more.
Conclusion
With Download Monitor, you can easily create a download page for your website, just follow the steps above, and you will be fine.
We have not gone through some of the configuration options, but those you will discover are easy to work with and can only make sense when you have several files and after some tests on what your users respond to better.
And yes, you can monetize your downloads. WordPress makes it really easy to succeed online; the tech stuff is sorted out for you, now go create something that people want to download.
That’s all, I hope you found this helpful. You may also want to check out our top picks for the best free download manager plugins for WordPress to help you manage file downloads effectively.