WordPress is one of the best content management systems, it is used for building a wide variety of websites such as blogs, ecommerce websites, company websites and almost any other kind of website. Often the default WordPress installation limits the maximum upload size and it needs to be increased. In this tutorial we will go through 3 methods you can use to increase the maximum file upload size in WordPress.
Why You Need to Increase the Maximum File Upload Size
Depending on your requirements you may want to upload a large file to WordPress. This can be a theme file, WordPress plugins or media. You may also want to upload a large file such as an eBook for your visitors to download. Your theme may be a few MB larger than the maximum upload size. No matter the reason, if the file size is larger the maximum allowed you will get an error: your file name exceeds the maximum upload size for this site
To work around this you will need to increase the maximum file upload size. There are 3 ways in which you can increase the maximum file upload size. You edit any of these 3 files: .htaccess, functions.php or the php.ini file.
How to Increase the File Upload Size in WordPress in 3 Ways
Checking the maximum upload size
Log in to your WordPress dashboard, on the left hand menu, under media, click on add new. The maximum upload file size will be shown.

Our current limit is only 2MB and it means we cannot upload any file more than 2MB. This can restrict us in a number of ways. Even a very basic WordPress theme is usually 5MB. A normal pdf would probably be more than 2MB. So let’s start and see how we can increase the maximum file upload size.
Method 1: Editing the .htaccess file
The .htaccess file is a configuration file usually found on apache servers. If you are using a cPanel host, this file will be in the WordPress installation directory, most probably the public_html folder. To increase the file upload size, simply add the following code to it:
php_value upload_max_filesize 256M

php_value post_max_size 256M

php_value max_execution_time 400

php_value max_input_time 400
Method 2: Editing the functions.php file
This will set the maximum file upload size to 256 MB you can change this as per your requirements. We have also increased the maximum execution time to 400 seconds, since uploading a large file will also take some time. You don’t want the php upload script to time out.
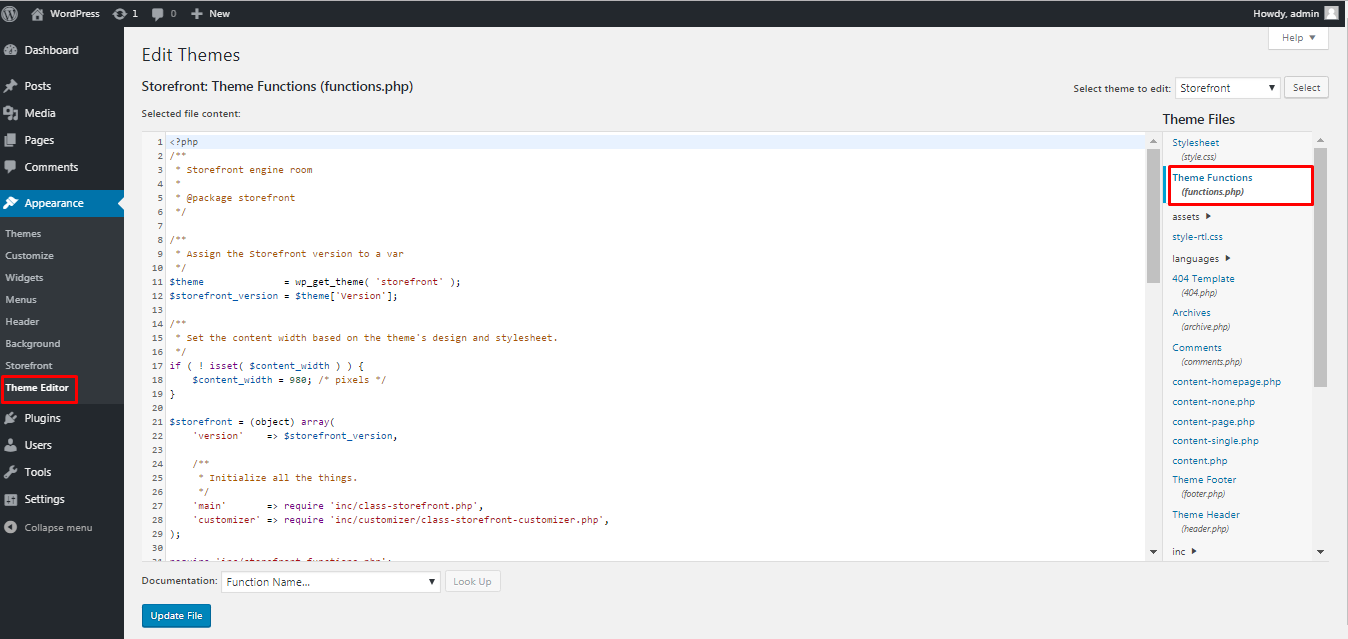
Login to your WordPress dashboard, under the appearance menu click on theme editor. Here you will find a list of files for your current theme and WordPress installation. You need to find the functions.php file to be able to edit it.

Scroll to the bottom of the file and add the following code to it.
@ini_set( 'upload_max_size' , '256M' );

@ini_set( 'post_max_size', '256M');

@ini_set( 'max_execution_time', '400' );
Click on update file once done. You should now have increased the WordPress maximum file upload size to 256MB and the maximum execution time to 400 seconds.
Method 3: Editing the php.ini file
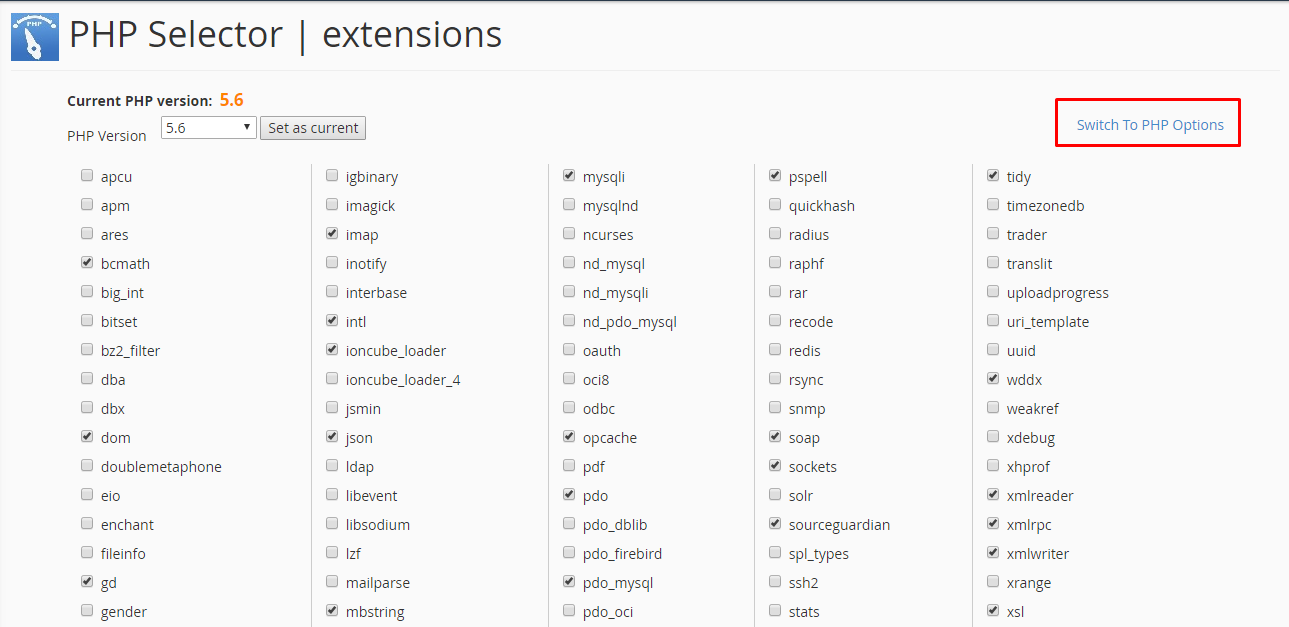
Most shared hosts use cPanel for management since it is the most popular and has all the features needed to host a website easily and securely. If you are using a cPanel host, log in to your cPanel account and search for php. Click on select php version.

This will open the php selector page. Click on switch to php options.

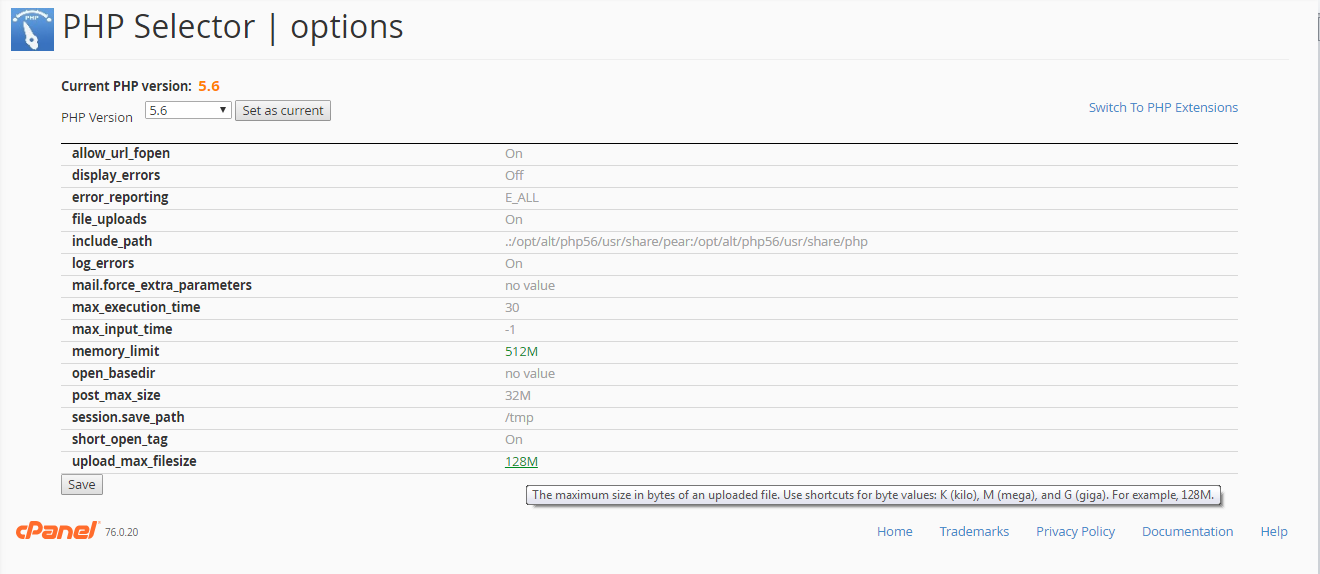
This will open the php options, the last option here is upload_max_filesize, changing the value for this option will allow you to change the maximum file upload size.

Editing the .htaccess file and the php.ini file both require access to the hosting panel or the file manager. Editing the functions.php file can be done right from the WordPress dashboard and might just be the easier of the 3 methods.
Conclusion
Sometimes your hosting provider may restrict the maximum file upload size and you will need to contact them to have this increased. Given the different hosting environments from different providers one of these methods may work for a few people while another method may work for others. You also need to take security in to consideration. Allowing a larger file upload size can also be exploited by attackers. If you don’t need to upload large files often you can increase the file upload size for the instances you need and then revert back to a lower file upload size.
That is all for this article. We hope you are now easily able to increase the maximum file upload size in WordPress. You may also want to learn how to fix 404 errors in WordPress.