Learn how to create CSS3 buttons today because – buttons are not just colored boxes on a website; they are probably the most important element in any website as it draws attention and causes a visitor to do something: Signup and login your wesbite, share, submit or edit posts, buy your products, save and a lot more.
Creating buttons from scratch, especially considering cross-browser functionality – is not a piece of cake. Those familiar with HTML, CSS know how stubborn creating beautiful CSS3 buttons can be, thanks to WordPress CMS and MaxButtons WordPress plugin you will showcase some of the most beautiful buttons on your website.
Using MaxButtons, we can create CSS3 buttons without touching a single line of code.
We will get started by installing the plugin from the WordPress website admin area. If you would rather download the files, then download them from the author’s WordPress plugin page here.
What is Maxbuttons?

Maxbuttons is a great WordPress plugin that will easily enable one to create amazing CSS3 buttons that you can add to your pages, posts or even widgets on your WordPress website without having to touch a single line of code, of course, I must add – unless if you want to.
With it, one can create CSS3 call to action buttons perfect for multiple uses like social share buttons, buy now, contact us, and more.
Main Features of the plugin
- Easy to use, no coding skills are required to use it.
- Button shortcodes that can be placed anywhere in your content – pages, posts or even widgets.
- Create an unlimited number of CSS3 buttons.
- Works with all modern browsers, whilst compatible with the rest.
- Reusable buttons, as a foundation for creating others.
- Fully CSS3 compliant with text shadowing, box shadowing, gradients, etc.
- Color picker for unlimited color combinations.
- See your buttons on different color backgrounds.
- Among many others.
Creating CSS3 buttons
1.From the left Admin Menu, Click MaxButtons, and then click Add New

2.Or you can click Buttons, and Add new from the buttons dashboard. Before you create your first button you will have 3 buttons you can click to create a new CSS3 button. Click Add New.
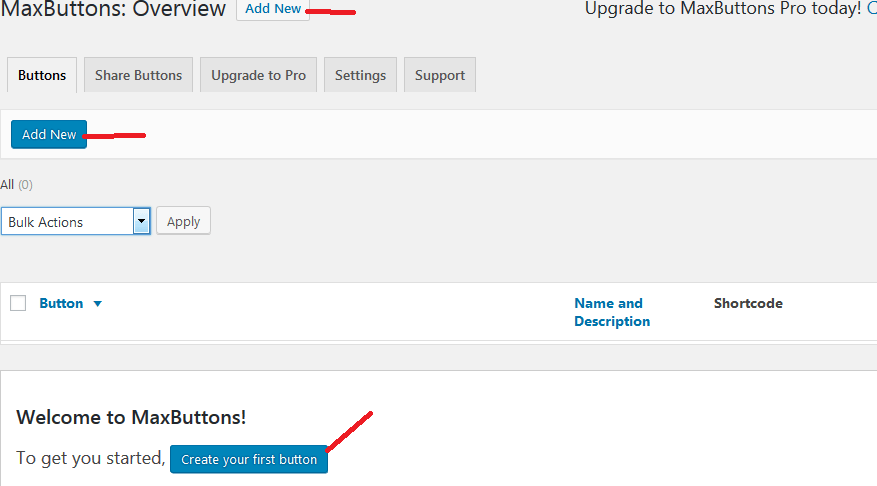
3.On the next screen, using the editor, create and customize the CSS3 button to your liking.
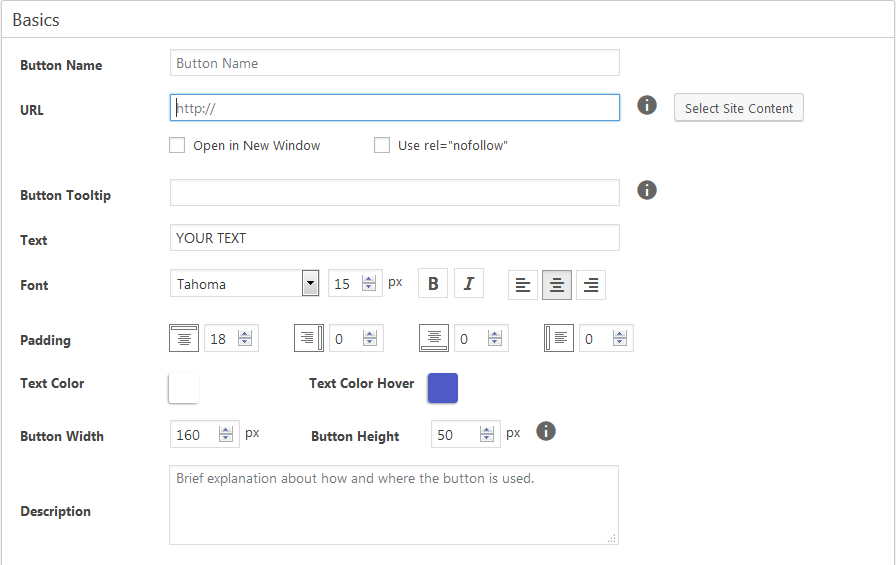
The options to customize your buttons are quite many and may seem overwhelming, but, it actually is not. You can start off with the default button settings, just change the target URL, button name and Text.
But as you experiment you can preview what you are doing and keep adjusting to your liking.
The button preview area is found on the top right corner of the plugin page. You can toggle to view or hide it by clicking the arrow key.
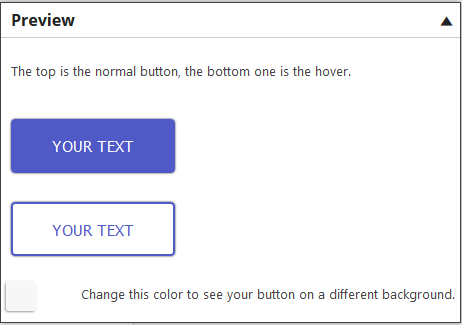
4.Make sure you click Save once you are done.
Inserting CSS3 buttons to the content
1.Copy the button shortcode for the button you created above
![]()
2.Paste this shortcode anywhere in your page, post or widget and the button should appear there.

3.Maxbuttons comes with an extra great feature.
Ability to reuse the CSS3 buttons you created without having to go through the same process.
This is typical of websites where consistency is important.
There are two ways of reusing the CSS3 buttons
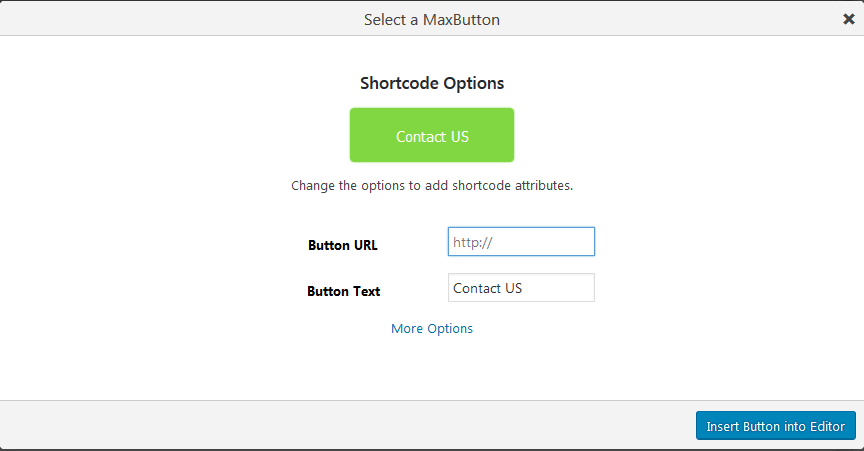
1.First, As you create your post or page with the visual editor – click MB.
I want to add a button to a widget and preferred to use the visual editor like we are using now, then you will need to use a Visual Editor widget, you can learn more from our beginners guide: Edit Widgets with WYSIWYG Visual Editor in WordPress.

On the popup form click the button you want to add to your content.

Set all the options you want for your button, define the new, text, the link of the page someone will be redirected to when they click on the button and more.
When you are done defining your options, click, insert button into the editor.
Here is how our content editor looks like with the shortcodes added. The second shortcode was one we added in the last step.
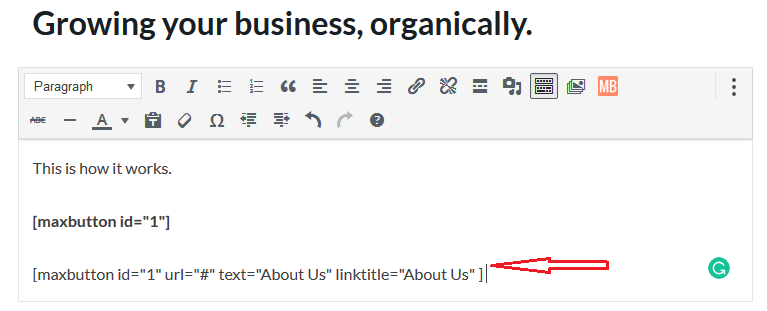
2.The alternative route to adding the buttons with the shortcode is passing parameters to the shortcode.
Here are the parameters that you can use to create a css3 button with the design one had made.
- Add a button by using the button name [maxbutton name=”Contact Us”]
- Same button with different link [maxbutton id=”1″ url=”http://yoururl”]
- Same button with different text [maxbutton id=”1″ text=”yourtext”]
- All possible shortcode options [maxbutton id=”1″ text=”yourtext” url=”http://yoururl” linktitle=”tooltip” window=”new” nofollow=”true”]
Let us shade light and make sense of these parameters
Maxbutton id – this you know is the unique id assigned when you create a css3 button with Maxbutton.
Text – is the text as will be displayed on the on the button.
URL – is the link to the page or website a user will be redirected to when they click the button.
Link title– When someone hovers over a button, a tooltip is shown, you set the text here.
Window – by default a button will open the target page on the current window. When you pass in window=” new” parameter to your shortcode, the URL will be opened in a new window once the button is clicked.
Keep in mind that passing parameters to the shortcode will override the default settings you made when you did create the CSS3 the button.
When it is all done, our content should display the buttons.
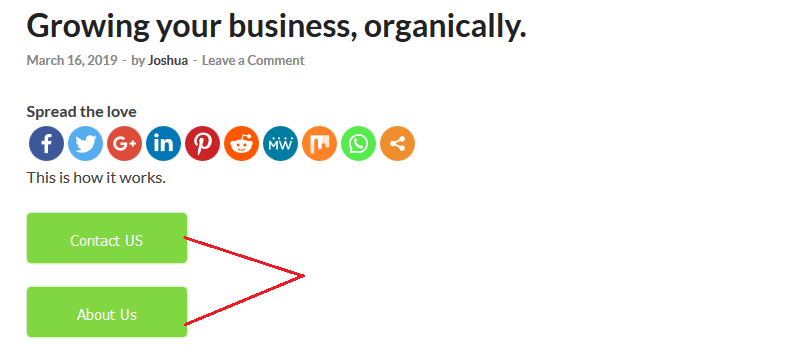
With Maxbutton WordPress plugin you can create beautiful CSS3 buttons – without any technical coding knowledge – buttons that will suffice for any call to action you need to add to your content.
If you love what the basic plugin can do for you, then you could consider the add-ons to do a lot more with the plugin.
If you are shopping for a plugin to use, then, it is only prudent to consider others. Here are a couple more plugins.
- Buttons Shortcode and Widget
- Forget About Shortcode Buttons – yes that is its Create CSS3 buttons right within your page or post without a shortcode.
Hopefully this helped you create CSS3 buttons easily, you may also want to learn how to create a newsletter/subscribe widget for your WordPress site.