In this article, I will walk you through how to set up WooCommerce and to get started selling online.
What is Woocommerce?

WooCommerce is an open source WordPress plugin used to sell anything online.
WooCommerce is a tried and tested eCommerce platform available for any hosted WordPress website.
It only makes sense why it is the go-to solution for anyone who wants to sell products digital or physical online using their website.
For payments, WooCommerce integrates with almost all the popular payment gateways available.
Paypal payments, Bank, cash and Stripe are some free options available.
It has an active and rich marketplace where you can buy almost any kind of extension an e-commerce site would require.
Before you get started, I will assume a couple of things.
- You already have a self-hosted WordPress website. If you are using wordpress.com kind of blogging platforms, then you will need a business account to install plugins.
- You have a functional website, by functional, I mean it is running with a theme.
- If you are starting from scratch, then you will need a hosting account, a domain name, install WordPress and install a theme to your account. If you do not have a theme, do not worry, there are hundreds of free themes that play well with WooCommerce.
Step by Step: How to install and set up WooCommerce?
Step 1: Installing WooCommerce plugin
WooCommerce files are downloadable from wordpress.org or search the WordPress plugin repo from within your website.
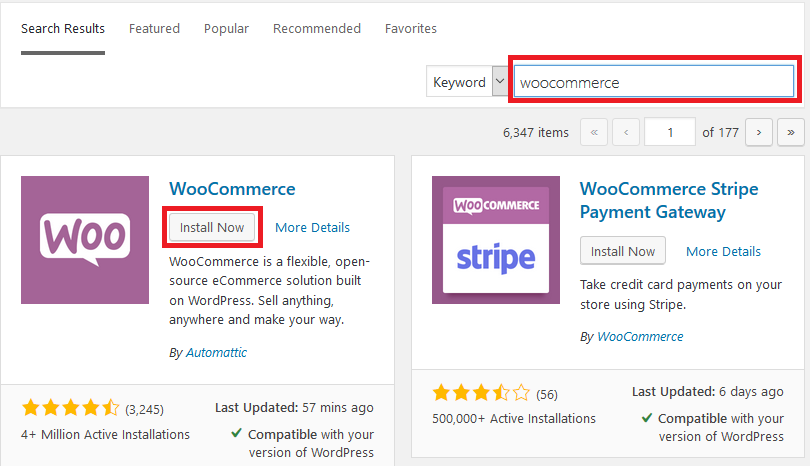
Navigate to Plugins, then click Add New. Enter WooCommerce in the search box and then click Install Now then activate under WooCommerce
Step 2: Configuring and setting up WooCommerce.
On activation, I recommend going through the initial setup Wizard.
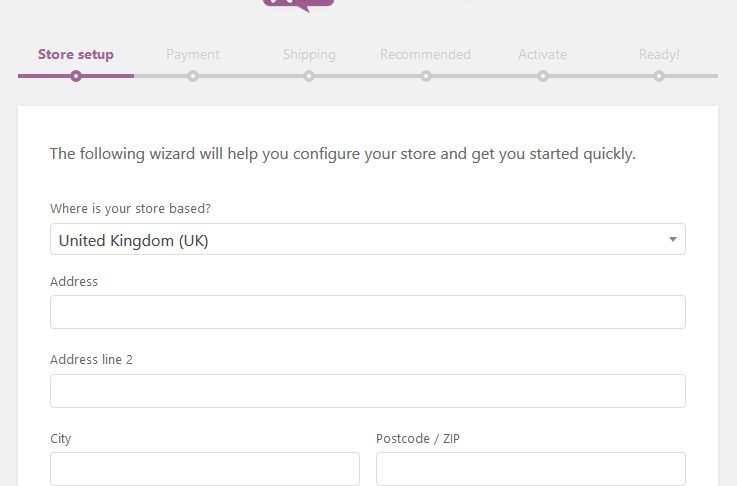
On the first screen, you will set up the information pertinent to your store.
Provide your address, the currency your store accepts, and the type of products whether digital or physical or both that your store will sell.
At the bottom of the screen, Click, Let’s Go, once you are done entering the information.
On the next screen choose the payment methods your store can accept.
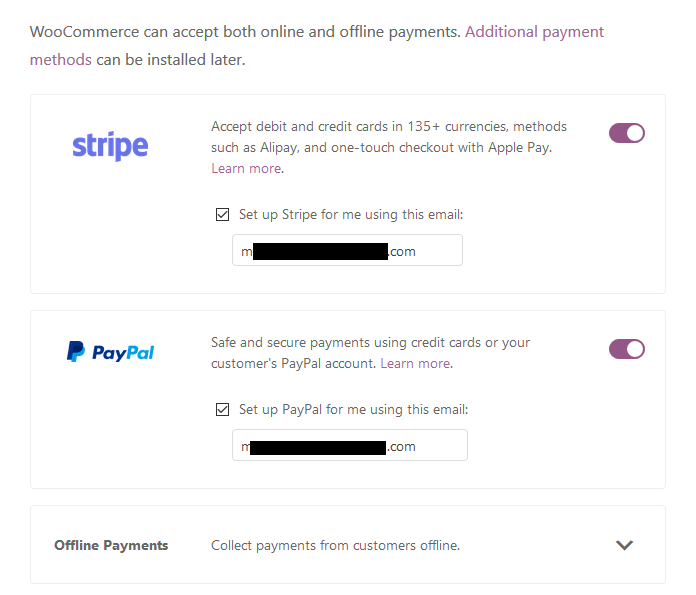
Out of the box, you can accept debit and credit cards, Alipay, Apple Pay with Stripe and Paypal.
If you have a physical store or if you accept offline payments, you can also set them here.
You can accept, Check Payments, Bank Transfers, and Cash on Delivery.
Choose what is appropriate for your store and then click continue.
Depending on the payment methods you choose, several plugins will be installed next.
The following plugins will be installed and activated automatically for you: WooCommerce Stripe Gateway WooCommerce Services Jetpack WooCommerce PayPal Checkout Gateway.
Jetpack and WooCommerce Services power stripe and PayPal setup.
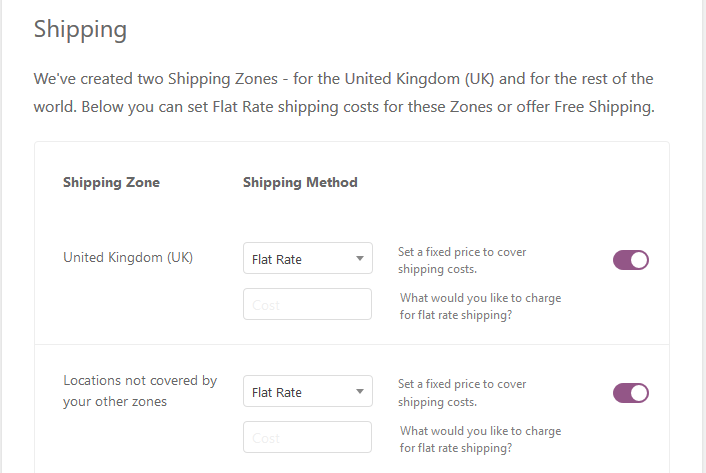
On the next screen configure your shipping details and click continue.
Next, choose if you want to consider the recommended plugins.
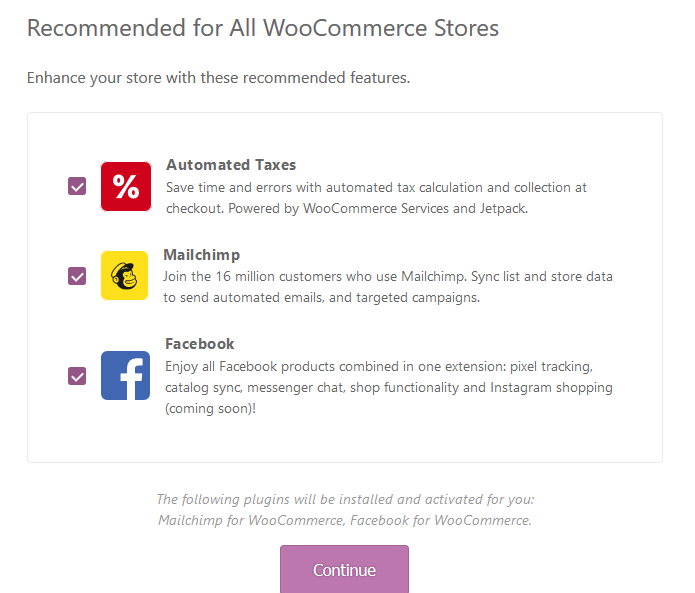
I personally love and use Mailchimp plugin on all WooCommerce stores I build; I think it is a very powerful tool that automates lots of marketing tasks and processes of an eCommerce store.
I highly recommend it for anyone serious about email marketing and automation.
UnCheck the items you prefer not to install and then click Continue.
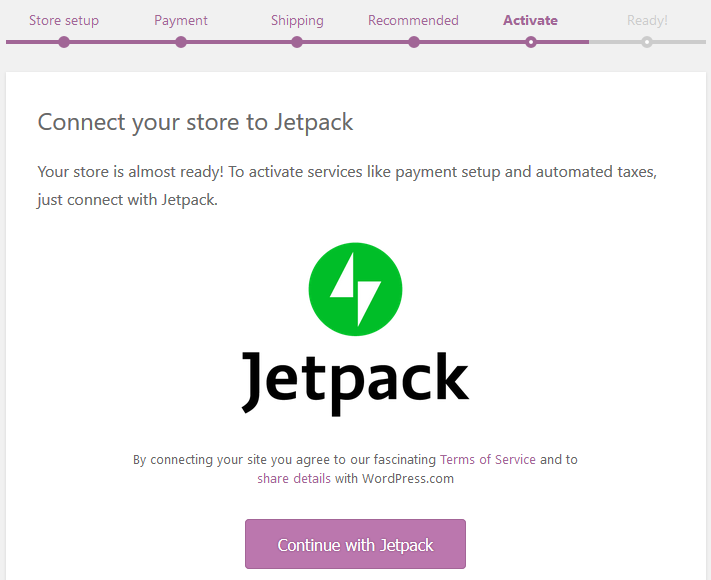
Depending on the settings you choose in the previous screens you may need to activate and connect Jetpack to your store.
Click the Continue with Jetpack button.
If you would rather do this later or if you do not need it at all, Click Skip this step at the bottom of the screen.
That’s it with the quick setup wizard.
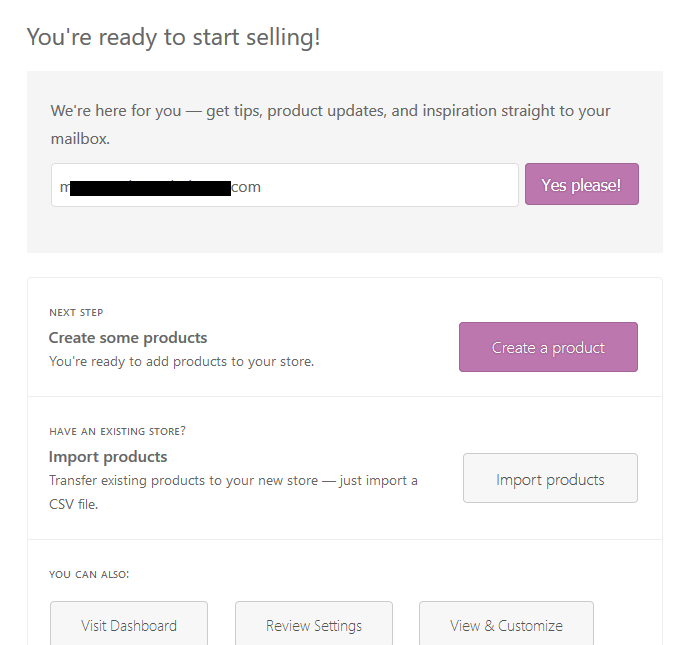
You can now start creating or import products, or go to the dashboard.
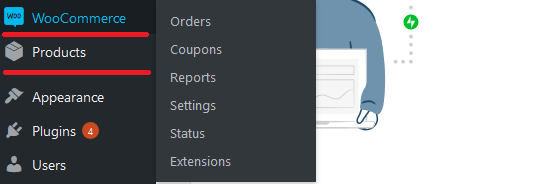
Once installed, you can always access and manage your store from the WooCommerce and product sections of your admin menu.
Step 3: Adding products to a WooCommerce store
Once your store is set up and configured, you are now ready to start selling.
The first thing to do is to add new products.
Go to Products, then Click Add New from the submenu.

Provide the product name and Long product description.
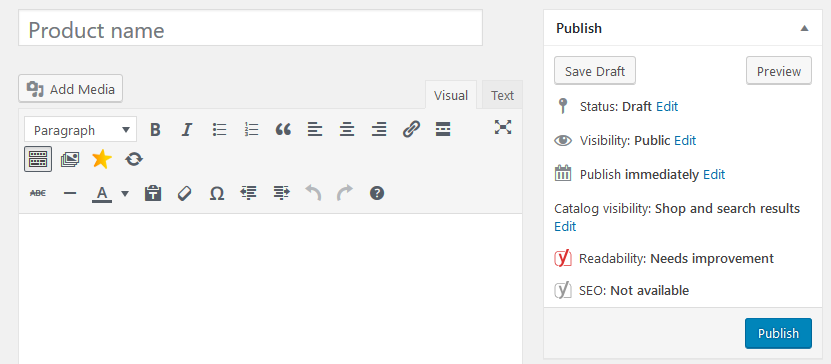
Next, Provide the product details
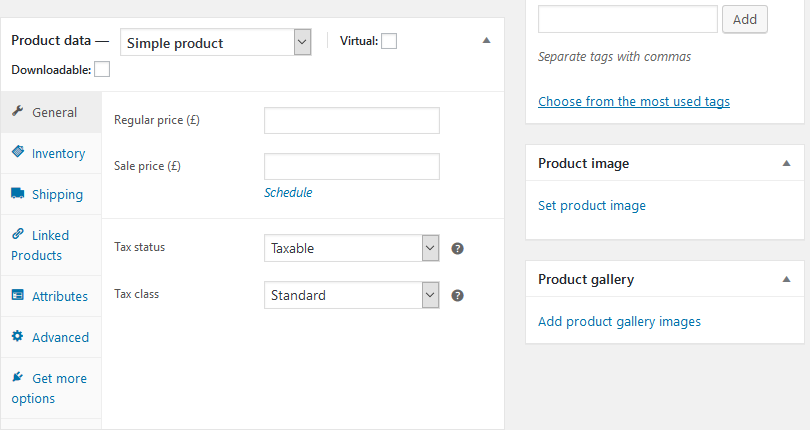
The most important is the Price, Shipping and on the right set a Product image.
Next, enter the product short description.
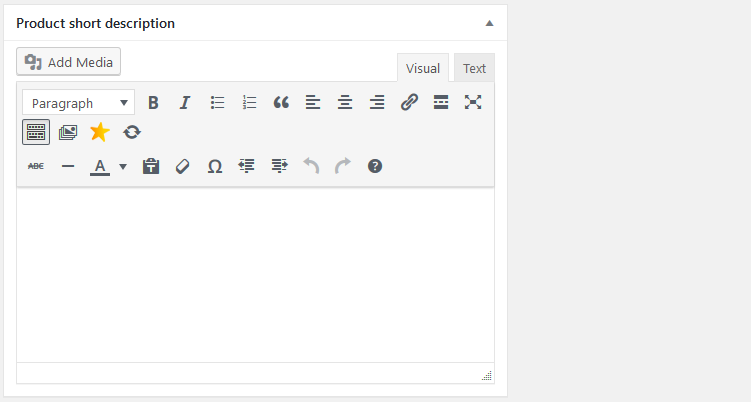
Scroll back up on the same page and click Publish.
Conclusion
WooCommerce within a few minutes of installation has the power to transform your WordPress website into a very powerful eCommerce store.
It is so simple to install and use. Very powerful and robust. A definite must for anyone who is selling products online or offline.
The free plugin by itself provides you a lot of mileage, but if you need more power, then you should consider the extensions in the WooCommerce market place.
We would love to hear and learn more from you about WooCommerce and eCommerce in general.
Share your thoughts in the comment below.
You may also want to secure your WooCommerce store from scratch.
