Named after the inventor of the printing press, Johannes Gutenberg, the new WordPress Gutenberg block editor debuted in the WordPress 5.0 release as the default editor for WordPress.
The mission is simple, to create a new writing and editing experience with WordPress.
Featuring blocks, the Gutenberg editor provides a unique experience in creating media-rich content with WordPress.
It brings lots of functionality natively to the editor that with the classic editor one would need plugins to accomplish tasks.
In a moment I will take you through how to use Gutenberg block editor.
Working with many clients using WordPress, not many were thrilled by the hard move into their editing experience.
That probably explains why millions of WordPress users installed the classic editor once the choice was taken from them with the release of Gutenberg.
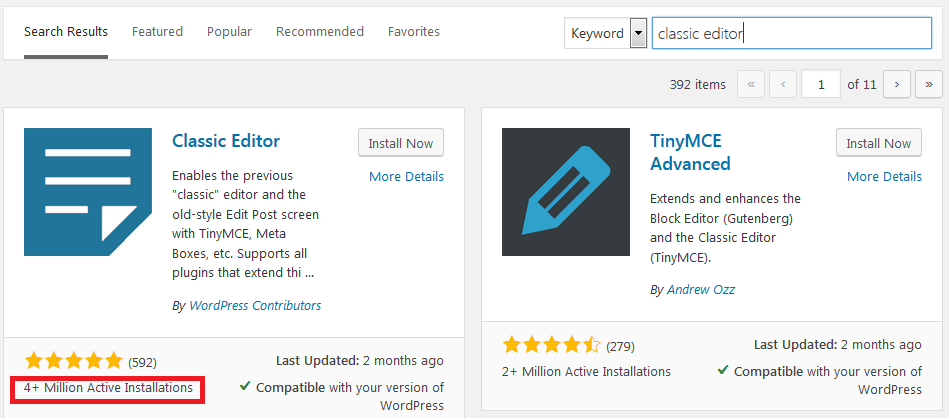
One part justification could be compatibility with older themes, another part just user indignation or lack of knowledge of how to use Gutenberg block editor.
I hope after going through this article, for the later, you will be comfortable with the block editor.
Step by Step: How to use Gutenberg block editor?
It starts with creating a page or a post. Something you are already familiar with.

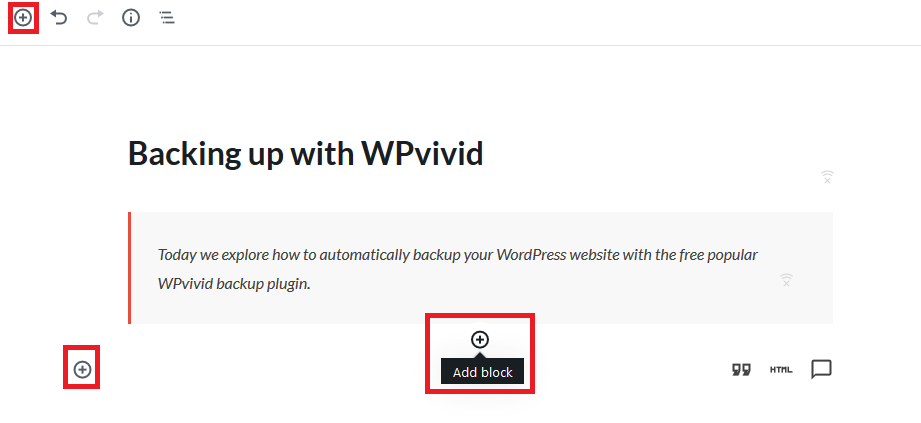
When you add a new page or post, the first thing you should notice is this toolbar.

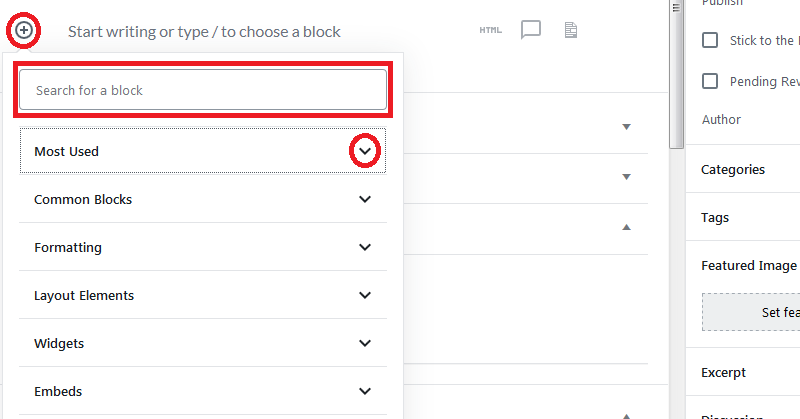
On the left, we have the + Add Blocks toolbar. This is one of the places you can add blocks to your content.
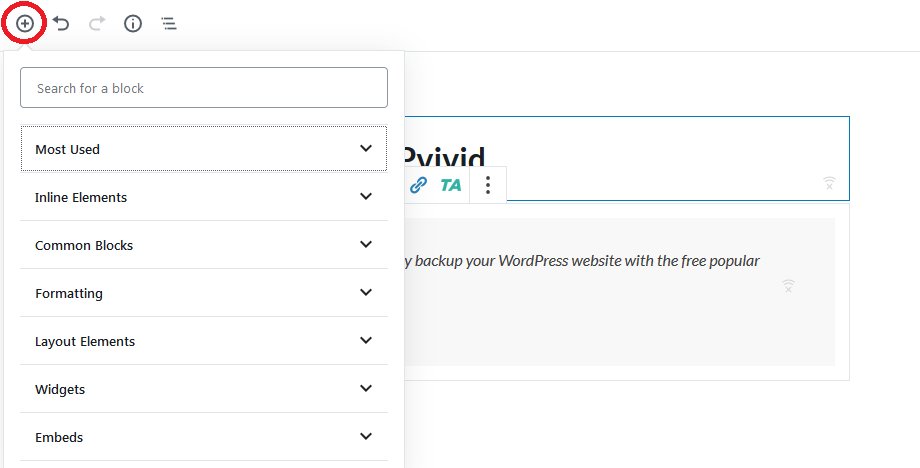
You can also add block by click below the last block then click the + icon the appears.
Alternatively, hover between blocks, the Add Blocks Icon appears, click it to add the block.
Next up, are the Undo and Redo buttons.

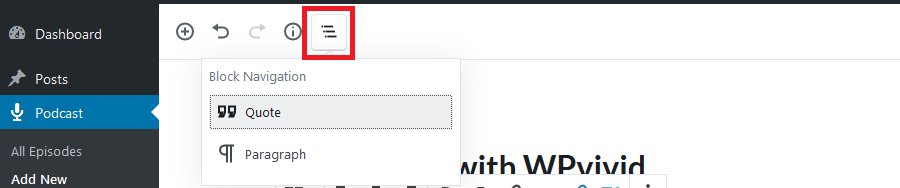
The next icon on the top toolbar shows your content structure.

Next is the Block Navigation
If and when your content grows with many blocks, you can navigate to the blocks from here. Cool isn’t it.
On the right,

These are pretty straight forward, Save Draft, Preview your post (Opens it in a new tab) and Publish.
The next icon toggles the display of the settings. It displays or hides the right panes.
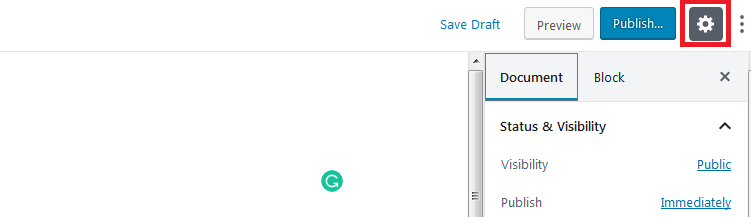
If the settings are visible, click it to hide for a wider distraction-free editor. Click it again to show the settings.
At the tail end of the toolbar are three vertical dots. That allows you to hide or view more tools and options.
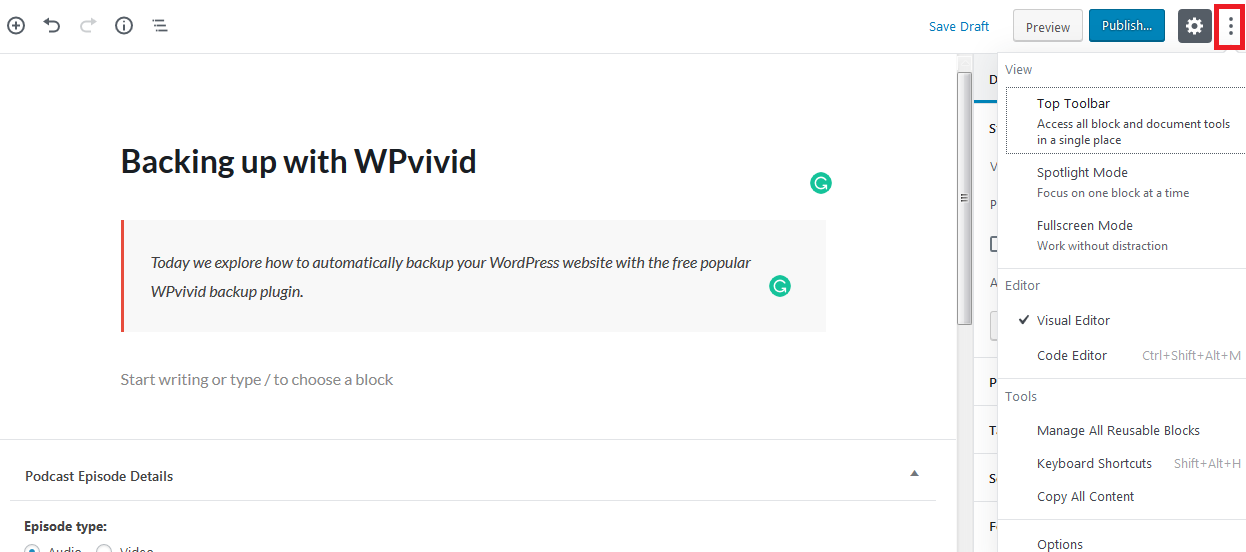
So what can you exactly do with the more tools and options?
- You have the Toolbar – access all block and document tools in one place.
- Spotlight mode. Lets you focus on a block at a time
- Full-screen Mode. Blow up your editor for a total distraction-free editing experience.
- Toggle between the Visual editor – what you see now, and the Code Editor – if you need to write code that the Code and HTML blocks cannot handle.
- Manage Reusable blocks
- Keyboard shortcuts and
- Copy all content on the editor.
The Gutenberg Blocks
So far you have kept seeing blocks, but what are they?
We shall take the long route to see how they work, and hopefully, it will then make sense, and you can give it a definition based on your understanding of it.
There are six categories of blocks in Gutenberg each, including, Most Used, Common Blocks, Formatting, Layout elements, widgets, and embeds.
While creating content, with the classic editor, all you had to do was enter content into the text areas.
With the new editor, you will utilize blocks, that have been organized about the type of content. To add text content, one needs the text/paragraph block, Images – Images block, Html, HTML block.
This is something different from the classic editor where you inserted all your content in one place.
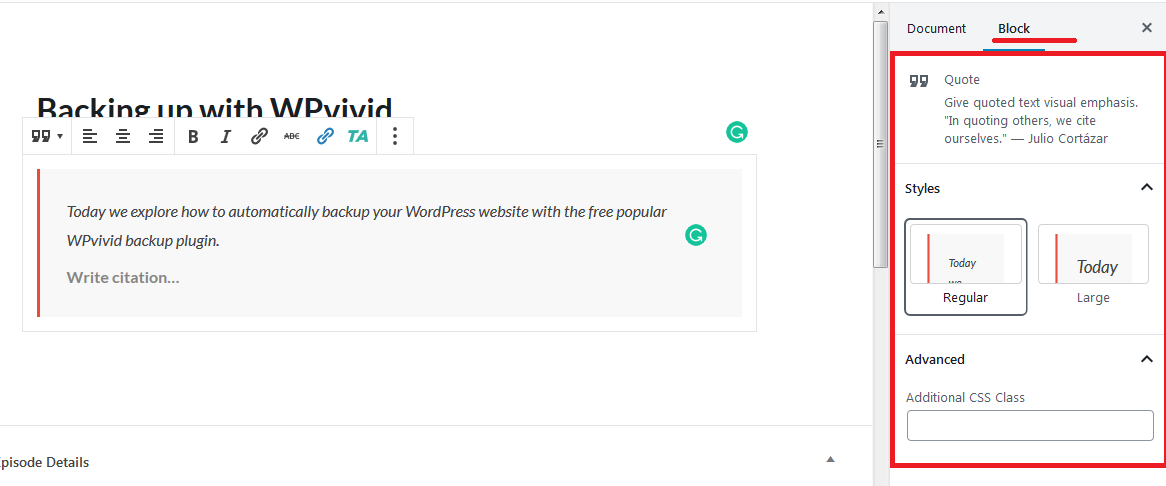
Using the block tools
Each block has its tools that you can use when creating and editing content.
Unlike the classic editor that had all tools visible.
To access these tools, click the content in the block. We shall use the paragraph/content since this is one you will often be using.
When you click the text or content in a block, a toolbox opens up above the content.

The tools you will see are exclusive to the block you are using, so do not expect to see the same tools when you click a media block.
The paragraph block, for instance, has text formatting tools left align, center align, right align, bold, italics, insert a hyperlink, and text strikethrough.
Plus more formatting tools that are added by other plugins you install to extend the default blocks functionality.
The two features on the block tool kit that cut across the blocks are the “Transform block” at the beginning, and then at the end, you should see the “More options” Icon – three vertical dots – that contains more settings for the block you are working with.
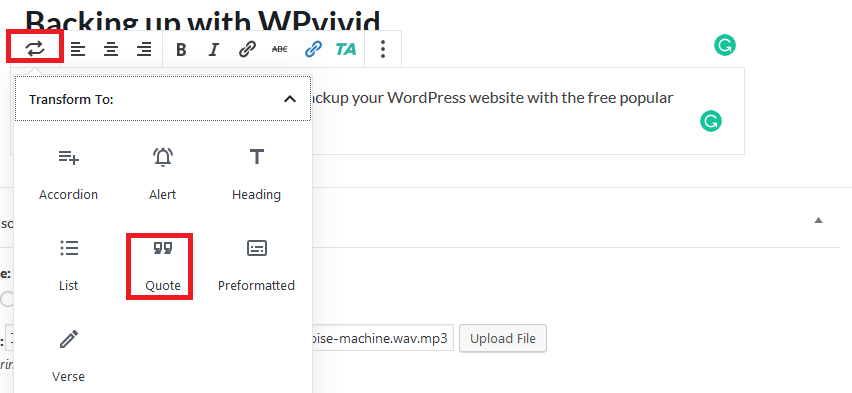
Transform a Gutenberg block
To transform a block, click the block as you have seen in the paragraph block above.
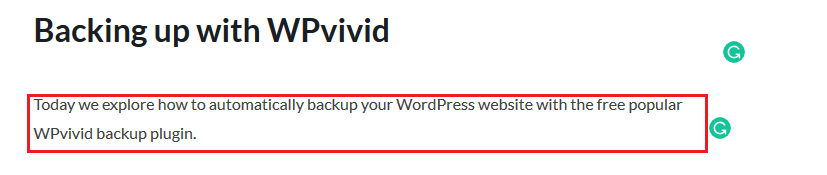
Assuming we want to transform our first paragraph to a quote, you click it, then click the Transform to Icon and then choose the new block you want to transform it to.
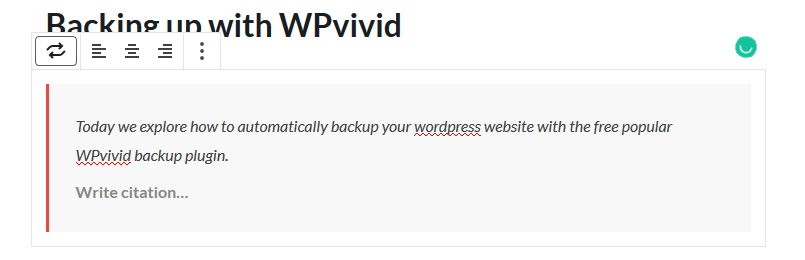
Transforming the paragraph block to quote now looks like this.
The More Options Button
The other button the block tool kit has is the “More Options” icon – the three vertical dots. Click any block to see it.
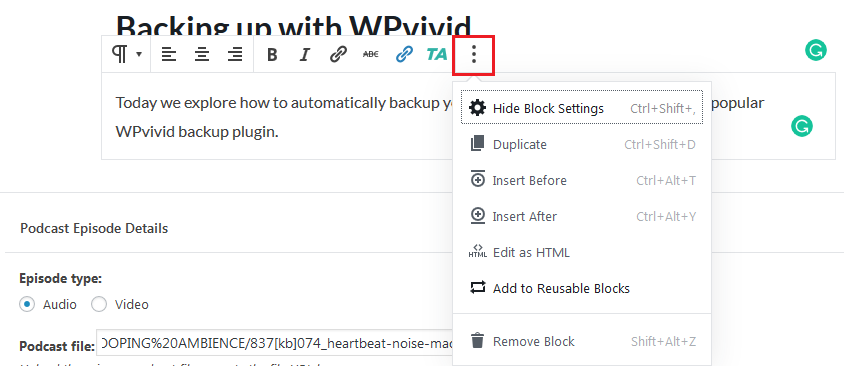
With the More Options, you can do more with your block like; Hide the block settings, Duplicate the block, Insert the block before or after the preceding and proceeding blocks, edit the block as HTML, add the block to reusable blocks, and finally, Remove or delete the block.
Changing the permalink of a post or page with Gutenberg block editor
Click the title of the post or page. Above it, the link will be displayed.

Click the Edit Button, then modify your link and then click Save

Document and Block Settings on Gutenberg Block Editor
On the right of every Gutenberg post or page is a pane with two tabs.
The Document Pane has the document-wide settings for the page or post, including the Status and visibility, post authors, Tags, Feature Image, Discussions – to allow commenting, Categories and plugin related settings for posts and or pages.
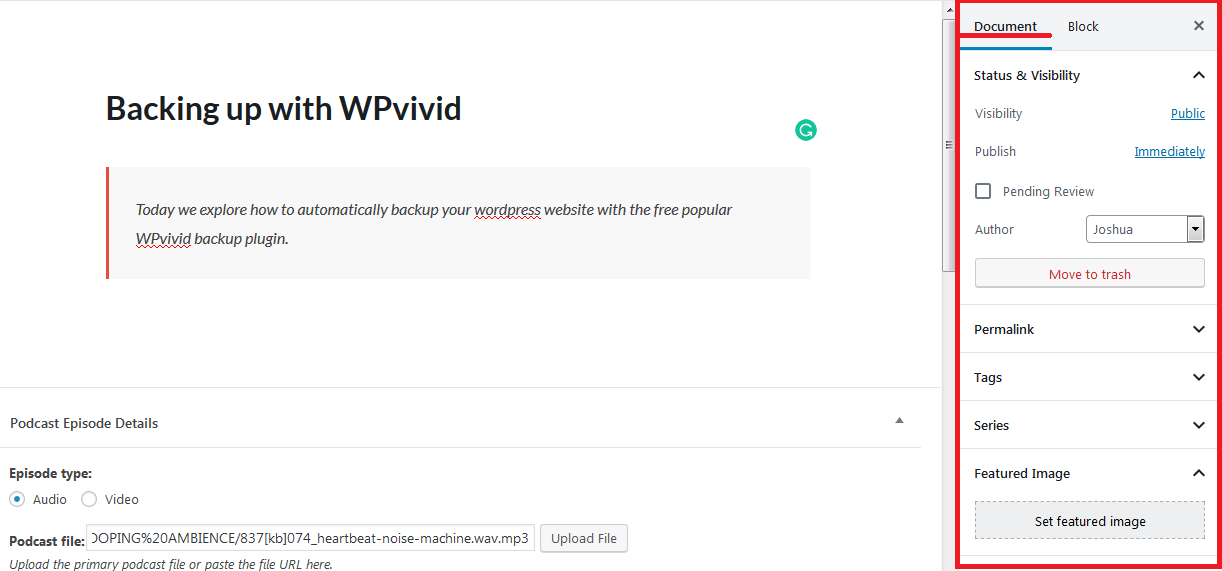
The block pane contains a block-specific setting.
Click the block in the content area, then on the right pane click the Block pane.
Conclusion
We have covered a handful of information about the Gutenberg Blocks editor.
I hope with that knowledge it should be less intimidating to use it for content creation and publishing.
Are you using the new blocks editor? What is your experience with it?
You may also want to convert existing WordPress posts to Gutenberg blocks?