One way of keeping your website active is to accept user generated content. Website visitors are probably the most important asset of any website. Allowing them to contribute to your website is a great way of keeping them engaged and making them feel part of the community. User generated content is also a great way of keeping your website’s content fresh and up to date. You can allow people to share reviews, experiences, ideas, tips and many other content types.
WordPress makes publishing posts a breeze from the back end, but you don’t want to give all your website visitors access to your back end. You can allow them to email you posts but then again that is just a tedious amount of workload that you will be increasing for yourself. You will have to copy, text, place pictures, add titles, set up categories before you can publish the posts. Remember, in WordPress you can use a number of plugins to extend your sites functionality, Thus, you’ll need to take advantage of WordPress plugins to help you do that easily. The one we use in this guide is User Submitted Posts.

Step by Step: How to Create A Front-End Page to Enable Visitors to Submit Posts
User Submitted Posts is an amazing plugin, that is easy to install and setup. It allows users to submit posts via the front end of the website. It has a number of awesome features that make it stand out from the competition and the best part is it’s free to use. The User Submitted Posts plugin allows you to accept posts from website visitors right from the front end. The plugin can be useful for websites that have multiple contributors.
Installing the Plugin
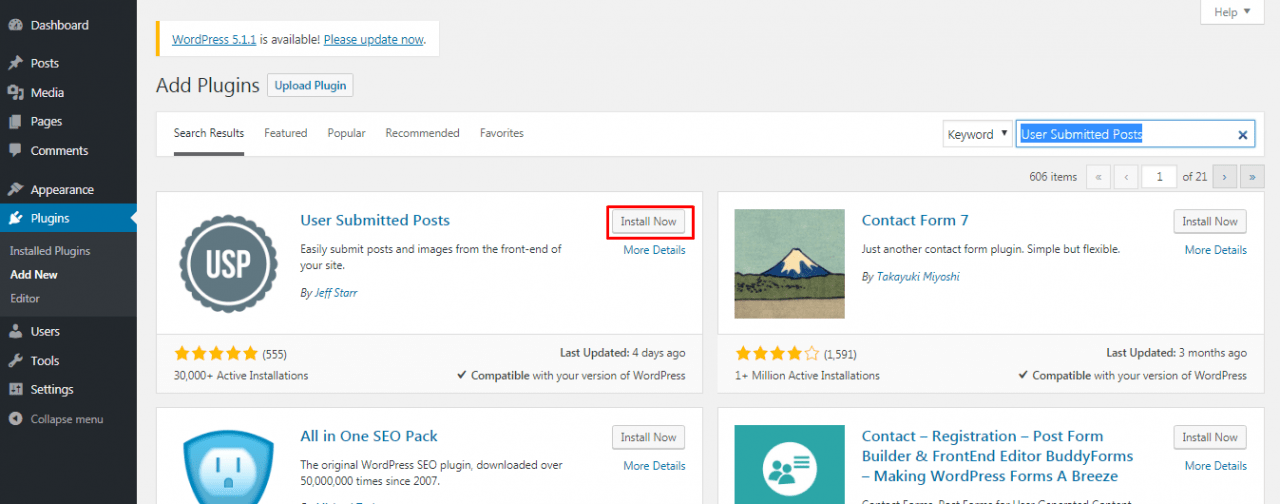
Just like most WordPress plugins this one can also be installed via the WordPress dashboard. Simply click on plugins, Add New and search for User Submitted Posts. Click on Install Now and activate the plugin to start using it.
To Access the plugin Navigate to Settings in your left hand admin menu and click on User Submitted Posts
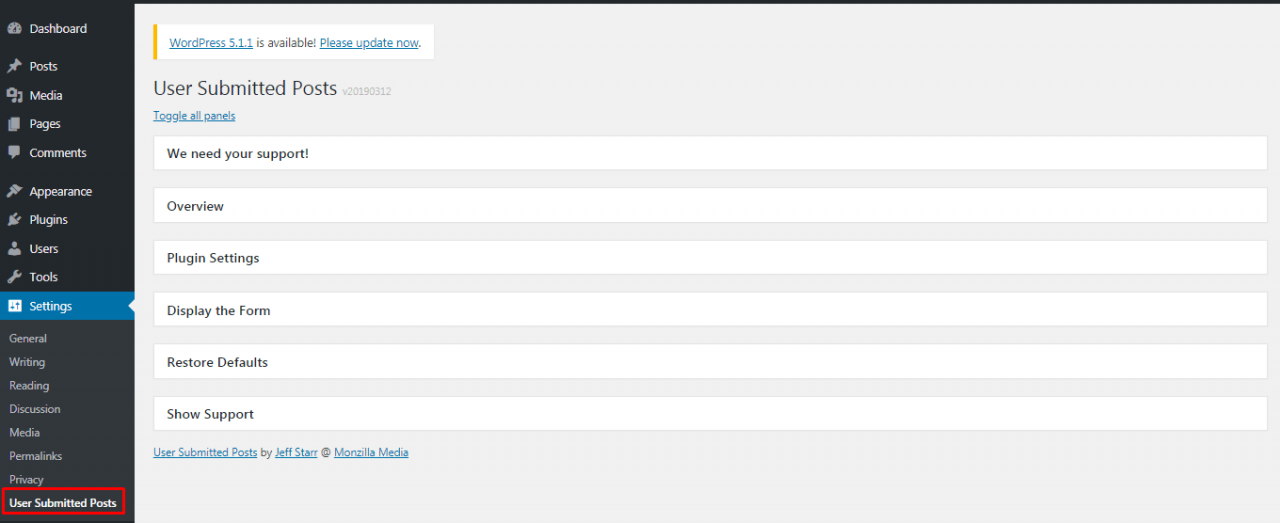
Plugin Settings
Under the plugin settings panel there are a number of configurations you can make. We will go through each heading under the settings.
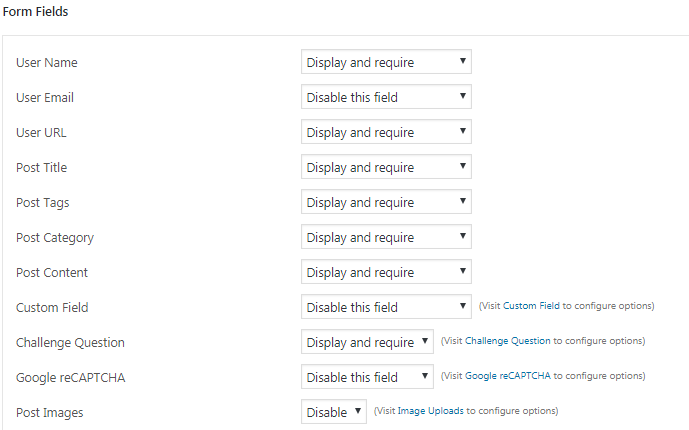
- FORM FIELDS – Here you can setup which fields you want displayed and if they are a must to fill out or optional. Generally you will want the username, post title, post category and post content to be required for all submissions. You can also setup image submissions.
- GENERAL SETTINGS – There are a number of options here as well. You can setup the form style, you have 3 options as shown. You can set the post type, whether you want new posts to be pages or posts. The post status allows you to auto publish user submitted posts or hold them for moderation. You can also set up redirects after submissions and success messages after submissions. Other options here allow you to enable the Rich text editor and enable support for short codes.

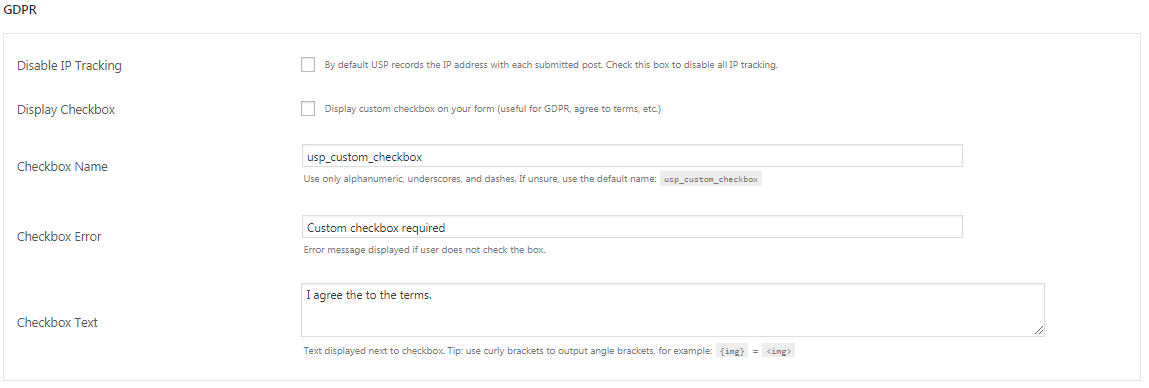
- GDPR – You can configure GDPR compliance here.
- CUSTOM FIELDS – If you enabled custom fields under the form fields above you can set the custom field name and label here.

- CHALLENGE QUESTION – This helps lower the amount of spam submissions that you receive.

- GOOGLE reCAPTCHA – Another option to help fight spam submissions. Simple enter you public and private key to use Google reCaptcha

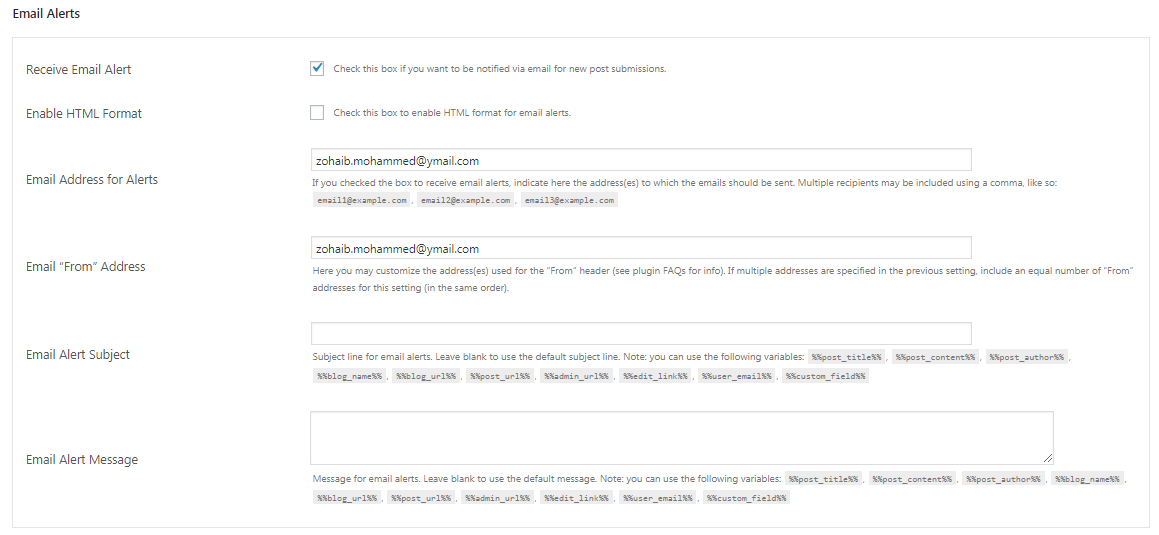
- EMAIL ALERTS – Various options here to allow you to set up email alerts for post submissions.
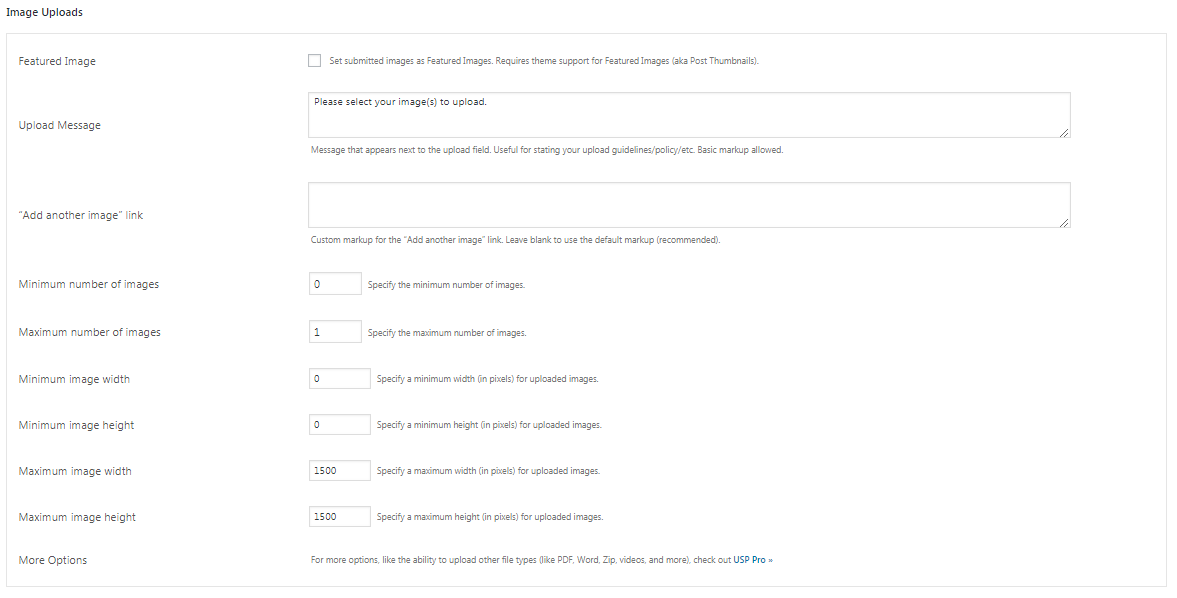
- IMAGE UPLOADS – Here you can configure if you want to allow users to submit images along with their posts. There are various options for you to setup image submissions such as allowing featured images, maximum and minimum number of images, minimum and maximum size, height and width.
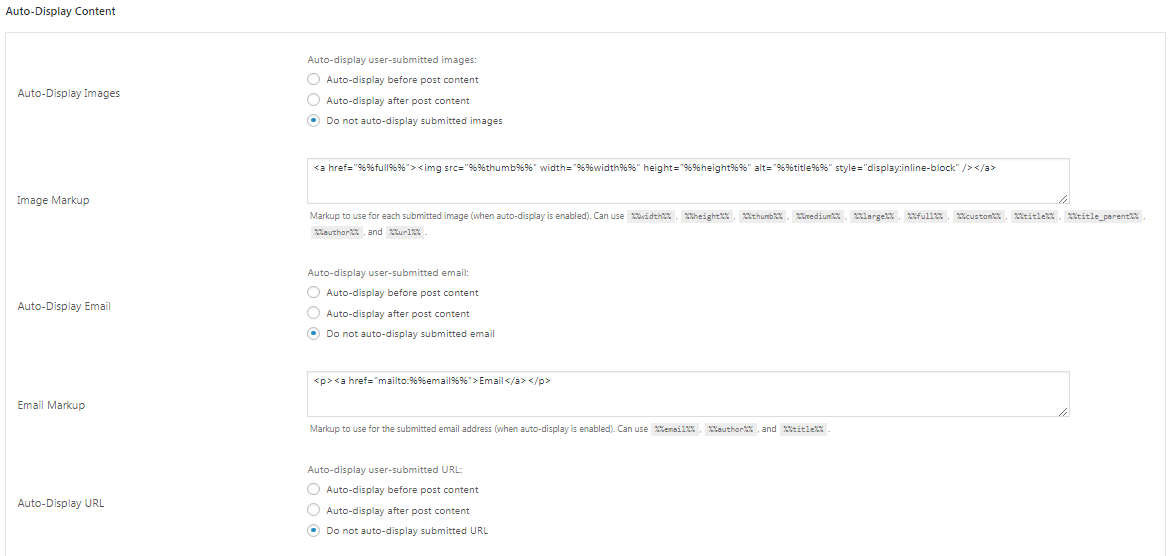
- AUTO DISPLAY CONTENT – Here you can setup if various options related to auto displaying of content that has been submitted by users.
Once you have configured the settings according to your requirements, it is then time to move on and display the form on your front end. In the display the form tab you will find various detailed instructions that will allow you to display the form in various places on your website.
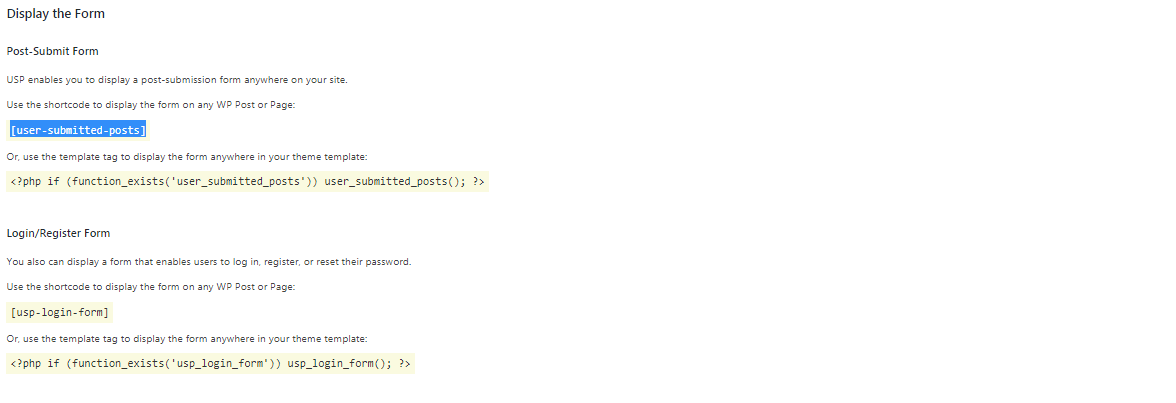
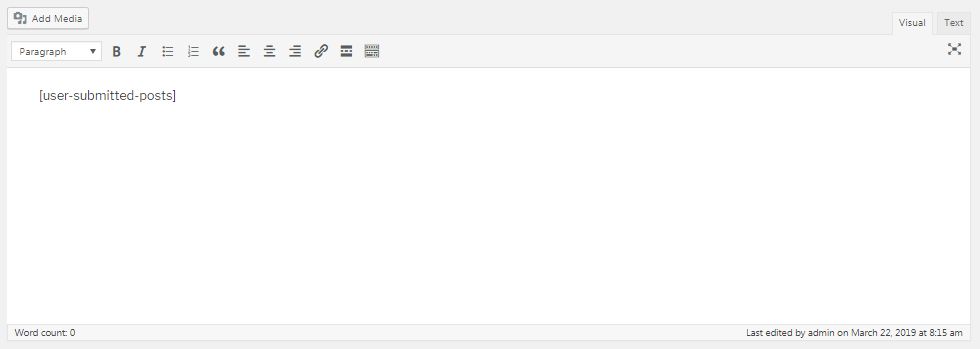
For Demonstration purposes we will use the shortcode as highlighted above to display the form on one of our pages.
Copy the shortcode and paste it in the body of a page where you want the form to be displayed.
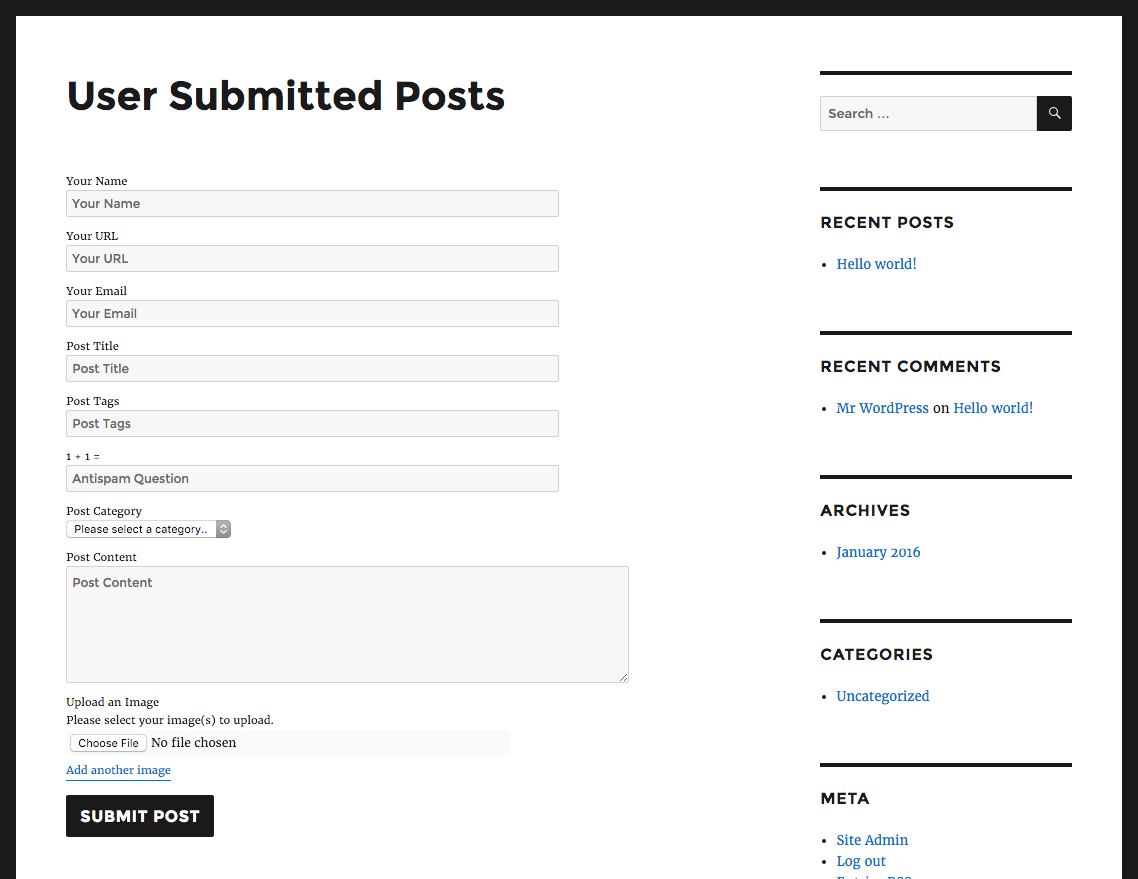
Visiting the page from the front end will then display a form that users can fill to submit posts as shown.
Conclusion
The free version of the plugin does the job of allowing front end submissions. You can display the form anywhere on the website with a shortcode or a template tag. The plugin comes with built-in Google reCaptcha support. You can also add custom fields to it.
The plugin does lack in a few key areas though. For example it would be great to be able to customize the form or add multiple custom fields. There is a paid version available of the plugin that has very few additional features such as priority support.
If you are not able to create content on a regular basis, using user generated content is a great way of keeping your site active with fresh content. You may also want to display recent posts on your WordPress site to always serve the latest content