Learn how to extend Gutenberg editor without touching any line of code; specifically, we shall look at how to display a grid or a list of posts.
Over the years, WordPress has evolved and has continued to push the realms of possibilities to live true to its promise of democratizing publishing and the freedoms that come with open source software.
If you pay attention and understand the current trends of web development, then you know that there is a shift towards front-end design as can seen by the rise and dominance of page builders like Divi, Elementor builder, WPBakery, Beaver, Visual composer among many others.
WordPress’s answer to that is the Gutenberg block editor.
With the release of WordPress 5.0, Gutenberg became the default editor for WordPress.
This new editor changed everything we knew about creating content with WordPress. Literary.
Gutenberg editor seeks to enable easy creation of media-rich content without the dependence of WordPress plugins using blocks, that provide all the tools to achieve this.
At the time of writing this article, the Gutenberg editor has several layout options and features used to build a full website with no need of installing a theme or page builder.
Of course, it is not as powerful as the standalone themes or page builders, but as the Gutenberg editor continues to evolve and mature, this is a certain possibility.
In the mean-time developers have kicked in to extend Gutenberg editor covering areas its short in with great Gutenberg block plugins and tools.
Stag Blocks is one such plugin that extends Gutenberg editor by adding several blocks that provide you an author, writer or designer a few more ways to display your content.
The major blocks it adds to extend the Gutenberg editor are; Accordion, Alert, Container, Hero, Posts Grid, Pricing table, Profile, Stats, Customer testimonial and, Website card blocks.
Step by step: How to extend Gutenberg editor to display a grid or list of posts with Stag Blocks
Step 1. Install Stag Blocks plugin
Install and activate Stag Blocks. The plugin files can be downloaded from its WordPress plugin page.
Step 2. Start creating content as usual
Create a new page or post, depending on what you want or edit an existing one.
For a new page, you will notice two new icons added to the right; the accordion and alert blocks.
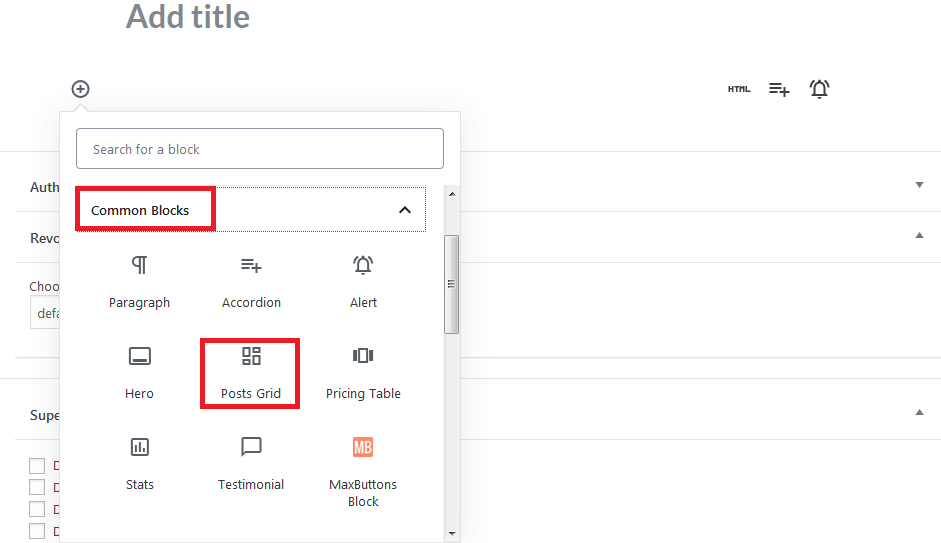
But since we are looking for the post grid, click the Add Block + Icon

Under Most Used or Common blocks choose Posts grid.
When you add that block to your editor, all the posts are added to your page or post.
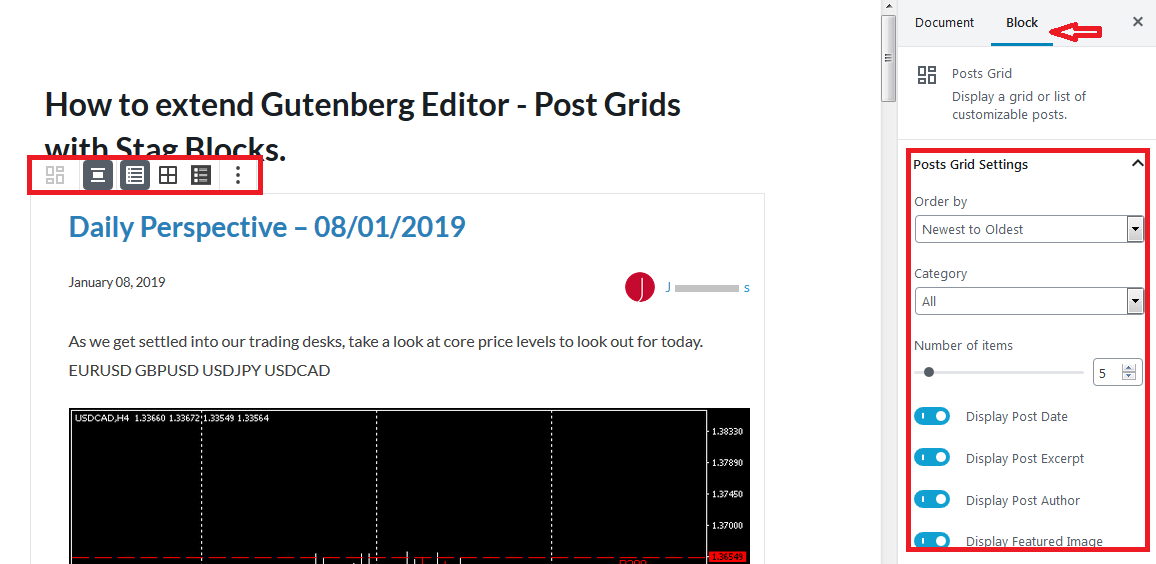
From here you can play around with the Post Grid settings and layouts to display your content as you desire.
On the right of the editor are the Posts Grid settings. Under the Block, You can sort how posts are displayed whether you want new posts or older posts to appear on top, then choose the category, set the number of items you need to display.
Toggle what is displayed, Postdate, excerpt, Author, and or featured image.
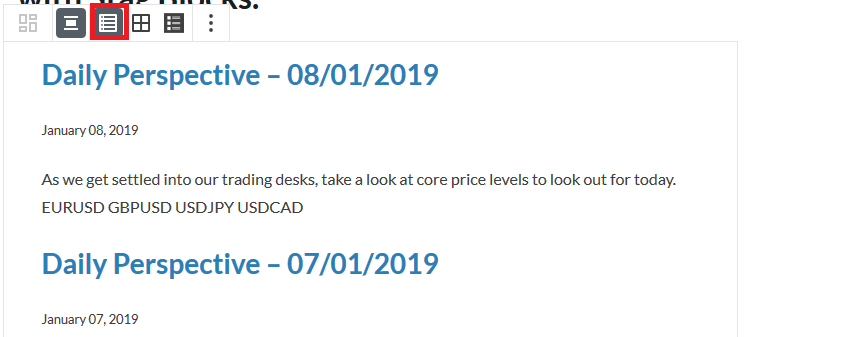
The other thing you would want to do is decide on what layout you would want the grid to take.

List View – displays all the items in a list, if you added the featured image it would take the full width of the container of the page/post.
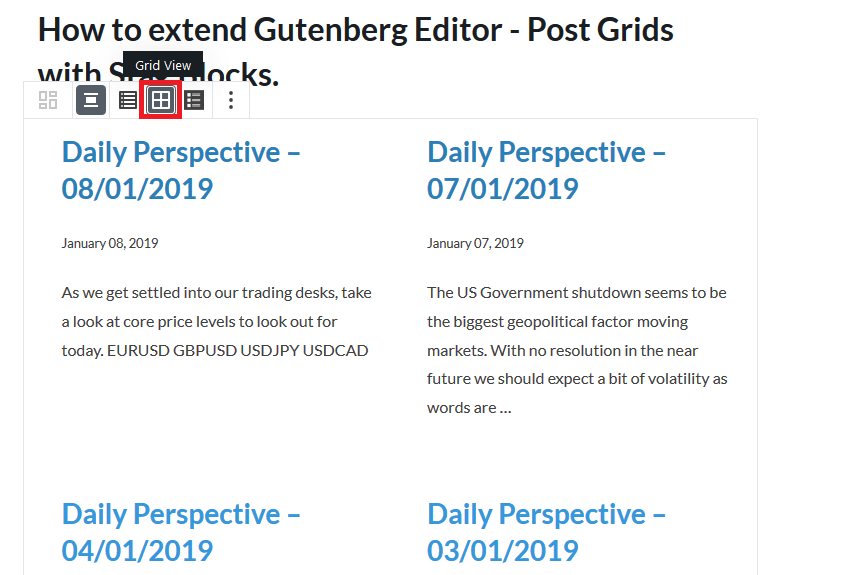
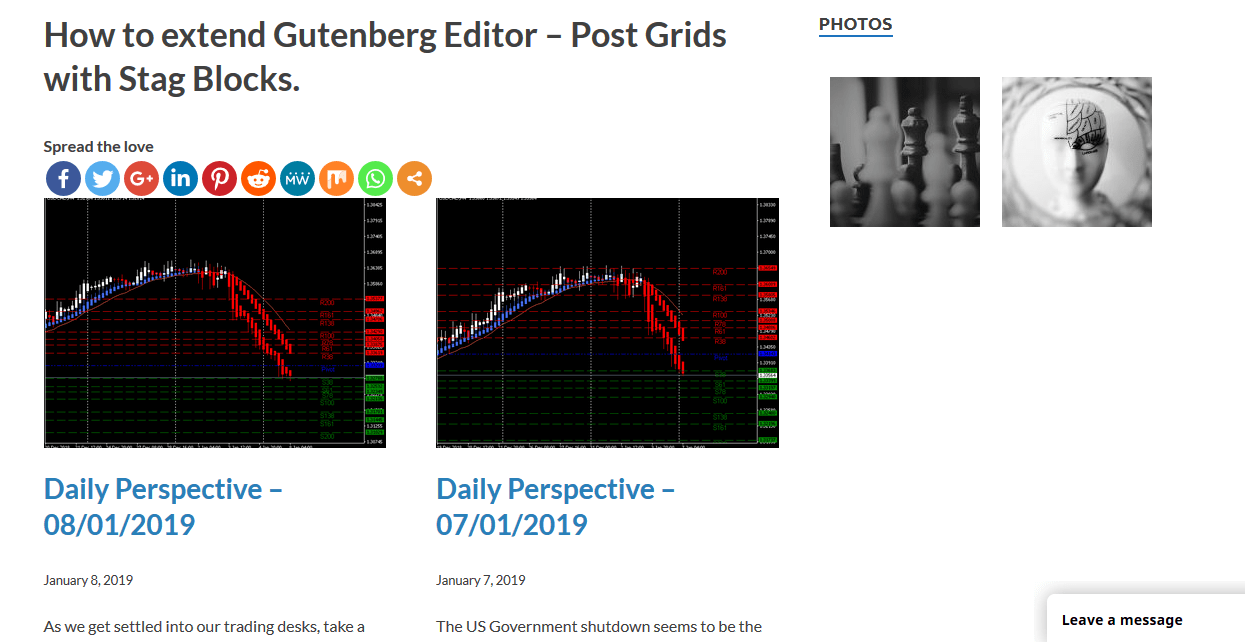
The Grid View – displays your posts in a grid.
Here is the layout of your posts with the Side View

The front end will take the same display you see in the editor. For instance with the Grid View enabled, my page looks like that, note, this has the Featured image added.
Well, that is how you extend Gutenberg editor, in our case we were able to display a list of posts or post grid with Stag Blocks.
You can do a lot more with Stag blocks beside displaying posts in a grid layout. We mentioned at the beginning the different features or blocks it adds to extend Gutenberg editor; Accordion, Alert, Container, Hero, Posts Grid, Pricing table, Profile, Stats, Testimonial and, Website card blocks..
Besides, these blocks, Stag Blocks also adds some pretty cool functionality where you can configure what blocks your Gutenberg editor can display.
This gives you the power to fully customize the editor with only the tools you need.
To do that, go to settings, and then click Stag Blocks.
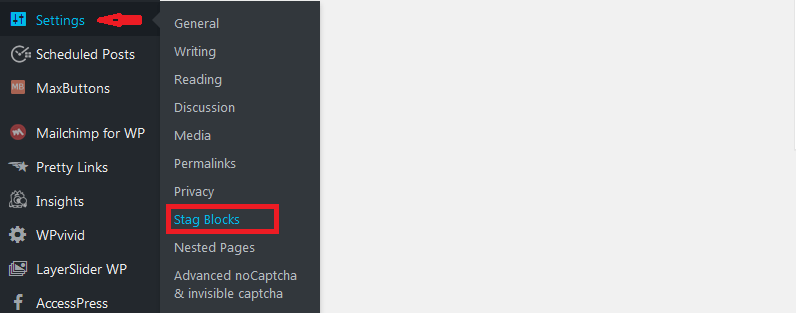
Now Click the settings tab.

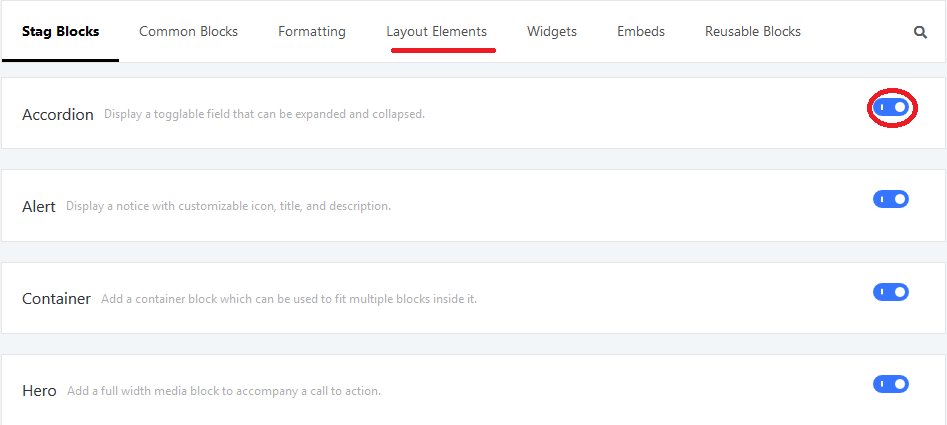
In the settings page, choose the block type – the Stag Blocks are displayed alongside all the default Gutenberg blocks.
Select the Block group, then on the right of the particular block click to the toggle to hide or display that particular block in the editor. Of course don’t forget to save.
Wrapping Up
One can accomplish a lot of things with WordPress today.
I think the tools to create and build on the web are at your fingertips; most of these tools do not require any coding skills thanks to the generosity of the WordPress community.
You, therefore, shouldn’t have any reason to not create for your audience a great experience.
Now you can experiment in varied ways how you want to showcase the content on your website.
If you are looking for more options with various features, here is our hand-picked list of top 10 Gutenberg blocks plugins to extend Gutenberg blocks.
That’s a wrap, have some fun with your pages and posts, and come back and share your feedback with us.