There are many websites where for visitors to make a decision, or more specifically a purchase decision the need a few answers. It might not be possible to provide those answers without input from the customer. A good example is insurance premiums. Customers are usually required to give details such as type of insurance, amount insured, asset type e.t.c Based on these factors insurance companies calculate the premiums for each individual client.
It would be extremely tedious and involve a lot of manual work if these insurance premiums had to be calculated over the phone or the person would have to visit the insurance company’s offices.
A simpler solution around this would be to use a calculated form on their website, where the customer can input their required info and get an instant quote. It saves time, is easier to use and can result in a higher conversion rate.
Why you need a calculated form.
Calculated forms can be used in a wide range of websites and businesses. A good example is in the health niche, you can create forms that allow visitors to calculate their ideal weight, calories, BMI e.t.c
Calculated forms can also be used for issuing dynamic quotes, calculating mortgage payment schedules, loan financing schedules e.t.c
In WordPress you can easily create a calculated form using the calculated form field plugin. The plugin is an all in one solution for anyone looking to create a calculated form. It has some handy features such as:
- A visual form builder that is easy to use
- Support for various field types such as checkboxes and dropdowns
- Simple and advanced calculations, including operations with dates
- Pre-built sample forms that are easy to modify
- Multi-page forms
Step by Step: How to create a calculated form on your WordPress site.
Installing the Plugin
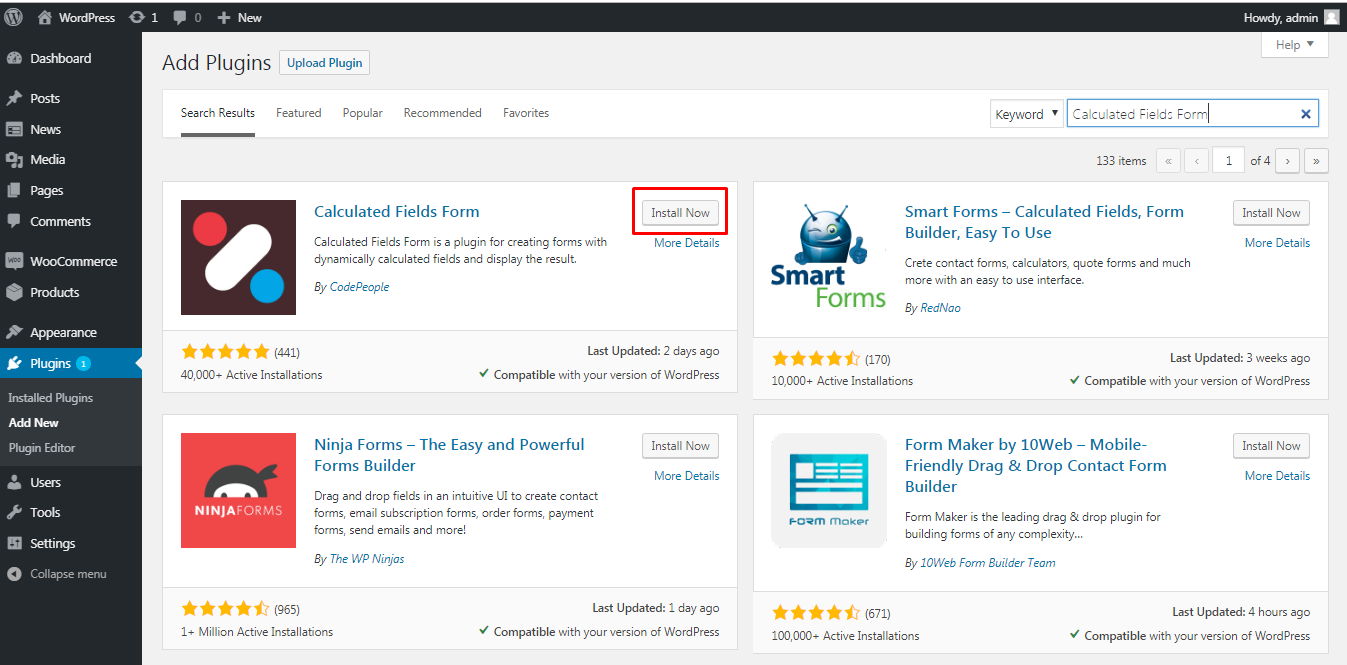
Open your WordPress dashboard and navigate to the plugins section. Click on Add New. Search for Calculated fields form. Install and activate the plugin.
Setting up and using the plugin
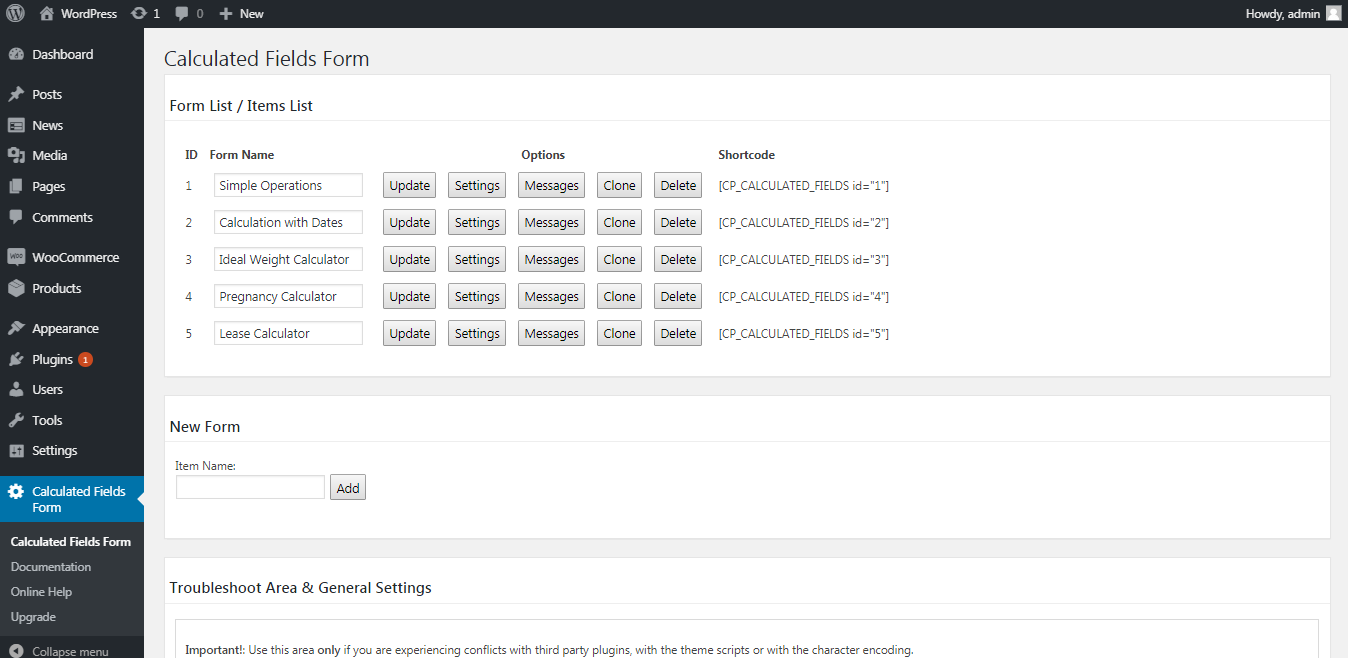
Once you have activated the plugin you will find a new menu item in your dashboard for Calculated Fields Form. After opening the Calculated Field Form menu, you will notice there are 5 pre-built forms that you can edit, clone or delete. These are ideal to get started and will give you a good idea of how the plugin works. There are 5 options available with each of the sample forms provided.
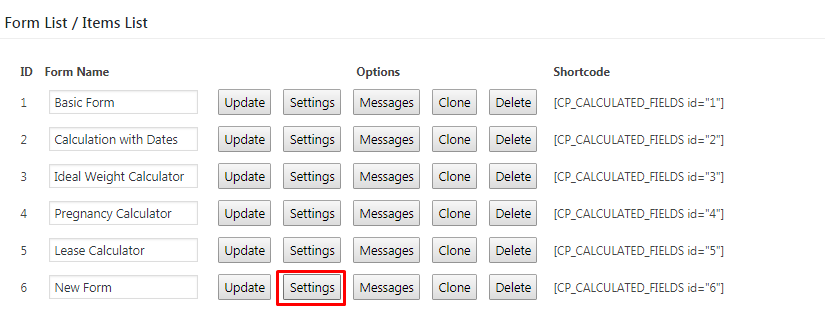
To update a form name simply edit the form name field and click on update as shown.

To edit a form click on settings. We will go into more detail on this a bit later on.
To view the messages submitted via a form click on the messages button next to it.
The clone and delete buttons are self-explanatory, clone will duplicate the form and delete will remove the form.
Creating / Editing a Form
To create a new form type in the name and click on add

To start editing your new form click on the settings button next to it, from the list of forms. This will open the form builder.
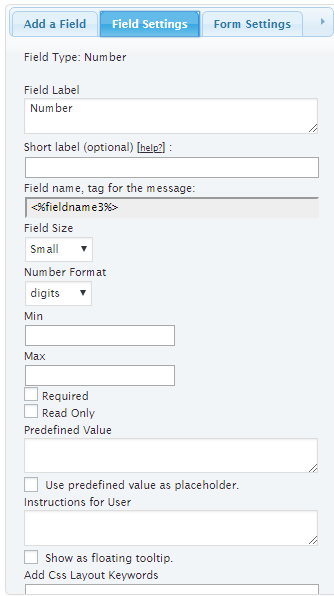
The form builder has a number of fields that you can add to your form. Simply click on your desired field to add it to the form. In the example below we have added a number field.
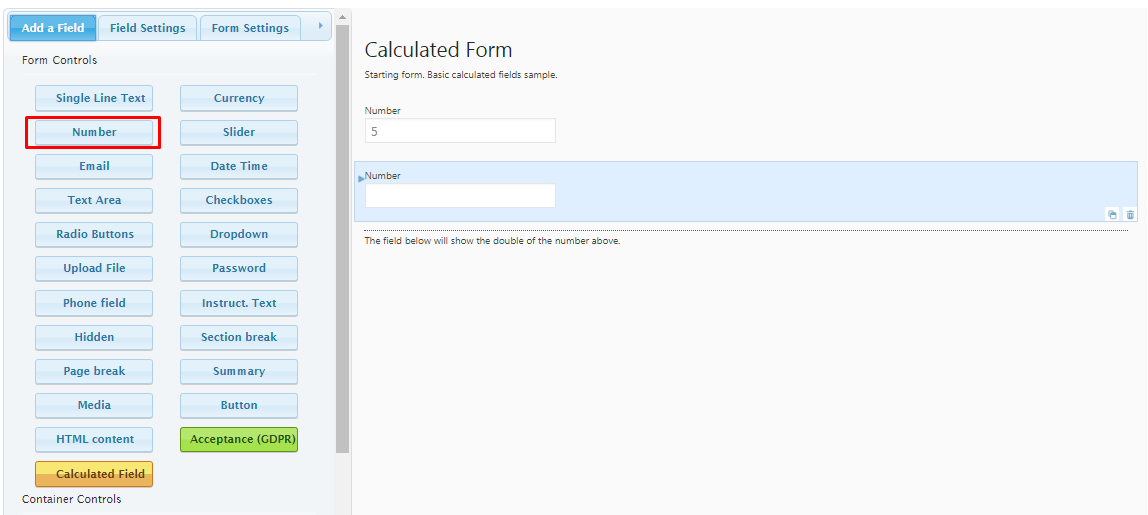
Once you have added a new field, click on the field settings to configure the field that you have just added. You can set the name of the field, label, size, force users to fill it out, fill out predefined values and add css keywords.
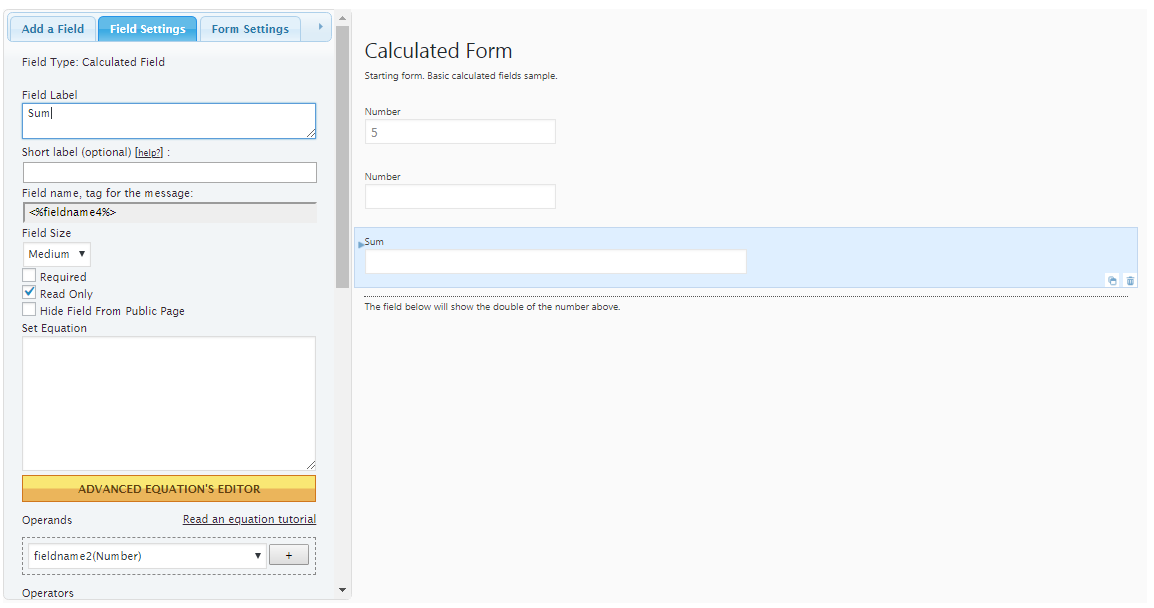
To add a calculated filed, click on the calculated field button. Set the name of the field in the field label. Since this is a calculated field we have set this as a read only field. Next you need to build the equation.
In this example we will build a simple equation of adding the 2 number fields above. From the dropdown menu select the first number field and click on +.
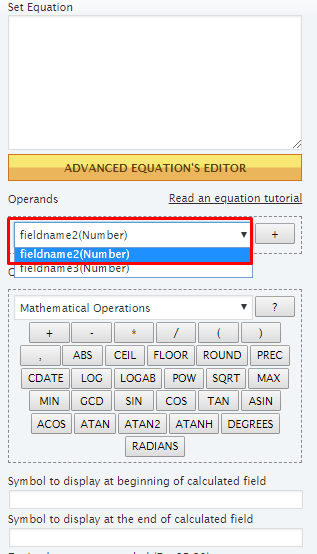
Then select the mathematical operation. In our case this is an addition.
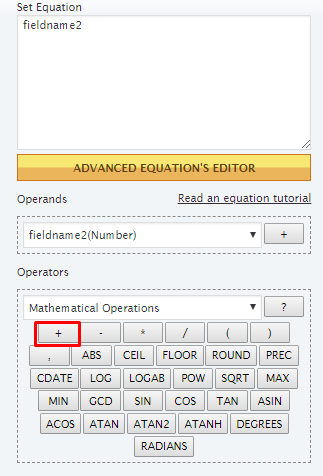
Then select the next field that you want to sum up and click on +.
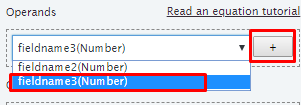
The equation now looks like this, which is simply an addition of the 2 number fields.

Save your changes and you are now ready to publish your form.
Publishing a Form
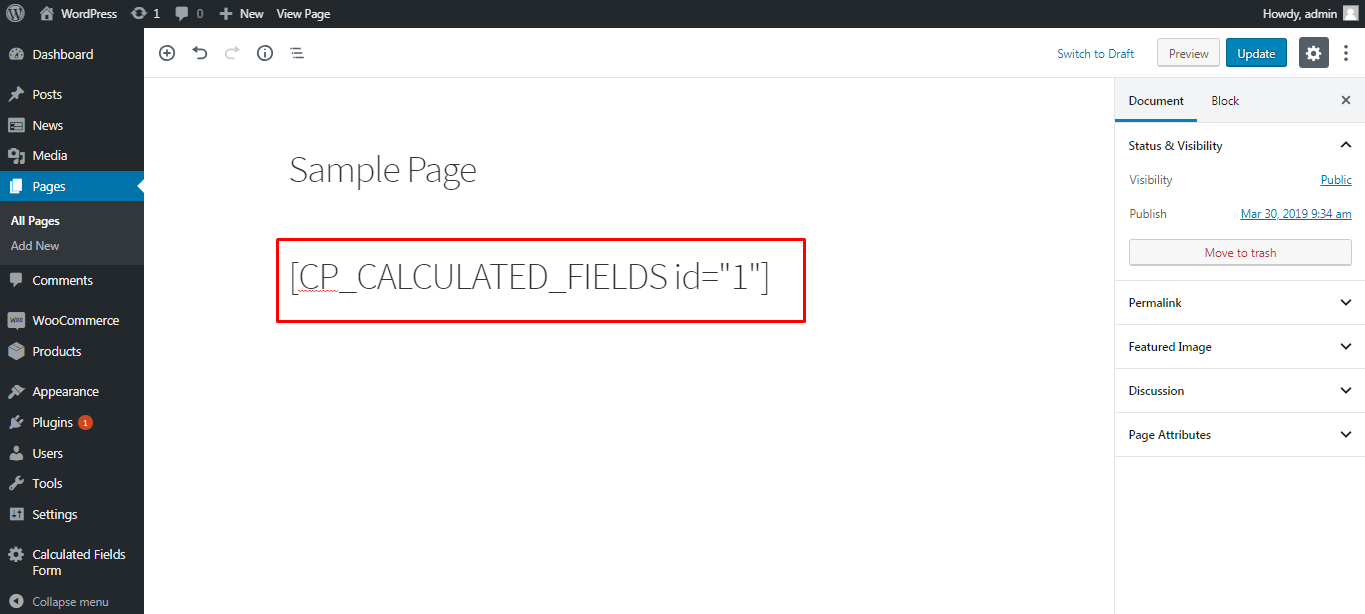
You can display the form on the front end of the website via a shortcode. Simply copy the shortcode of your form and paste it on any page or post that you desire.
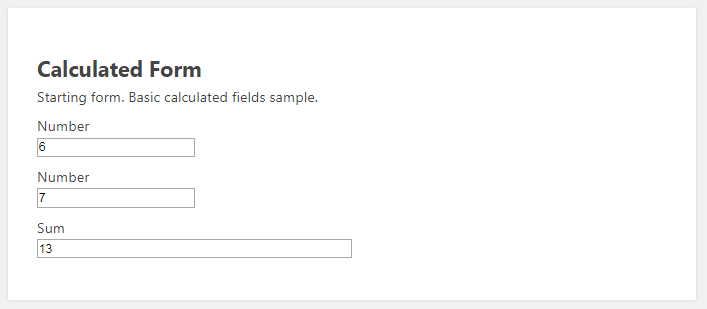
Here is a preview of the form we have created.
Pro Features
The plugin’s paid features are slightly complicated. It is not like other plugins which are as simple as pay and get the pro version. There are 3 paid versions available; Professional costing EUR 49, Developer costing EUR 99 and Platinum costing EUR 149. There are many different features for each version. We will take a look at the major differences. The professional version has PayPal integration, supports file uploads and has email delivery. The developer version is best for complex calculations such as date and time. The platinum version has all the features of the other versions and Google analytics integration, Dropbox support and many other payment gateways.
Other than having 3 paid versions the plugin also has a number of paid addons available.
Conclusion
If you are looking to create any type of calculated form in WordPress, Calculated Form Field plugin is a great solution for you. Although in this tutorial we created a basic calculated form, the plugin has all the required features to create more advanced technical calculated forms. They need a bit more work though. The plugin has a detailed documentation to help you create any type of form you are looking for.
If you are searching for a instant support solution for your online business, then you may consider to add a live chat support.