Do you want to create a question and answer site in WordPress? If yes, then this article is for you.
Provide your customers, prospective customers, and the general public at large with answers to the most or frequently asked questions about your business, service or product.
These questions can be curated and collected from your client facing teams, or you can have a page on your website where questions can be submitted by the clients or prospective customers.
With the latter usage, this can work perfectly for providing support or creating a community support section on your website.
In this article, we shall create a question and answer site. I hope you will get to learn something and create one for yourself.
Let’s get started.
Is WordPress installed? Yes? Great, now we shall install and activate a free plugin.
For this task, we shall use; DW Question & Answer WordPress Plugin.
Step-by-Step: How to Create A Questions and Answers Site in WordPress
Step 1: Install and activate DW Question & Answer
Upload the files to the plugins directory on your host with a FTP client or install it directly in your WordPress administrator area.
If you opt for the later, then log in, and under plugins click Add New.
In the search box enter Question Answer, in the results under it Click Install Now, and then activate.
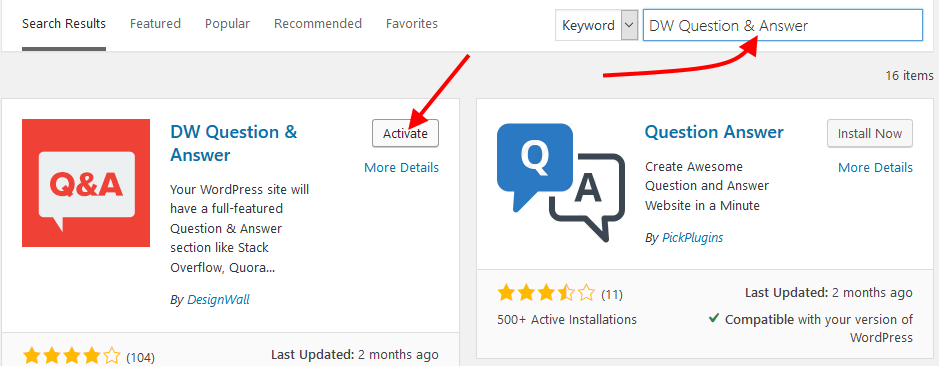
Once the plugin is activated, we are ready to add questions and answers to our website.
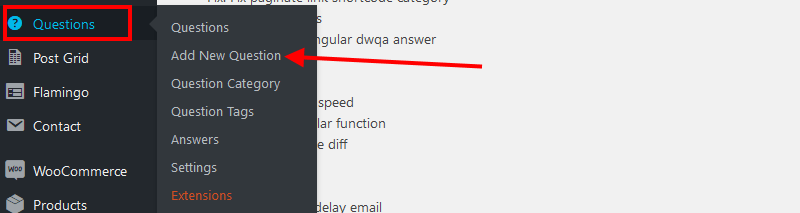
Step 2: Adding Questions
Find and click Add New Question under Questions on your menu.
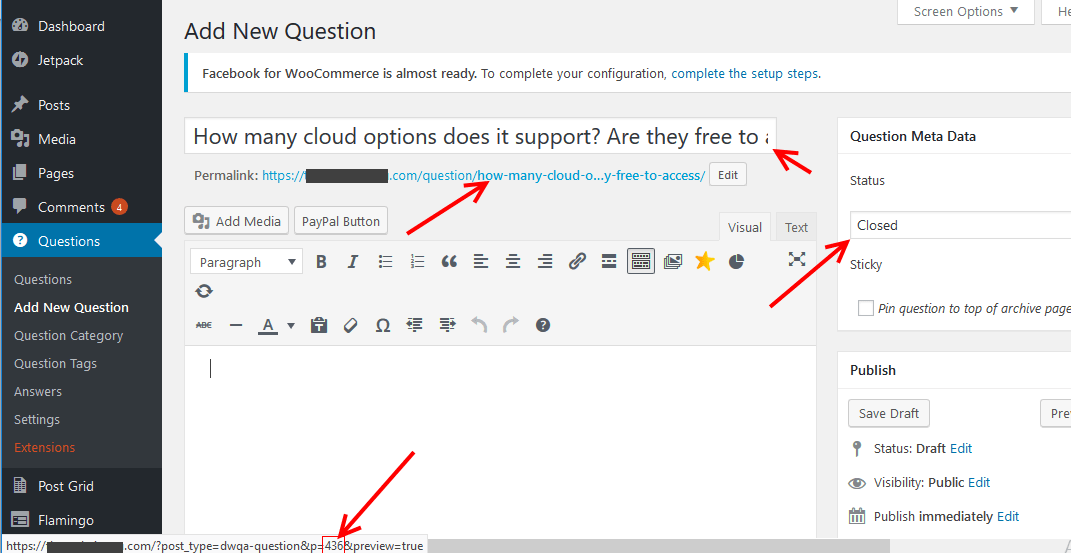
On the editor that opens, provide the necessary information, use the title area for the question, on the right choose the status of the question – from Open to closed.
Hover over the permalink and down on the status page copy the page ID number. You will need this later as you create the answers.
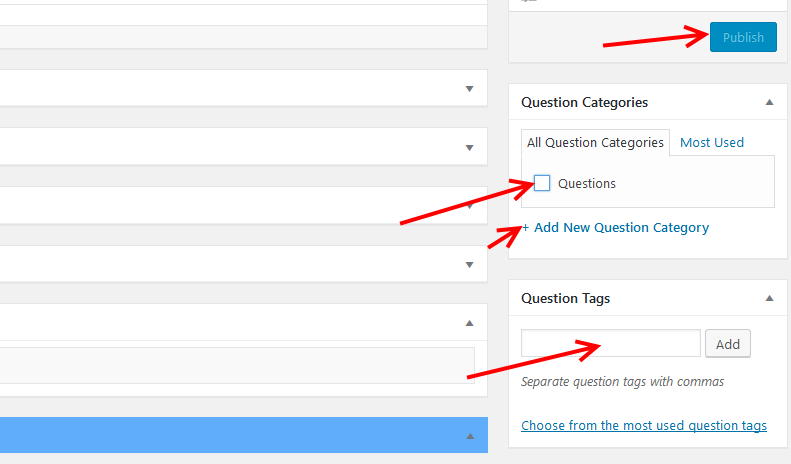
Scroll down to add the question to a category. Click Add New Question category to create a new category.
Then Enter and add the question tags.
When you are done, Click Publish.
Step 3: Adding answers
Go to Questions on your left menu and then click Answers from the submenu.
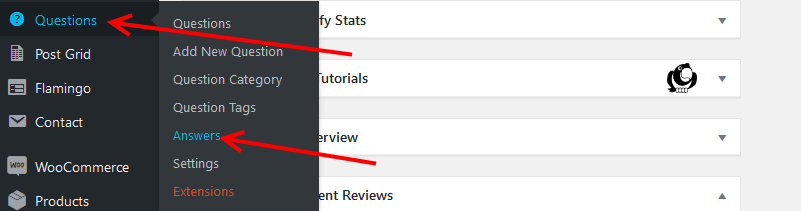
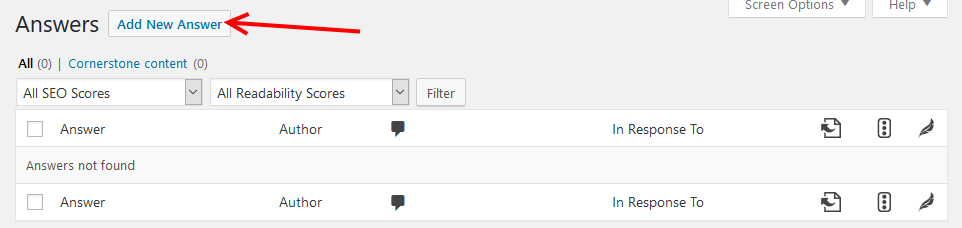
Click Add New Answer.
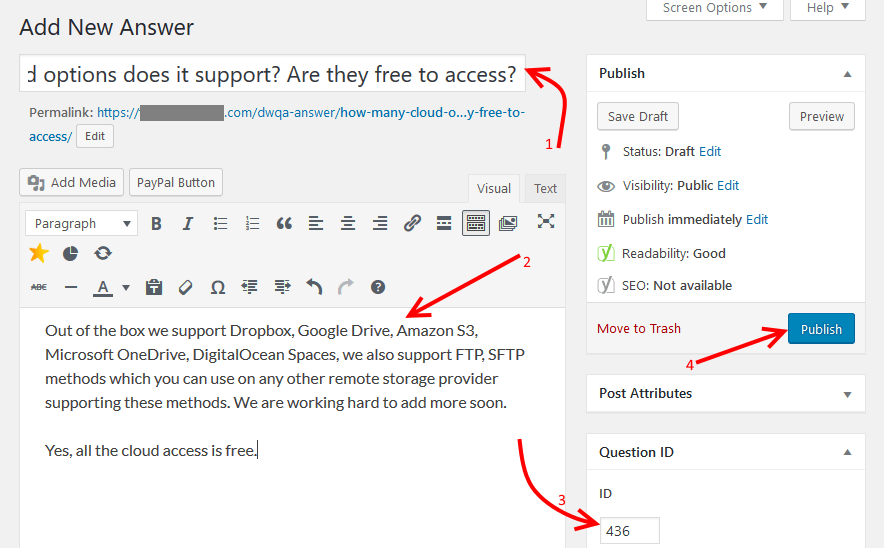
- Enter the question you are answering in the title section. It does not have to be the exact question. I prefer it that way such that later when you have a lot of questions you can easily identify them.
- In the text area, enter the answer to the question.
- Enter the Question ID you copied earlier here.
- Publish your answer.
Step 4: Viewing the questions and answers
When you activated the plugin DW Question & Answer created two pages;
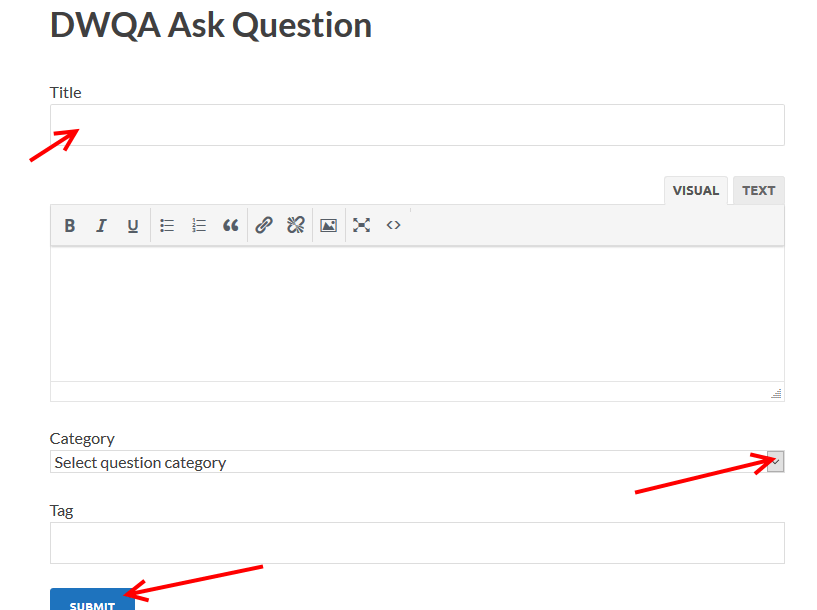
https://yourdomain.com/dwqa-ask-question/ – on this page visitors can ask questions.
https://yourdomain.com/dwqa-questions/ – this one lists all the questions that have been asked in one place.
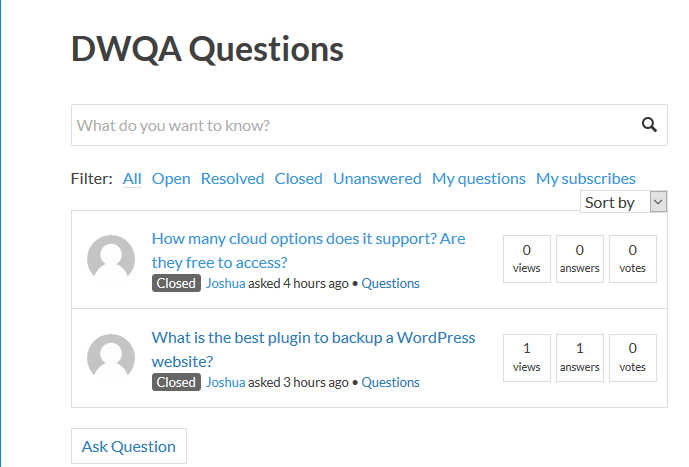
Now, you do not have to use the default pages; you can edit them, just go to pages and edit the page. Change the title from say DWQA Questions and the permalinks to something related to your website.
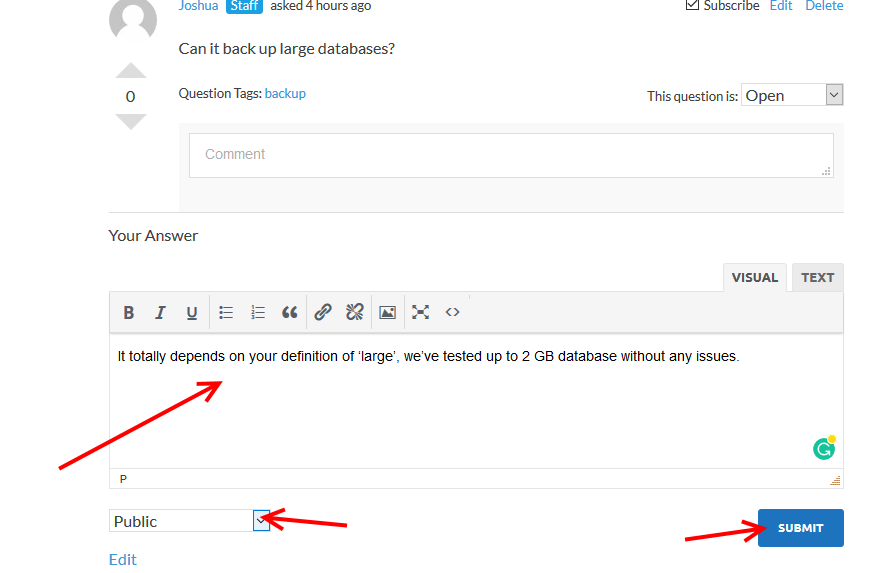
Step 5: Answering Customer or visitor questions
When someone leaves a question, you can go to questions panel and answer them or just go to the questions page, click the question and then provide the answer.

Enter the answer in the text area, then choose if it the answer is publicly viewable or private then click submit.
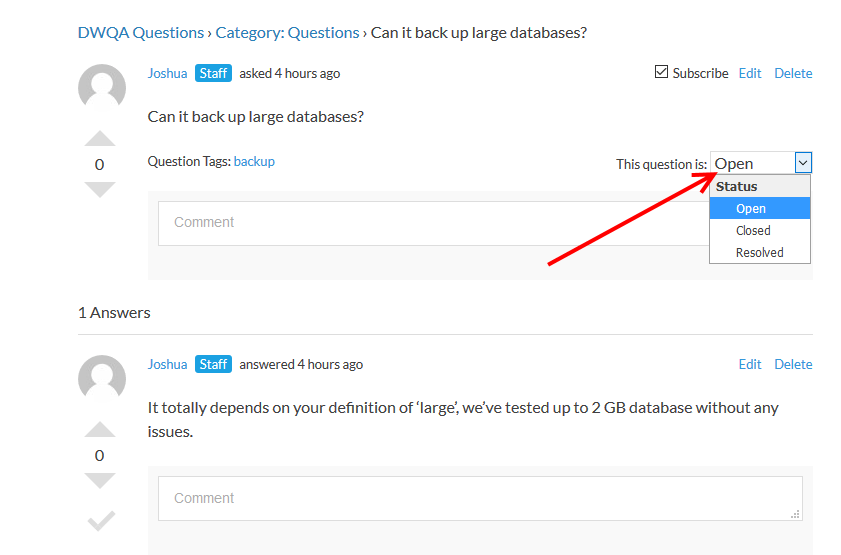
Step 6: Changing the question status
Once the user’s issues are resolved, you can change the status of the question by clicking the drop-down beside This question is:
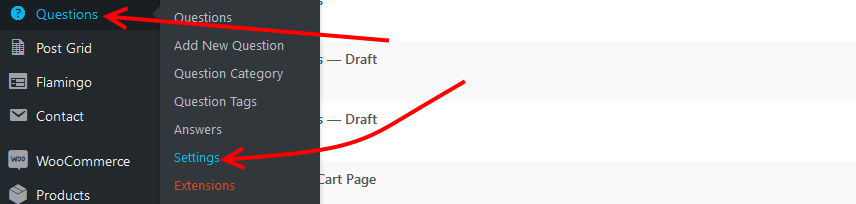
Step 7: Working with the DW Question & Answer settings
Now that you have the idea of adding and answering questions let us look at the different plugin settings.
From the left menu, under Questions click Settings.
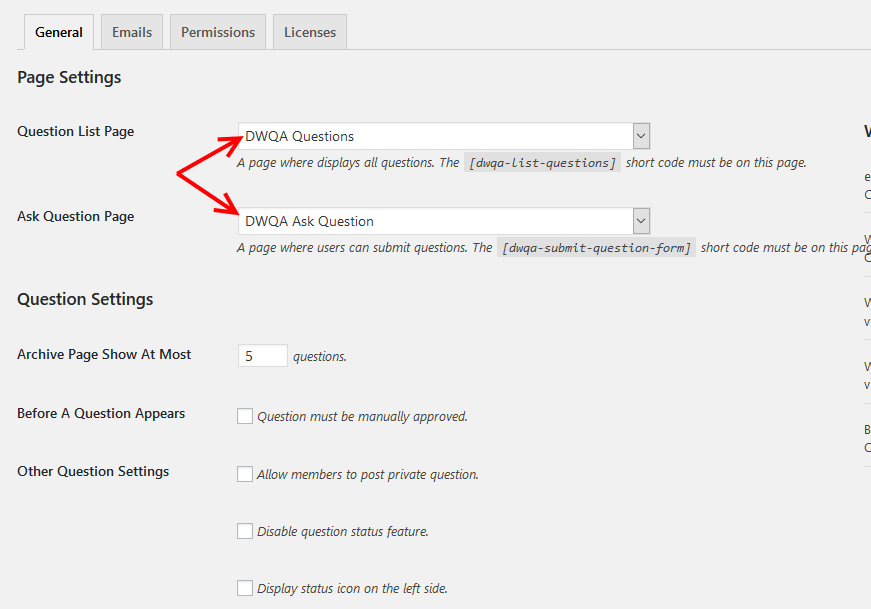
Under the General Tab, there are a couple of settings you can make.
First, specify the pages used to list the questions and ask questions.
If you do not want to use the default pages, copy the respective shortcode and past them in your pages.
Next, are the Question Settings, Answer Settings, Vote Settings, Auto Closure Settings, Captcha Settings, and Permalink Settings.
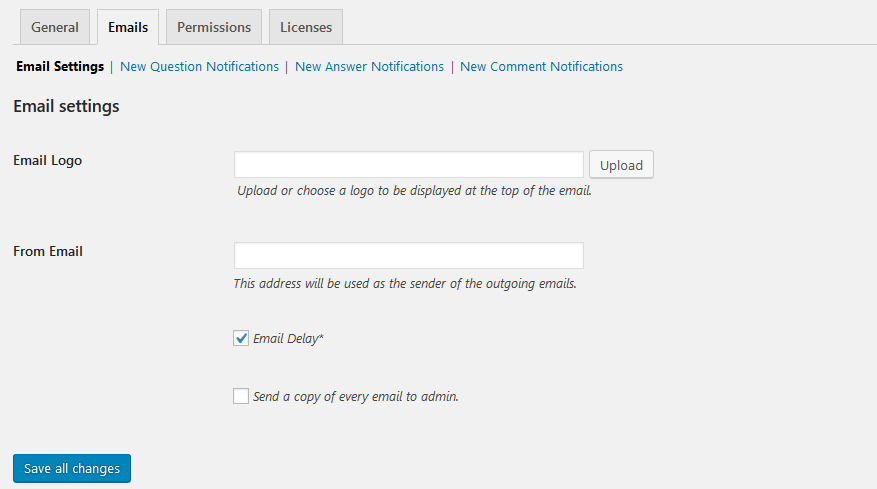
Under the Emails tab, provide the settings and default notification emails sent for new questions, answers and or comments.
Under permissions, set the privileges and rights each user type has with Questions, answers, and comments.

Do not forget to save the changes you make.
In Conclusion
we have explored how to create a questions and answers site with WordPress.
Using DW Question & Answer WordPress Plugin, you should have learned how easy it is to set up and manage your website.
I hope, with this you can provide your visitors the means to interact and engage with your website and organization in general.
If you found this article helpful or if you have any queries, do not hesitate to share them with us in the comments section below.
You may also want to create a forum with WordPress and build a community around your bussiness (for free).