Want to create a custom login page and are wondering how?
No worries, we got you.
The default WordPress login page works just fine if you are running a personal blog or website; however, if you have a membership site or a site that has users register to complete a transaction like an e-commerce website, then there are more benefits you can get with a custom login page.
The greatest benefit is that it improves on your brand image and provides your users with a consistent look and feel or user experience across the website.
As you know, buyers are picky, and little things as seeing another logo other than the one they are expecting is enough to turn some away from your website.
In this article, we shall use a great plugin to help us customize the login page. You will not touch any line of code.
We shall use Custom Login Page Customizer – a free WordPress plugin.
With this plugin you will be able to;
- Add a logo to the admin login page.
- Change the page background with either a color or an image.
- Style the form and its fields
- Style the buttons
- Change the Logo URL from wordpress.org to one of your liking.
- Remove back to website link.
- and much more.
Step by Step: How to Create A Custom Login Page in WordPress
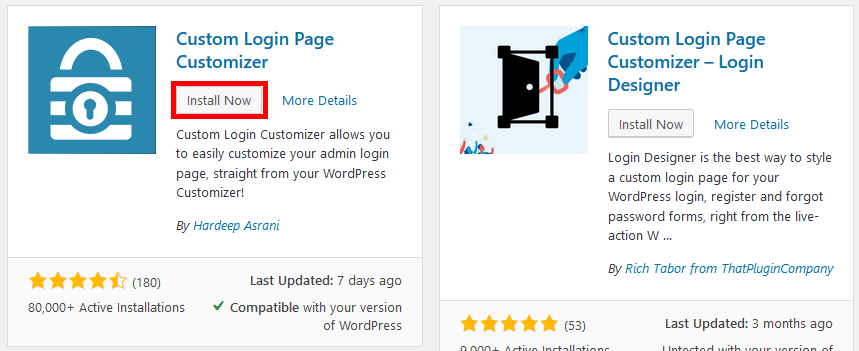
1: Install Custom Login Page Customizer Plugin
The first thing you need to do is to install and activate the plugin. You can do this from your admin dashboard.
Go to Plugins, Add New.
You can download the files from Custom Login Page Customizer WordPress page and then upload them in the plugin page, alternatively, you can install it directly from that same page.
2. Create A Custom Login Page
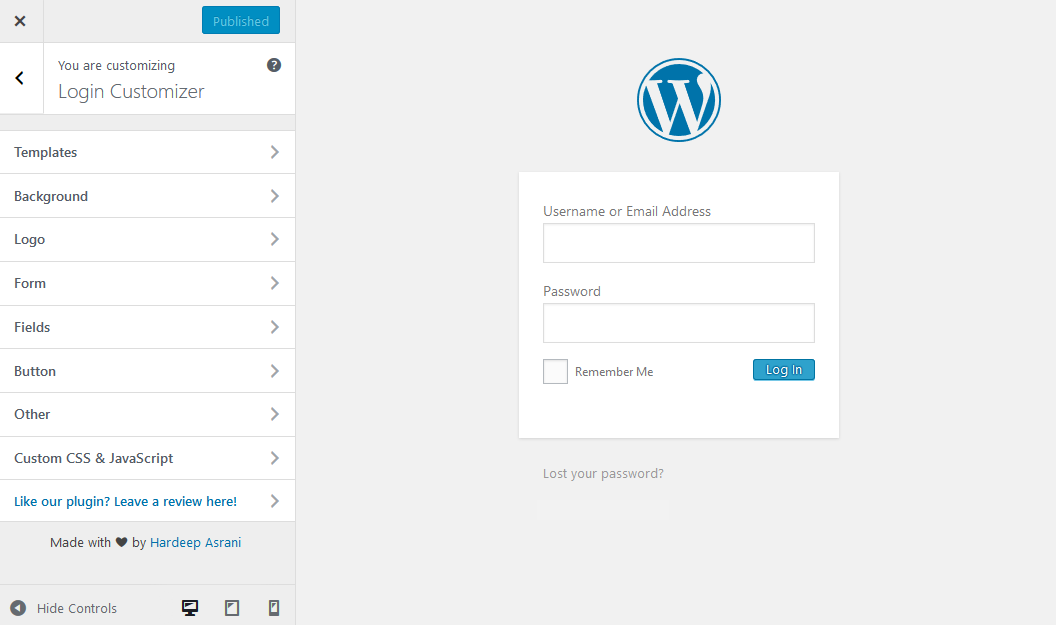
Once you activate the plugin, under Appearance in your menu, click Login Customizer.

On the page that opens, you can customize the login page.
3. Choose A Template
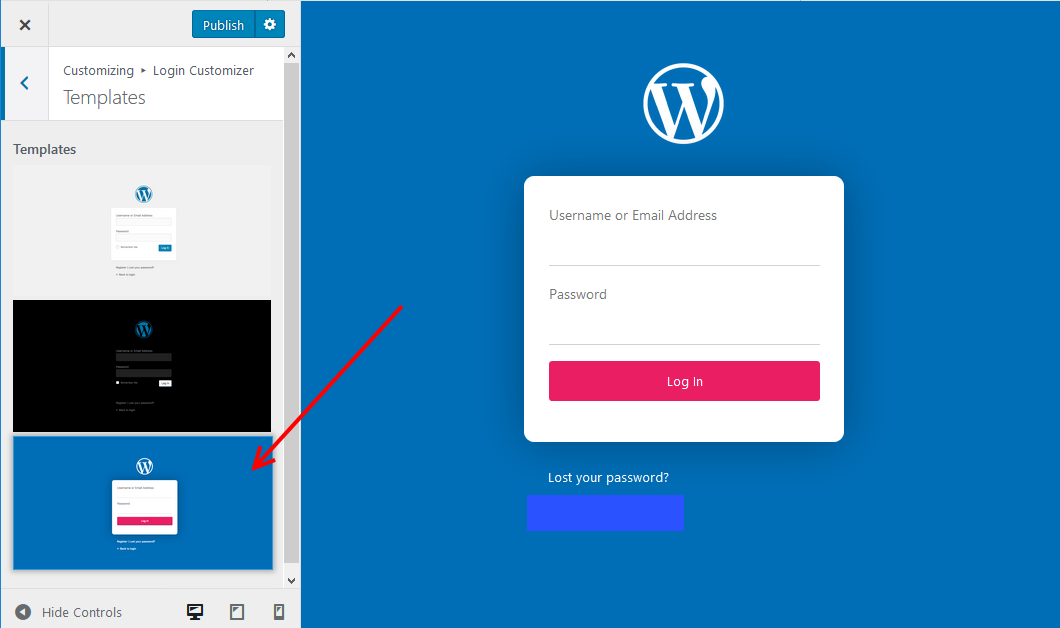
Click on the template you like.
4. Set the Background for Your Login Page
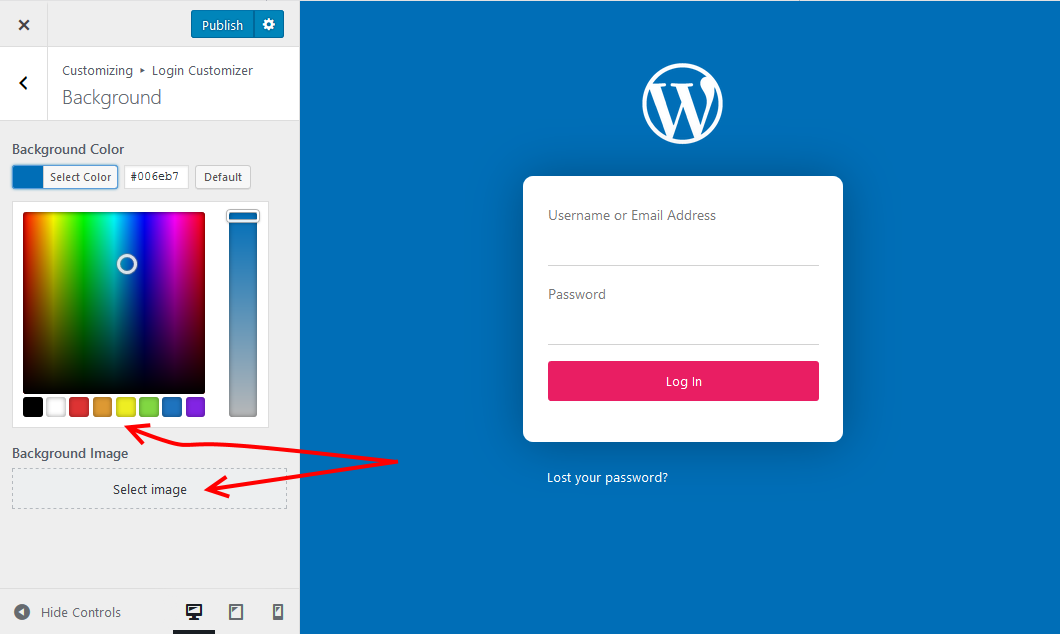
You can use a color for the background, in that case, use the color selector, or you can use an image for the background.
Click Select image then select one from the Media library or upload a new one.
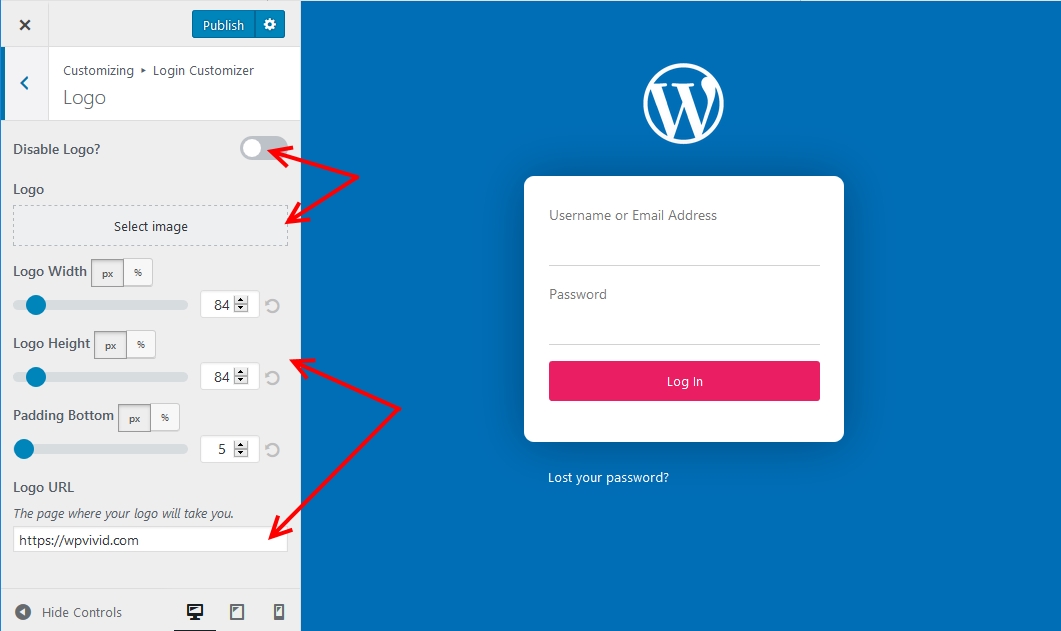
5. Add the Logo and Logo URL
Toggle the disable logo icon to enable or disable the logo on the login page.
Select Image to add the logo, then at the bottom of the page, enter the URL users are redirected to when they click the logo. The default URL is that of wordpress.org, you can use any URL here..
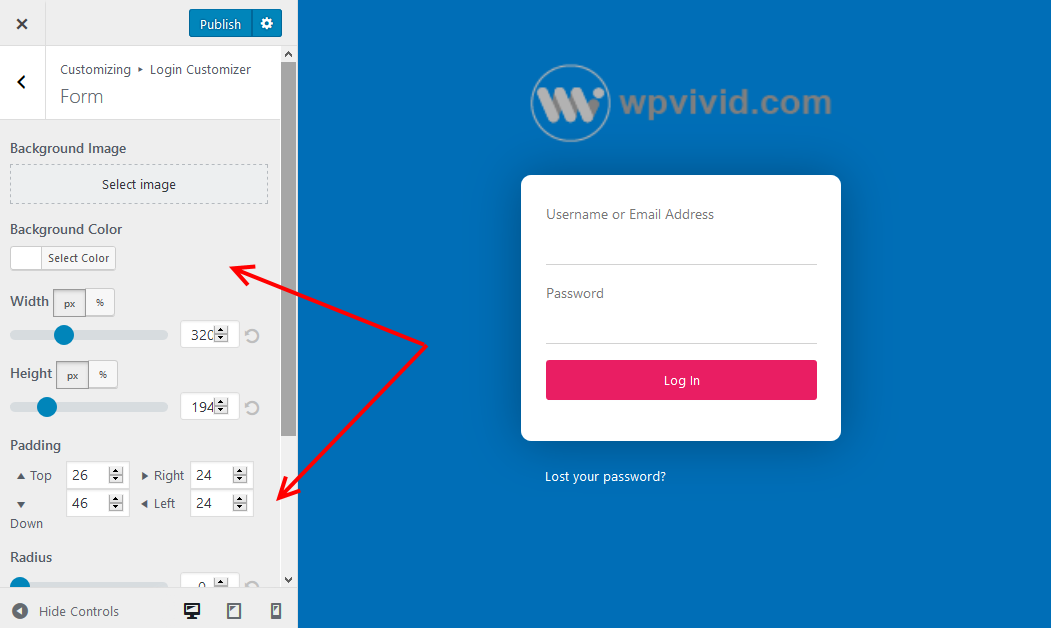
6. Customize the Form
From here, you can accomplish several things regarding the form. You can set a background image for it, note that this is different from the background image you set earlier.
The earlier image is for the whole page, while this one is for the area around the form.
The fields section allows you to style the fields of the form.
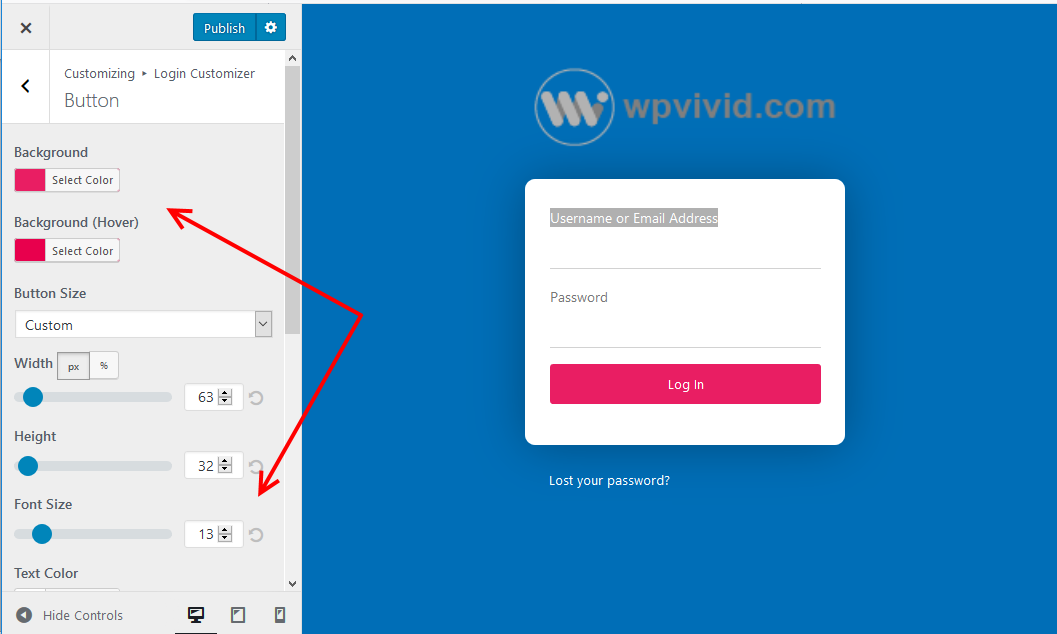
7. Customize the Button
Style the button from here, change the background and the hover effect, size, and its text color.
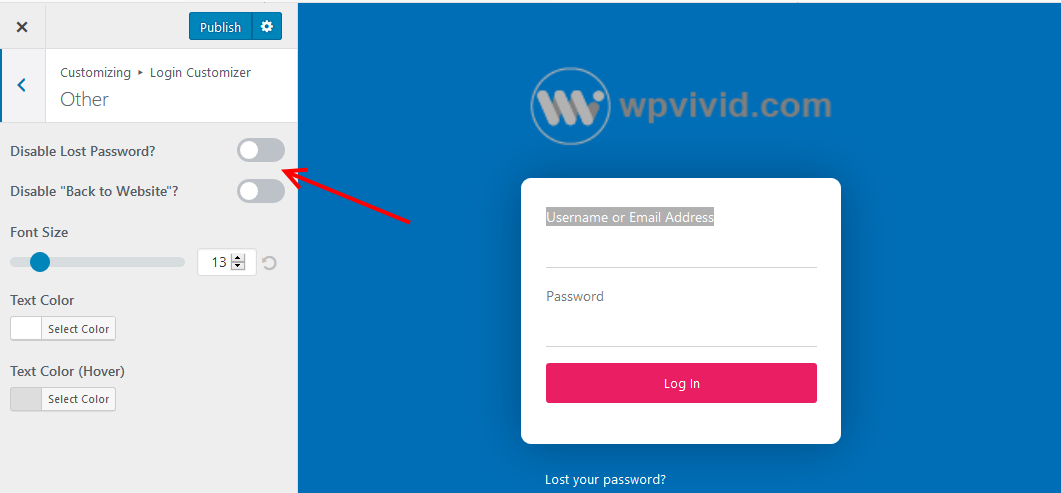
8. Other Settings
In this area, disable or enable the lost password and the Back to website links by click each items toggle button.
9. Custom CSS & JavaScript
This section is for advanced users; from here, they can add custom stylesheets and Javascript code to customize the login page further.
When you have finished customizing your login page, on the top left of your screen, click the publish button.
Log out of the admin area to see your new login page.
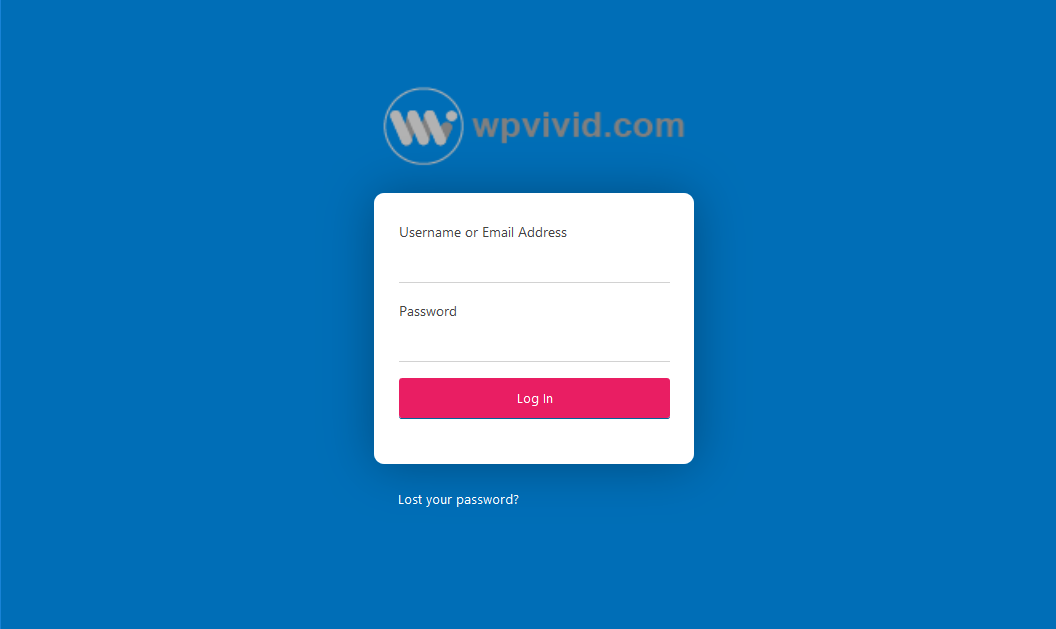
If you do not like how your page looks like, like ours, then go back to Appearance, Login Customizer and follow the steps above.
That wasn’t complicated, was it?
In Conclusion
Now you know how to create a custom login page for a WordPress website with the Custom Login Page Customizer plugin.
It’s time to put the knowledge into practice and customize that of your website.
Besides Custom Login Page Customizer, there several other plugins that you could use.
Here are some of them,
- Custom Login Page Customizer
- Custom Login Page Customizer | LoginPress
- Custom Login Page – Admin Page Customizer
Finally, depending on the theme you have, you can also create a custom login page with it.
Before you even think of using a plugin to create a custom login page, verify with your theme documentation and see if this feature is already there.
You may also want to create a custom short URL for your WordPress blog to improve your brand image.