Ever wanted to create a music streaming service to play, showcase or even sell music online, then here is a quick guide to walk you through how to add audio playlist in WordPress.
WordPress is famous for blog posts, but it is not limited to that, it can be used to publish a lot more than just text and images. With it you can build your version of Spotify.
Natively, WordPress supports audio files, and you can actually create a playlist without need for third party plugins. But if you need more customizations on the look and feel of the playlist, if you need to sell or make your audio files downloadable, then you will need a third-party plugin to manage your audio files.
This article will show you how to create an audio playlist in WordPress to play music on your website with or without a plugin.
How to Add An Audio Playlist in WordPress Using Gutenberg Editor without A Plugin
In the classic editor, creating an audio playlist was as easy as creating a photo gallery.
The new WordPress editor – Gutenberg – however, is yet to release a playlist block for creating an audio playlist.
The workaround as we wait for the playlist block is using the playlist shortcode.
In your WordPress admin area, create or edit a new post or page. (If you want your playlist on the sidebar, you don’t need to create a page or post, only paste the shortcode to text or HTML widget)
Paste the playlist block, and insert in it your audio ids.
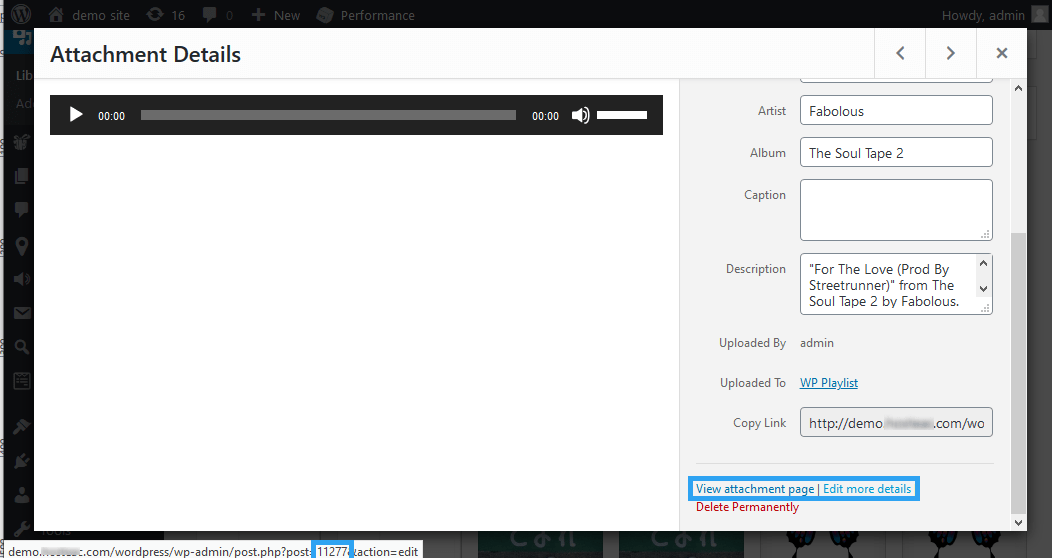
To get your audio IDs. Go to the media manager and click the audio file you want.
On the right, hover over View attachment page or Edit more details.
At the bottom of the browser, you will see the ID in the link. You can alternatively copy the URL from View attachment page or Edit more details, paste it in notepad and then copy the IDs.
Once you add the playlist shortcode with your IDs, publish or update your post.
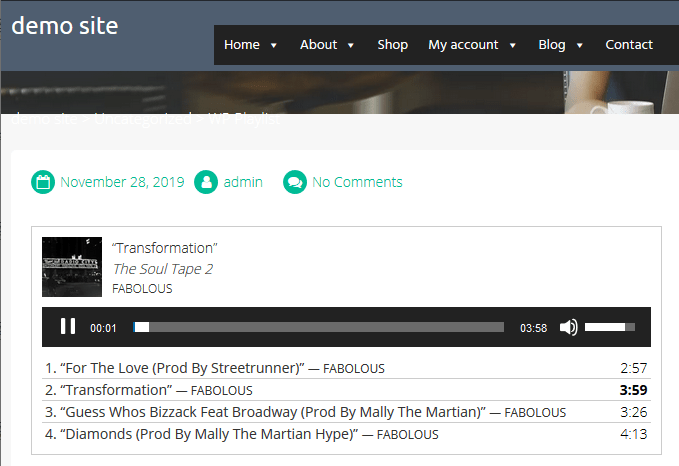
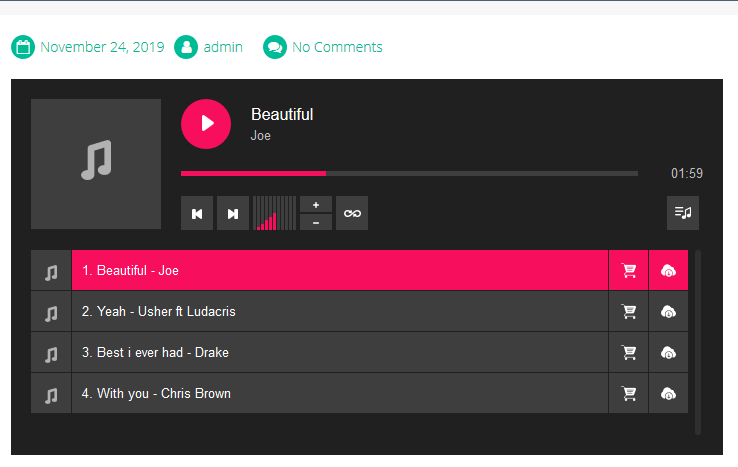
Then, go to your page or post to see the playlist.
If all you want is a simple playlist on your website, then this will work for you.
If you, however, want something more, like, control over the size and colors of your playlist, enable selling or downloading song – then, you will need a playlist plugin.
How to Add An Audio Playlist in WordPress Using A Plugin
There are several WordPress audio player plugins at your disposable, but I will show you how to create a playlist with AudioIgniter in your WordPress posts, pages or custom post types.
Install and activate AudioIgniter plugin
Log in to your WordPress website to install, then activate the plugin.
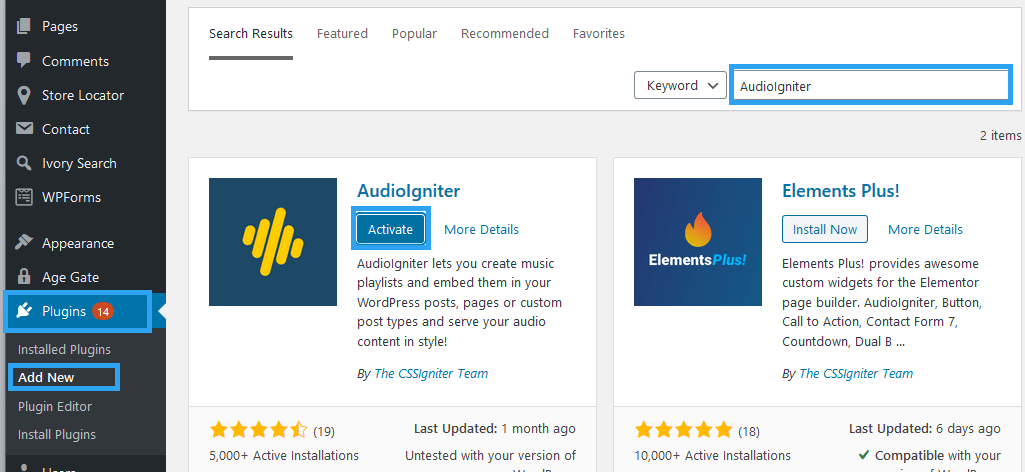
Enter AudioIgniter in the search box in the Add New page under Plugins to search the WordPress database.
The results are automatically displayed. Under AudioIgniter, click Install Now, then wait another moment to click Activate.
Create a playlist
On the Playlists menu item, go to Add New Playlist.
The working interface is pretty straight forward and familiar.
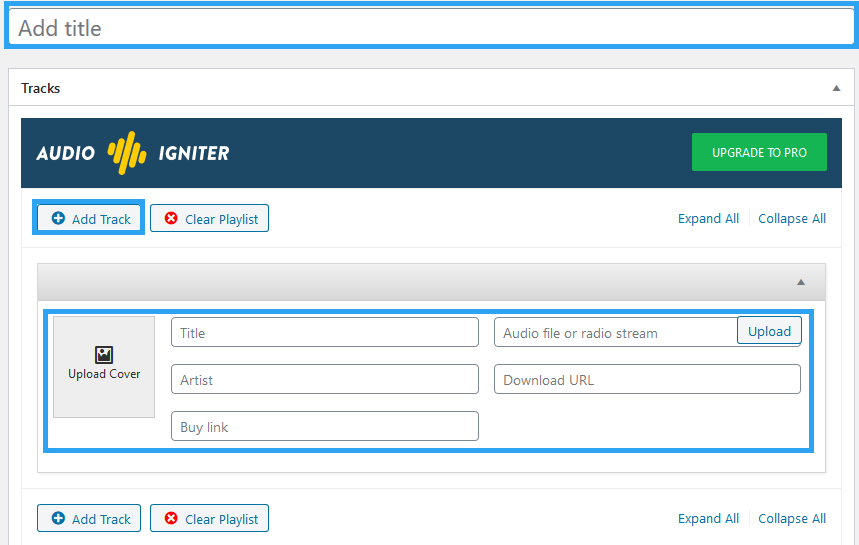
Enter the appropriate information for your playlist.
Under Tracks, click Add Track to add a new track to a playlist. Then enter the information for each track.
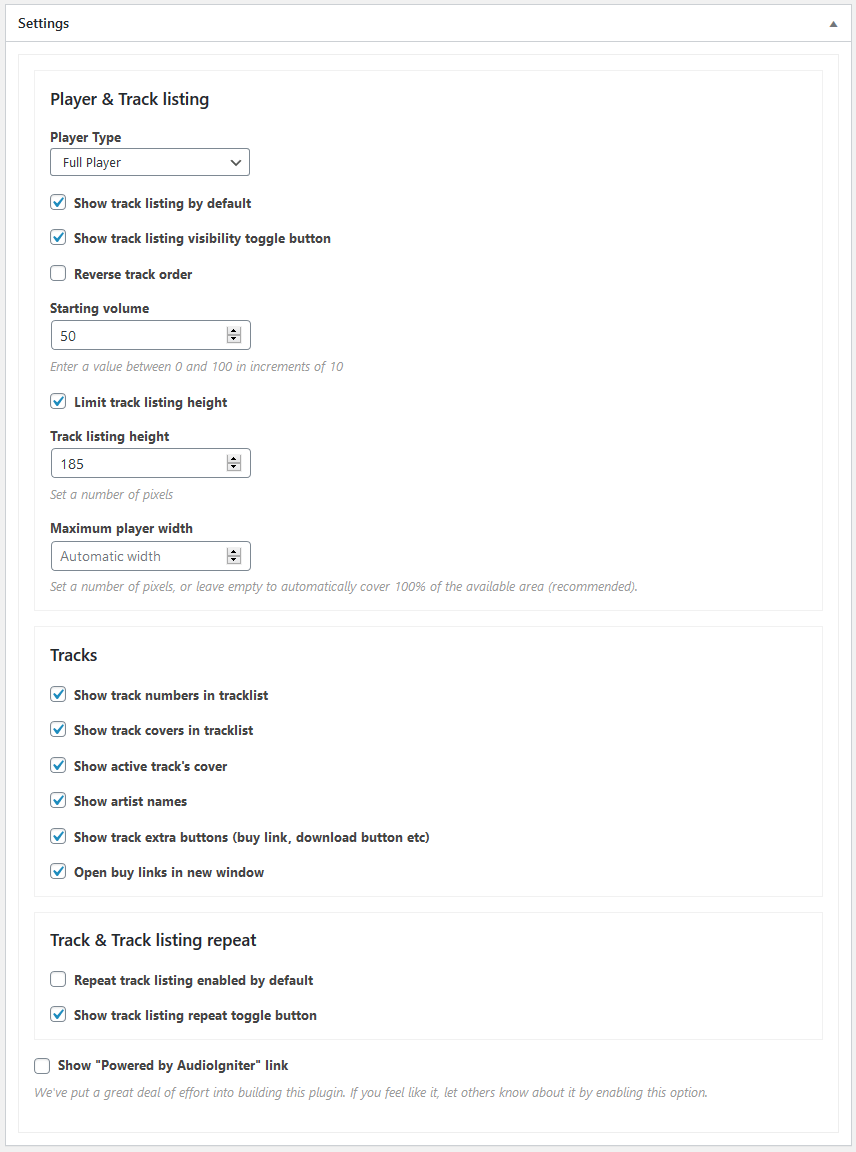
Under the settings section, tweak and customize the player and track listings to your liking.
Add the playlist to posts or page
When you are ready, copy the shortcode and publish your playlist.
Open the page or post or widget where you want to display the playlist, in there paste the shortcode.
Publish or update your post or page and visit it to see the playlist you just created.
Conclusion
And that’s how to add an audio playlist in WordPress to play music on your website.
Associating a playlist to your media player and change its looks to match the design of your WordPress blog as closely as possible.
If you’d like to try some alternatives before you stay with AudioIgniter, you can check out our handpicked list of the best free WordPress audio player plugins to help embed musics on your website.

