A popular site with auctions is eBay. if you want to do something similar – creating an auction site with WordPress using free or premium auction plugins.
Then this article is for you.
We shall use Ultimate WordPress Auction Plugin for this article.

The free plugin has a ton of features good enough to get you started with your auction site;
Here are some of the core features in the free plugin:
- Registered User can place bids
- Ajax Admin panel for better management.
- Add standard auctions for bidding
- Buy Now option with PayPal
- Upload multiple product images
- Show auctions in your time zone
- PayPal ready payment settings
- Set Reserve price for your product
- Set Bid incremental value for auctions
- Ability to edit, delete & end live auctions
- Re-activate Expired auctions
- Email notifications to bidders for placing bids
- Email notification to Admin for all activity
- Email Sent for Payment Alerts
- Outbid Email sent to all bidders who have been outbid.
- Count down timer for auctions.
- Lightbox feature to display auction images
- Ability to Cancel the last bid
- and much more.
Step by Step: How to Create An Auction Site in WordPress?
To get started, I will assume you have the basics in place, that is:
- A domain name
- A hosting account
- Installed WordPress to your hosting account.
If you do not have that ready, then follow our ultimate guide to start a website with WordPress.
Step 1: Install Ultimate WordPress Auction plugin
If you are good to go, then we shall start by installing and activating the auction plugin onto our website.
From the left menu, Click Add New under Plugins.
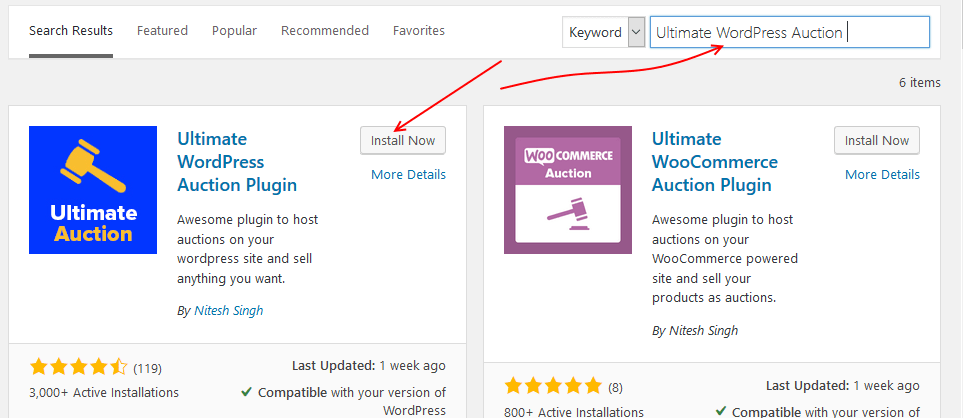
On the page, you are taken to, enter Ultimate WordPress Auction in the search box.
When the results are populated, Click Install now then activate Ultimate WordPress Auction Plugin.
Step 2: Configure the auction general settings
Now head to your menu, look for Ultimate Auction and click Settings
In the settings page, under the settings tab, configure the payment settings.
You have the currency and the payment options you accept on the website.
Click Save changed when you are done.
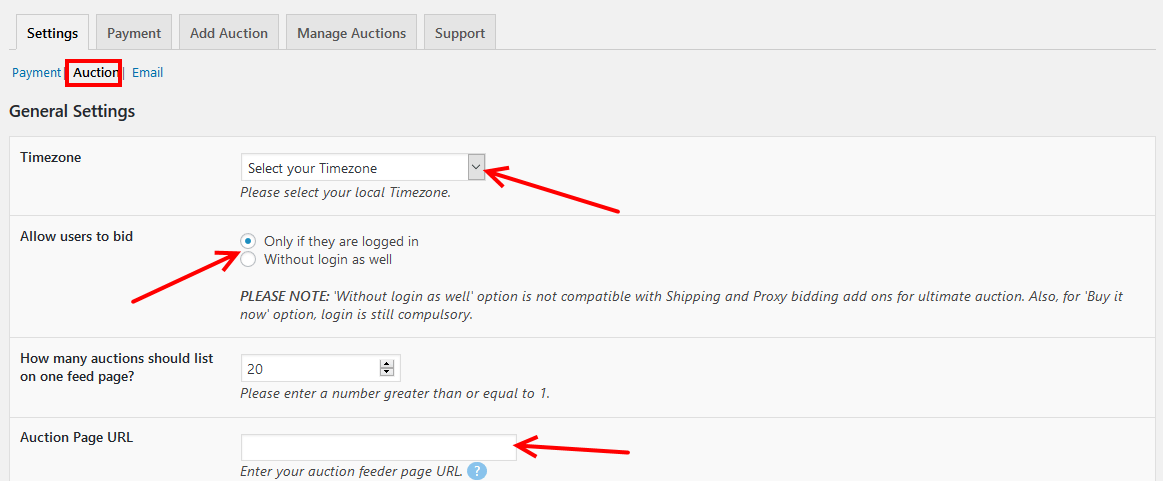
Next. Click Auction.
Set the timezone, what types of users can bid, the number of auctions to list, then enter your Auction Page URL – you will have to create it then add it here.
Scroll down for more optional settings, then save the changes.
Copy the shortcode provided under Auction Page URL and paste it into the page you want your auctions displayed.

Still, under the Email Tab, click Email and submit the email address that will receive bid notifications.

Step 3: Set up payment
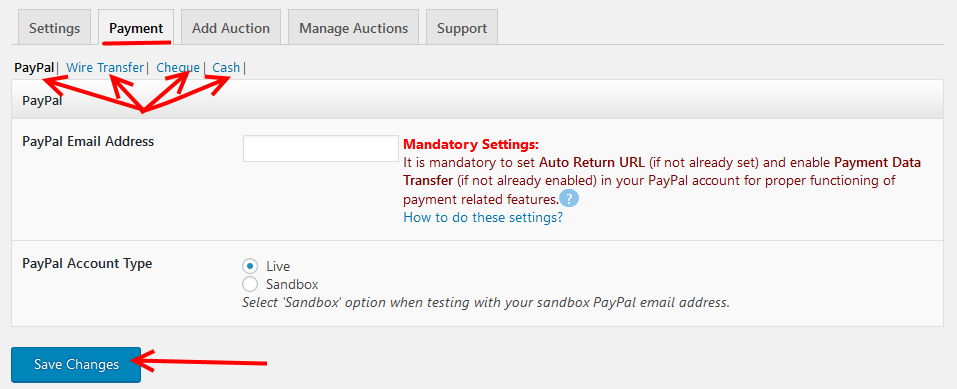
For whichever payment option you enabled earlier, you configure its settings here.
Click each individual payment option to configure it.
Do not forget to save changes.
Step 4: Add an auction
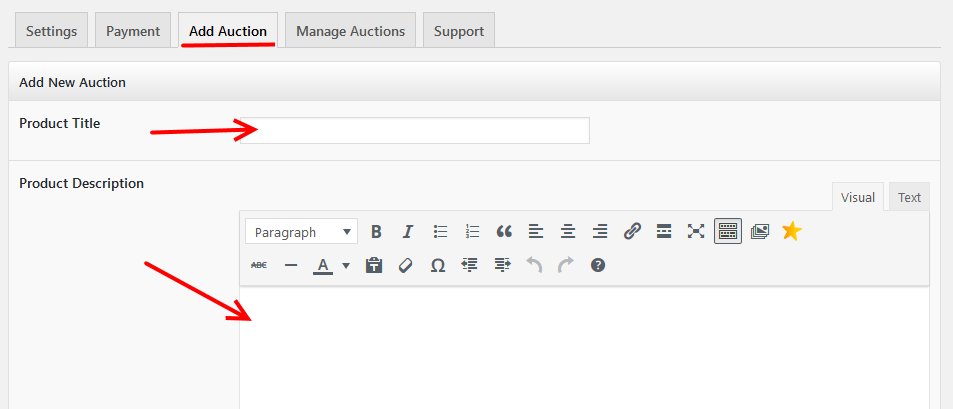
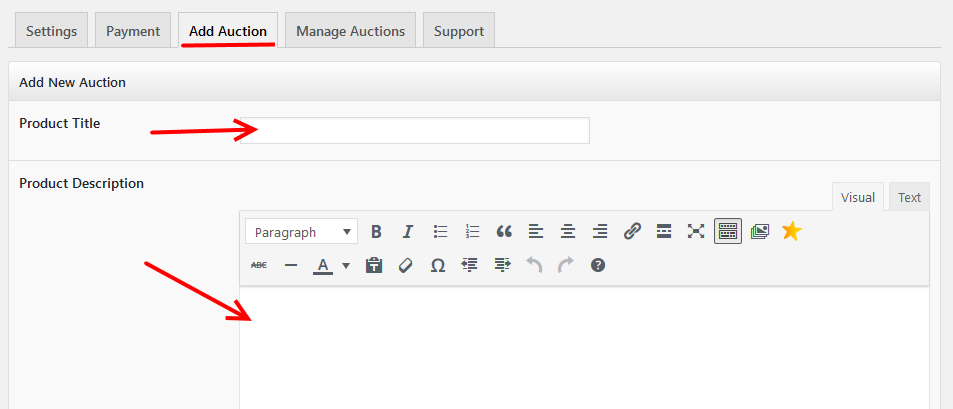
The next tab is, Add Auctions – note that you can also access this section by clicking Add Auction in the Ultimate Auction submenu.
Enter the Product title, Product description,
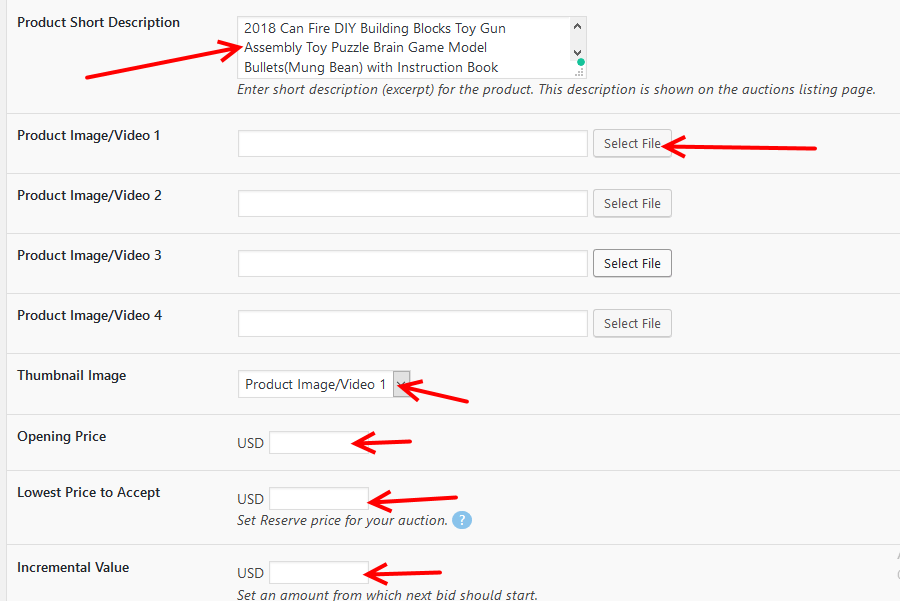
Scroll down and provide the product short description, product images or videos, thumbnail image, prices – including, the opening price, lowest price to accept and the incremental value.
Scroll down one more time and click to set the ending date for your auction, enter the Buy now amount and the payment method.
Save changes to capture the settings you have made.

Step 5: Manage an auction
To manage auctions, under settings click Manage auctions or from the submenu of Ultimate, Auctions click Manage Auctions.
From here, you can view and manage your auctions.
You can edit, or delete or end an auction. The tools are on the right of each auction item.
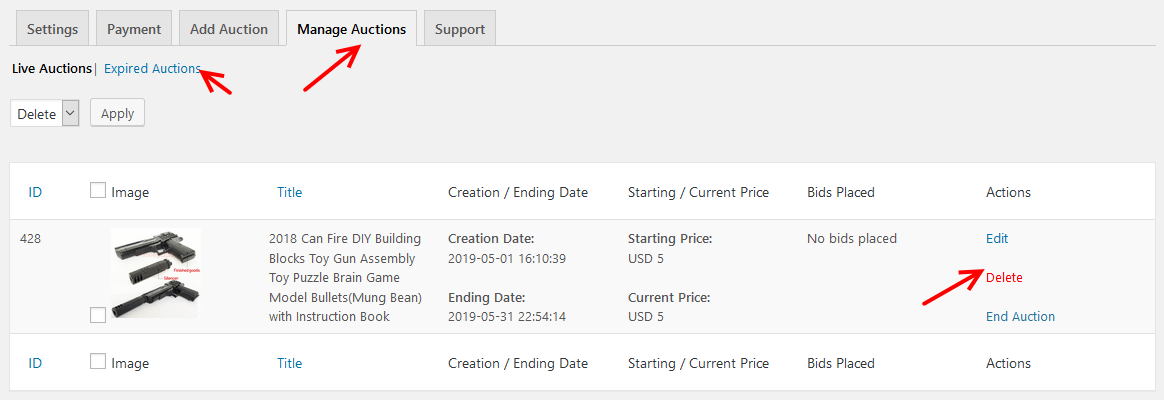
From Manage Auctions, you can also view your Expired Auctions.
Finally, is the support tab, you can raise a ticket or request for a custom feature from the developer in this area.

Step 6. Done
At this point, our website is ready to go live.
If you need to add more auction items, then go ahead and add as many as you need.
When you are done, we can go to our auction page and view it as will be seen by our visitors.
Visiting the auction page you created earlier, you should see the auctions you added.
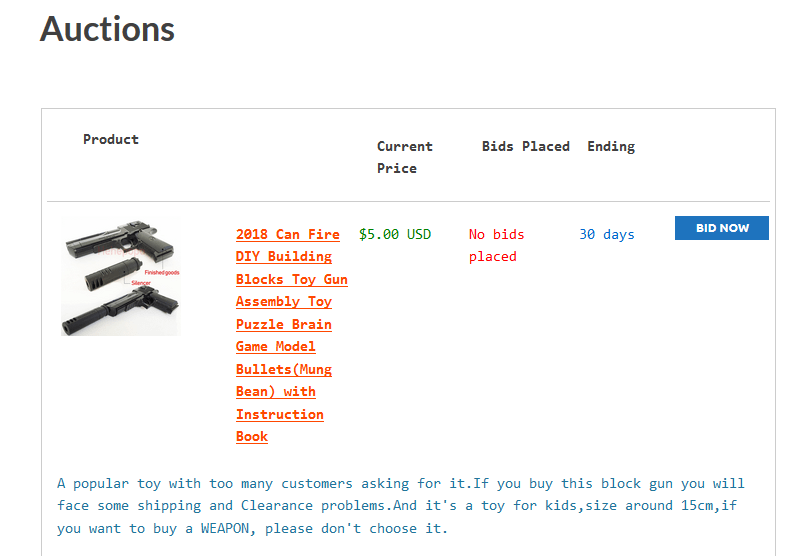
And that is how you create an auction site using a WordPress auction plugin like Ultimate WordPress Auction Plugin.
If you want to turn your wooCommerce website to an auction site, or if you wish to add the feature on some of your products, then the best plugin for you would be Ultimate WooCommerce Auction Plugin
It is a feature rich plugin that allows you to configure your products as auctions easily.
Are you running an auction website? What auction plugins are you using? Please share them with us in the comments section below. Questions and ideas are welcome.
You may also want to create a WordPress membership site to build online community for your business