When you create a website and have visitors coming in the goal for any website owner is to convert visitors in to active leads. This leads should ultimately benefit the website owner. This can come in the form of email sign ups, bookings and reservations, downloads, purchases and many others. A call to action makes your visitors take actions on your website. It stands out and clearly shows what the visitors need to do.
Call to actions can be in the form of simple text or prominent buttons or sign up forms. Many WordPress themes come with built in call to actions. You can also add custom call to actions to your WordPress site using a free plugin such as WordPress Calls to Action.
The plugin is an excellent solution for anyone looking to increase conversions. It allows you to track conversion rates, run split test campaigns and increase lead flow.
Why You Need Call to Actions on Your Site?
Call to actions are a way of telling your customers what exactly they need to do. For visitors to take action a lot will depend on how you place your call to action and where you place it. A poorly designed call to action or misplaced one can easily affect your conversion rate. Call to actions will help increase conversions and ultimately boost your revenue as well. It is therefore important to incorporate them on your WordPress website.
Step by Step: How to Add A Call to Action in WordPress?
1. Installing the Plugin
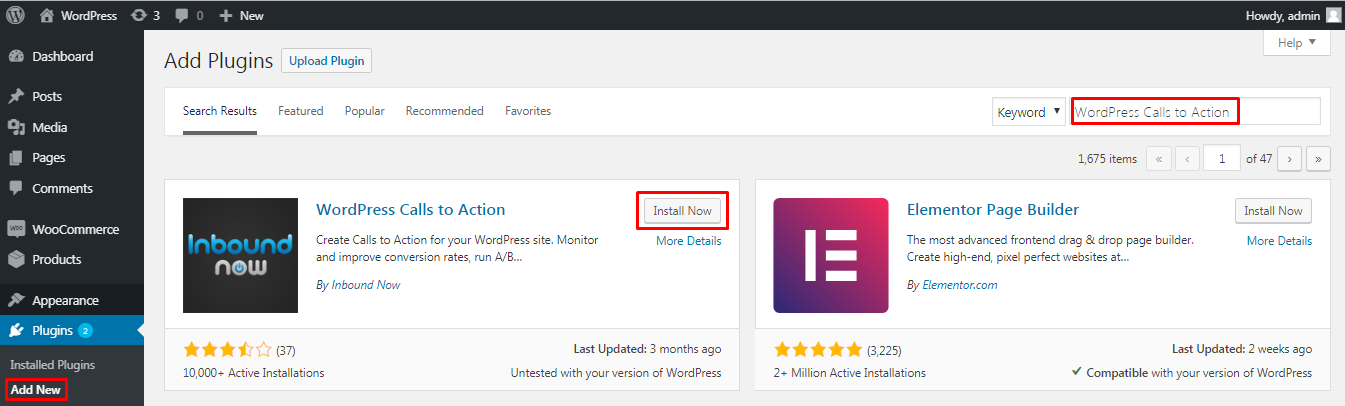
Login to your WordPress dashboard and click on Add New under Plugins. Search for WordPress Calls to Action, install and activate the plugin.
2. Setting up / Using the plugin
After activating the plugin, in your dashboard there will be a new menu item: Calls to Action. The first step is to create a suitable call to action. Under Calls to Action menu click on add new.
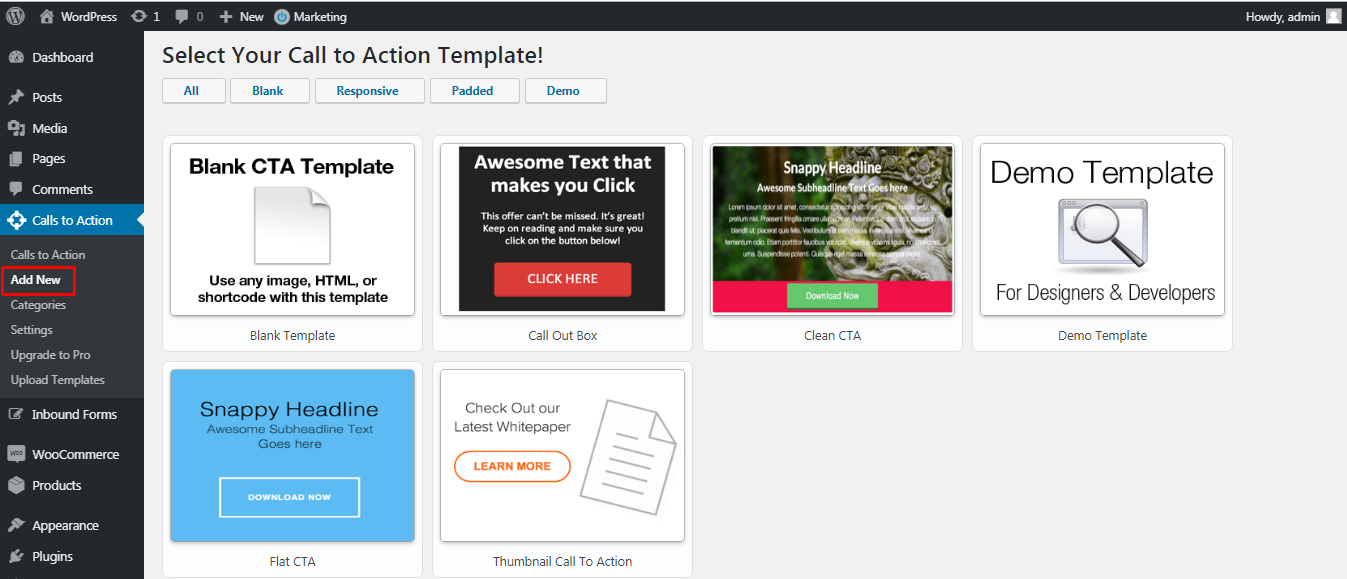
From here you can select 5 different call to action templates that are available or you can create a blank one and use HTML to create it. For demonstration purposes we will use the Call out Box template. Click on Call out Box.

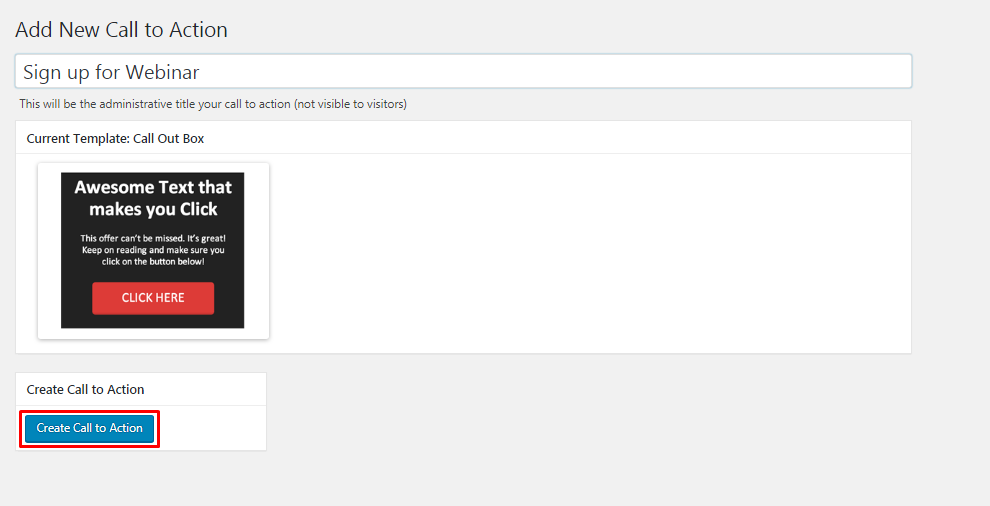
Specify a title for the new call to action and click on Create Call to Action.
Specify the width and the height of the call to action. Since we selected a template above, the headline color, the content alignment and the background color is already selected. You need to specify the Header Text.
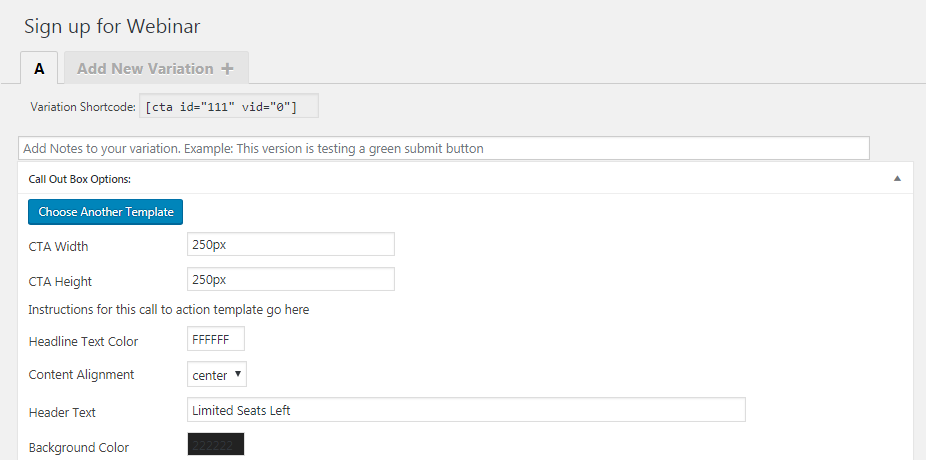
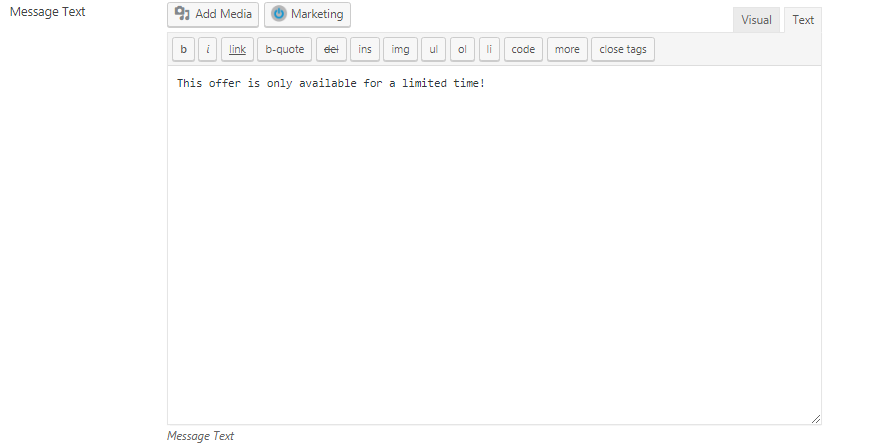
Scroll down and enter your message text.
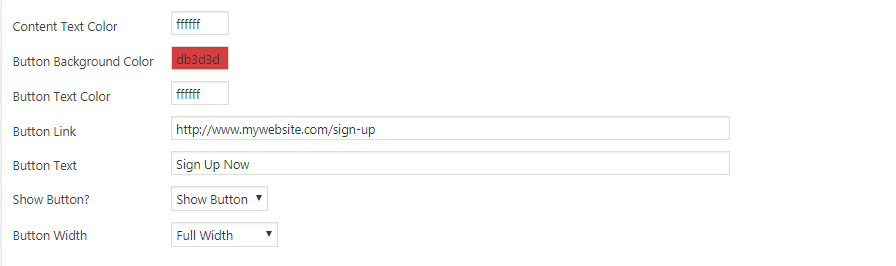
There are a few more options when you scroll further down. The content text color, button background color, button link and button text. You can set these as per your requirements.
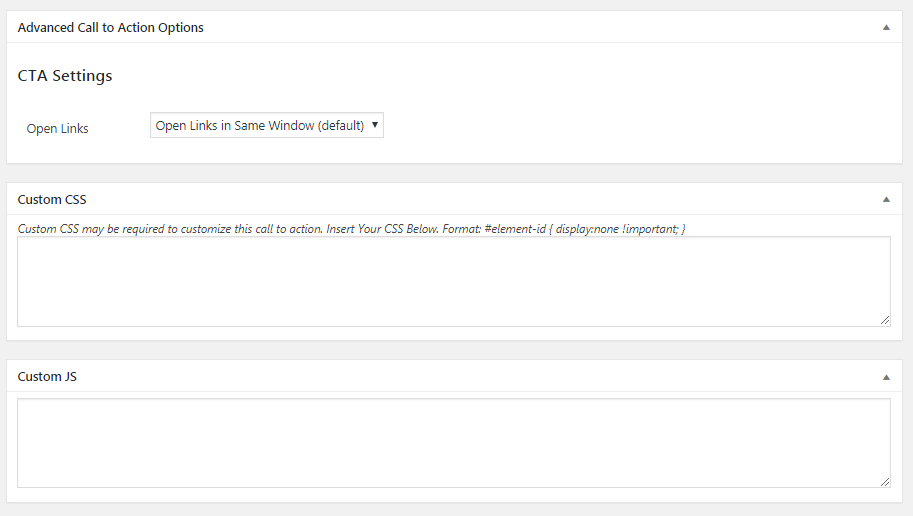
There are some advanced options further below. You can specify if you want the link to open in the same window or a new window. You can also add any custom css and js.
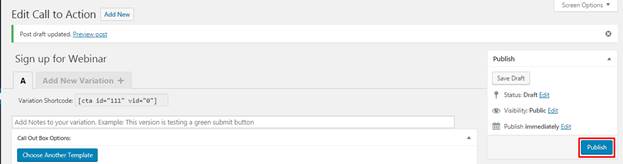
Once you are done customizing your call to action, click on Publish.
Under the call to actions section you can now see a list of call to actions that you have created. You can easily see the results of the call to action here. It shows the views, conversions, conversion rate.
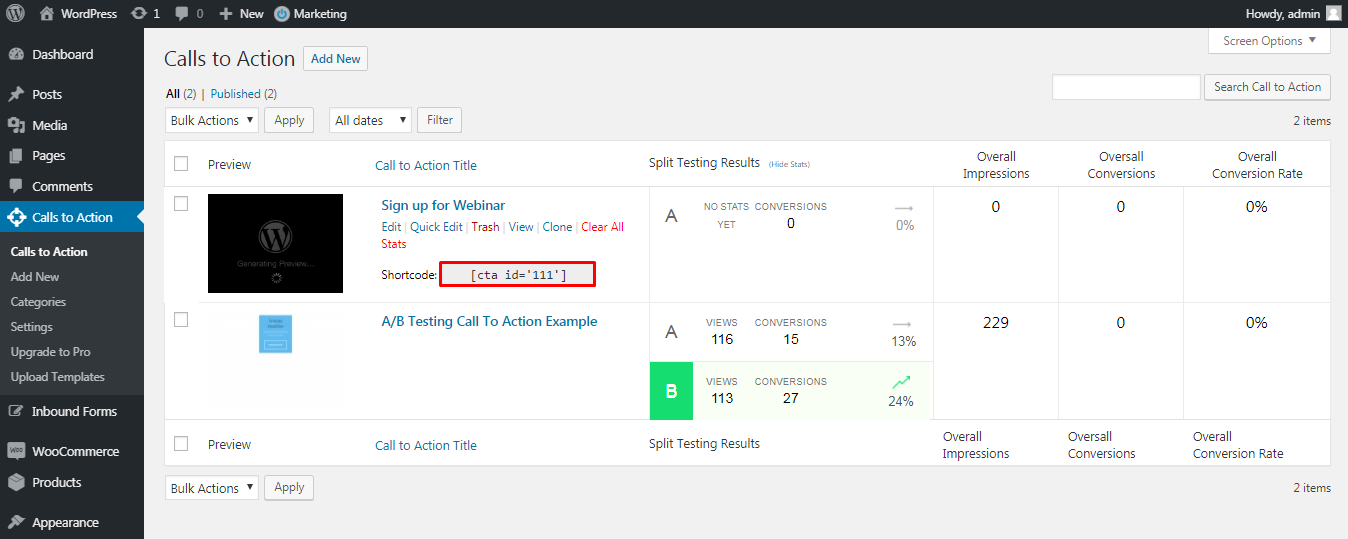
To display a call to action simply copy the shortcode of the relevant call to action, you can place it on any page or post.
Here is a preview of the call to action in the front end.
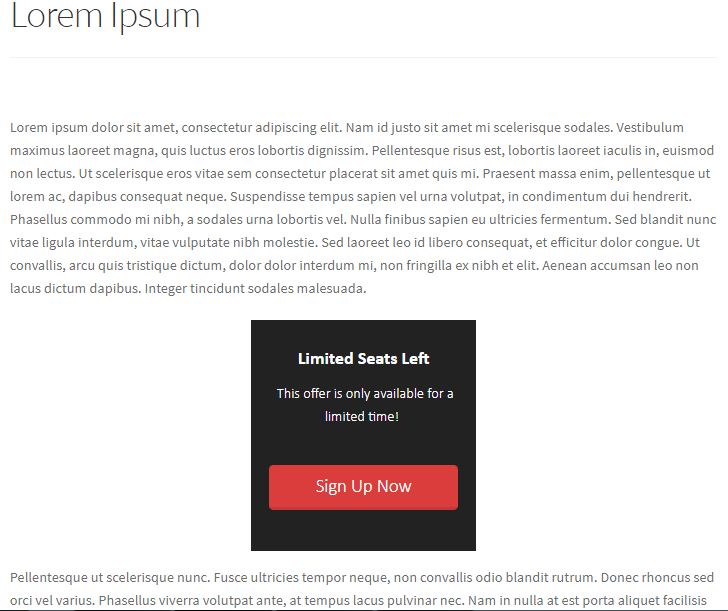
As you can see it stands out and asks the customers to take action by signing up. We also added some scarcity by mentioning limited seats and limited time offer. Scarcity is an important element that affects conversions. You can use words such as: last chance, exclusive, special offer, deadline etc to create scarcity.
If you see a call to action is not working, it can be that the text is not informative, the colors or design is not attractive or the information is also not sufficient. You then will need to do some split testing. This can be in the form of a different design or a different placement.
The key to creating high converting call to actions is to create good copy, design them well and place them properly. These three factors combined and if implemented properly can sky rocket your conversions.
Conclusion
As you can see the plugin is an easy to use solution that is robust and has all the features you need to create an attractive call to action. The only downside is, if you need to create a custom call to action you will need some coding knowledge.
That is all for this article. We hope you are now able to easily add a call to action on your WordPress website. You may also want to learn how to create some other beautiful CSS3 buttons without coding.