Working solo on a project or working with a team locally, it may make sense to run WordPress locally on your PC.
Development environments have grown in parallel with technology growth, between improved internet speeds and the remote teams a lot of development and testing environments have gone to the cloud.
It never surprises me anymore to meet a budding developer who does not know what XAMPP, WAMP, flywheel, and other application of the kind are.
Many who specialized on WordPress cited a couple of reasons – first, premade themes came and somewhat totally took away the need for hobbyists who just want to go online fast, for active developers, back in the day it was painful to move WordPress from a local site to a production server.
I still believe there is a justification for having a local server to run WordPress locally – well, not just WordPress but every other app you build.
Here Are Two Ways You Can Run WordPress Locally
Run WordPress Locally with WAMP
Wamp needs no introduction for most developers, its been around for ages providing developers a server environment for testing their web applications locally.
It is a Windows software consisting of the Apache web server, OpenSSL for SSL support, MySQL database and PHP programming language.
Putting the first letters of the leading technologies together it is stacked with you get WAMP.
You can download the files from wampserver.com
Install WAMP on a local computer.
Run the file you downloaded and then follow the installation steps.
Pay attention to the requirements, especially ensure you have Microsoft Visual C++ Redistributable for Visual Studio installed on your machine – for a 64-bit windows machine, you need to have both the x64 and x86 versions installed.
Once it is installed, you should see the Wampserver icon on your status bar in the notification area – on the right, it should show that all services are running.

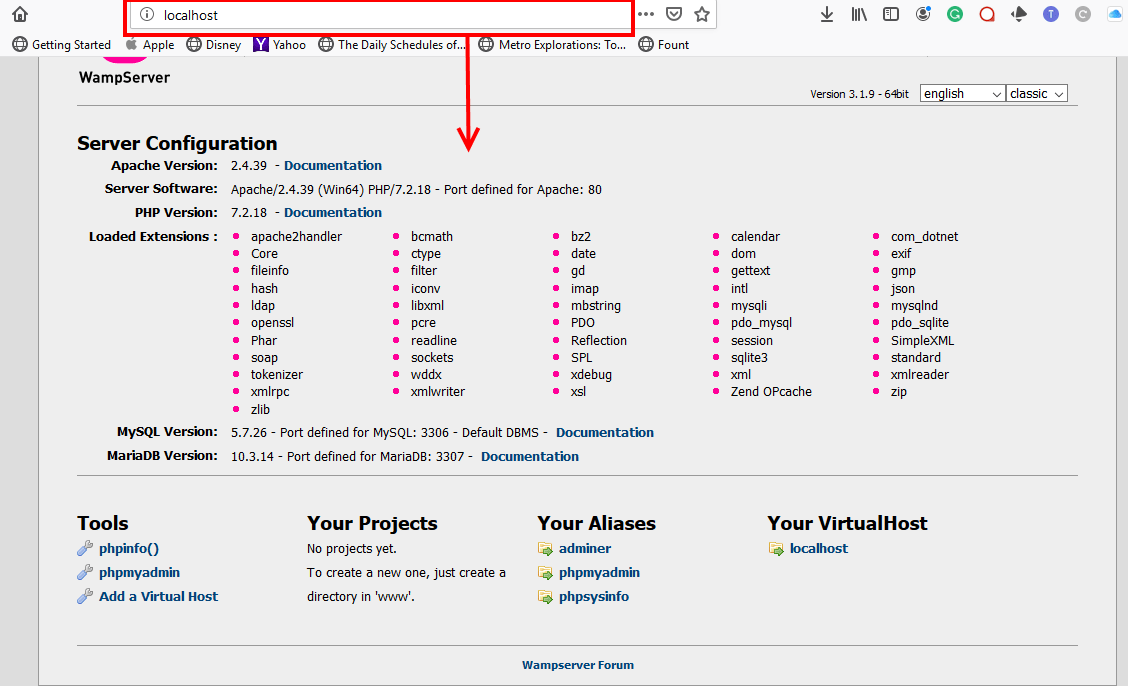
You can also test it by going to any browser on your computer and entering localhost in the address bar.
Create a database.
Before running installing WordPress, the database information will be required of us, so let us create this first.
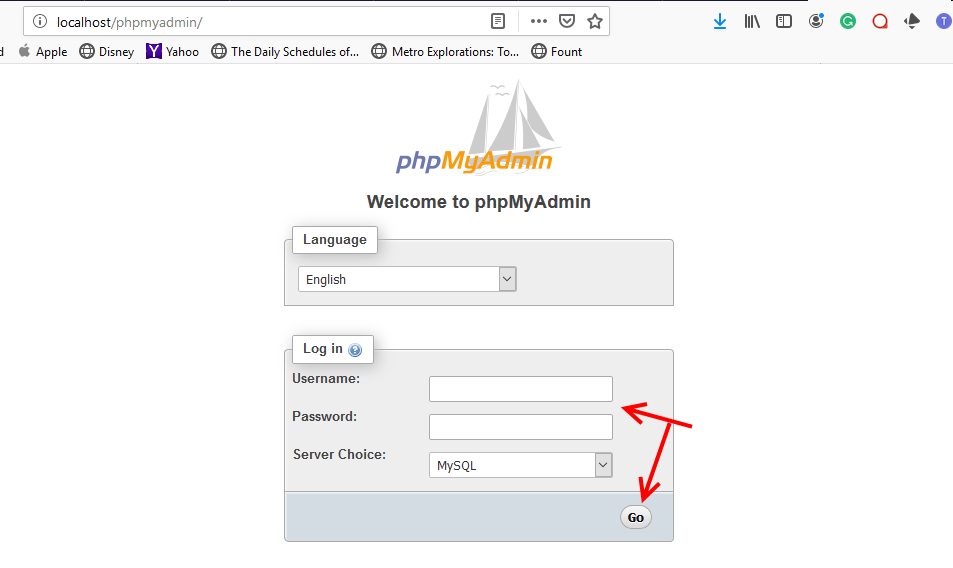
On your browser, go to localhost/phpmyadmin
Enter default username – root, leave the password field blank and click Go
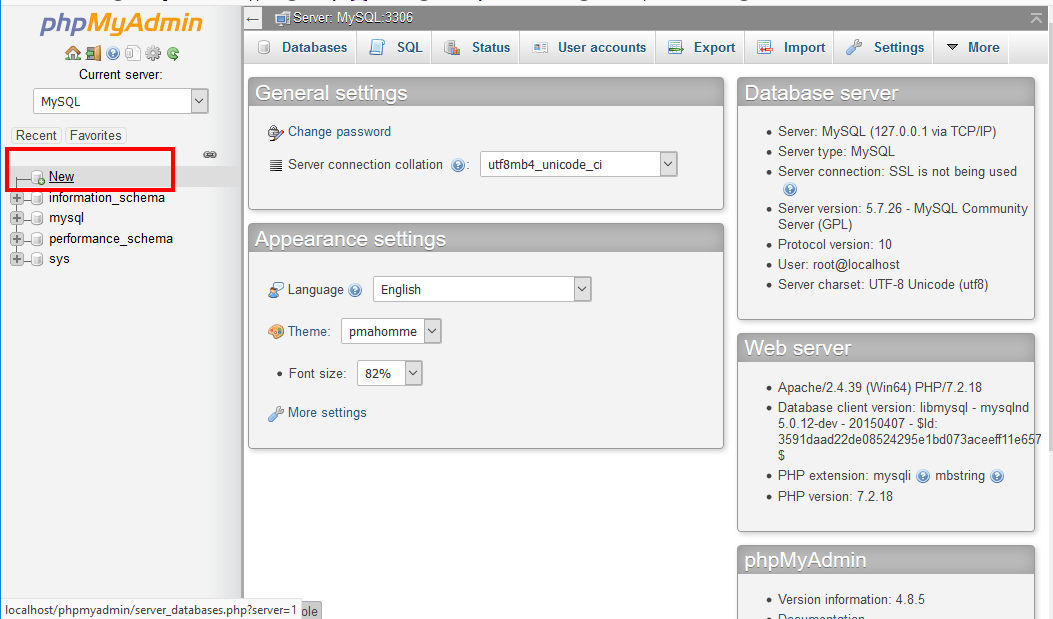
Once you are in, on the left, click New
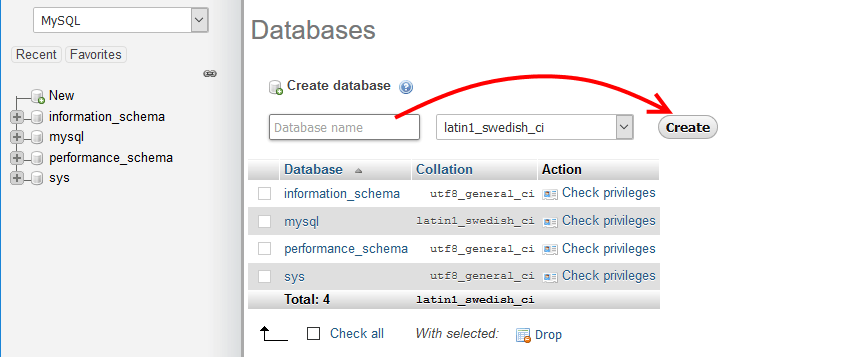
Next, provide the database name and then click create.
Create a WordPress Project.
To create a new project, go to the drive you installed Wamp on, open Wamp and in the ‘www’ directory create a new folder with names of your project.
In my case it is C:\wamp64\www and I created a folder WordPress – I actually did not, I unzipped the WordPress download file to that directory.
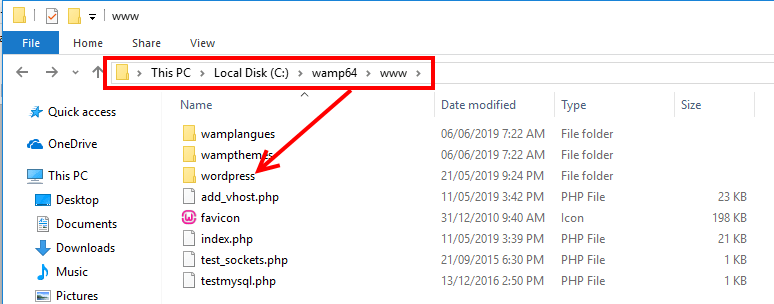
From here are on we shall work in a familiar territory.
Now go back to your browser and enter – localhost/your directory name, in my case it is localhost/WordPress
You are now taken through the all familiar WordPress installation process.
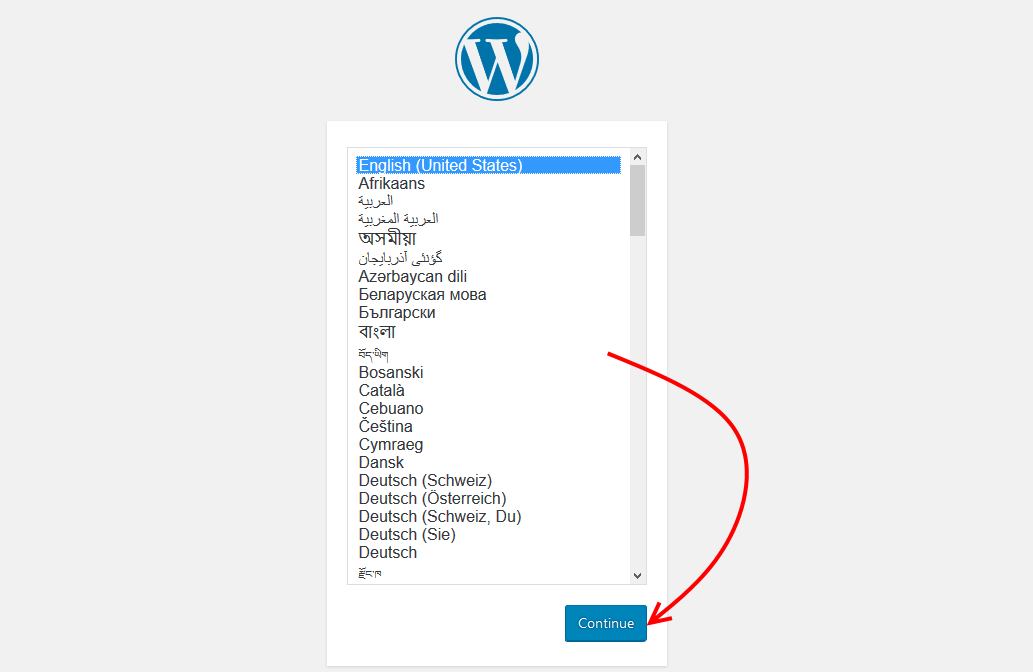
Select your preferred language and click continue.
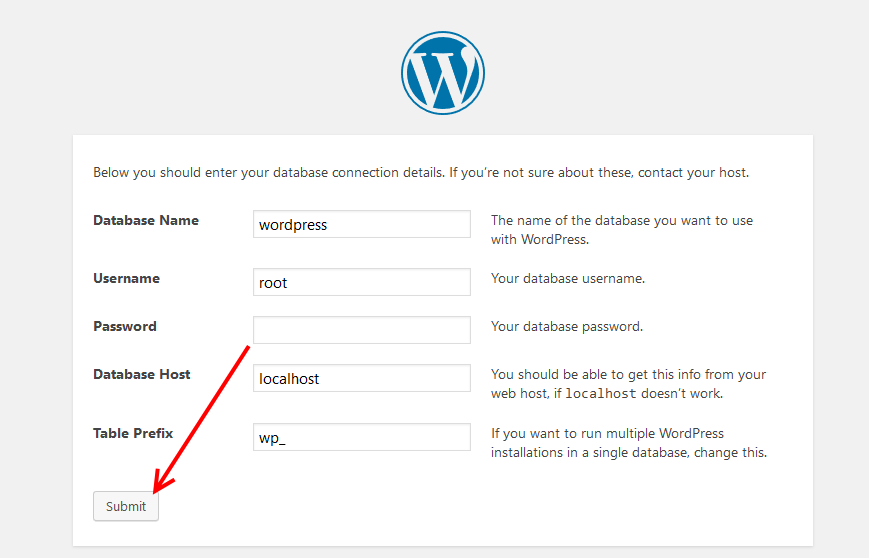
Now provide the database information for the database you created earlier.
- Database name
- Database username
- Database password
- Database host
- Table prefix (if you want to run more than one WordPress in a single database)
If you used default settings, then the only difference is the database name. Click Submit to continue.
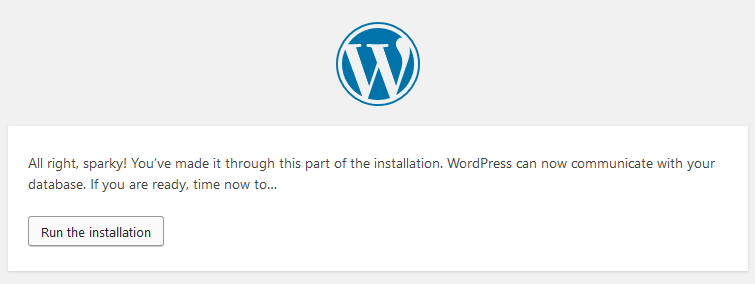
On the next screen, click Run the installation.
Provide the relevant information needed and then click Install WordPress
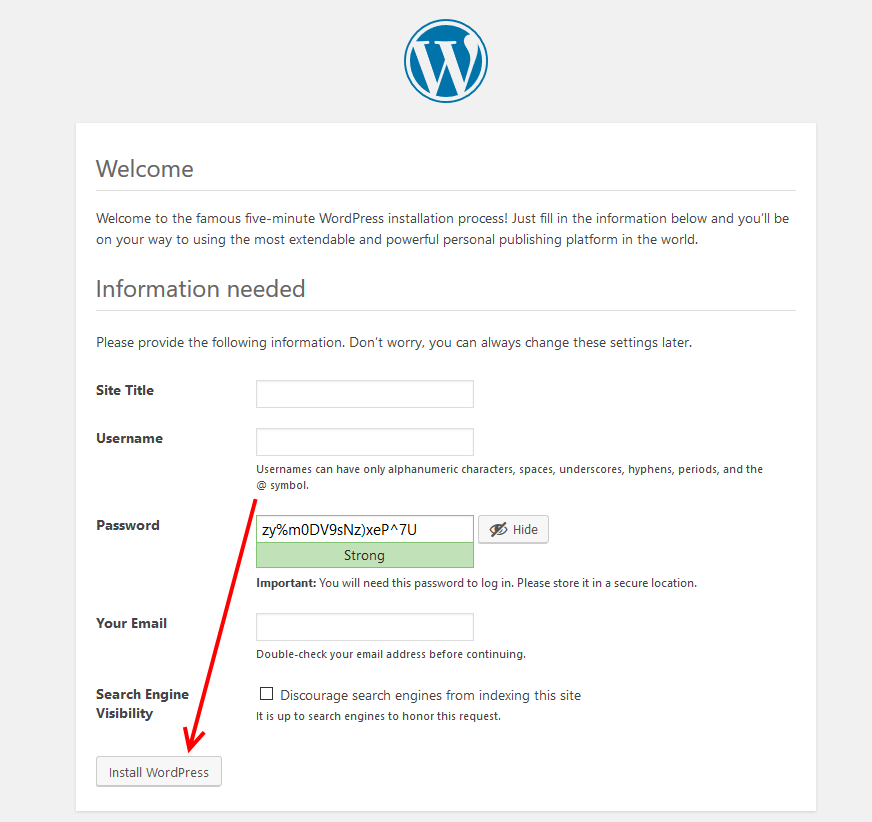
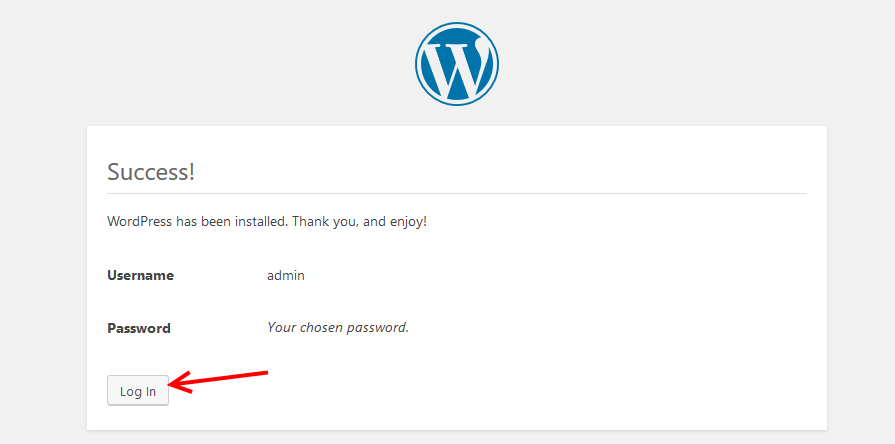
And that is it, you will now see the success page, click login to go to the admin area or
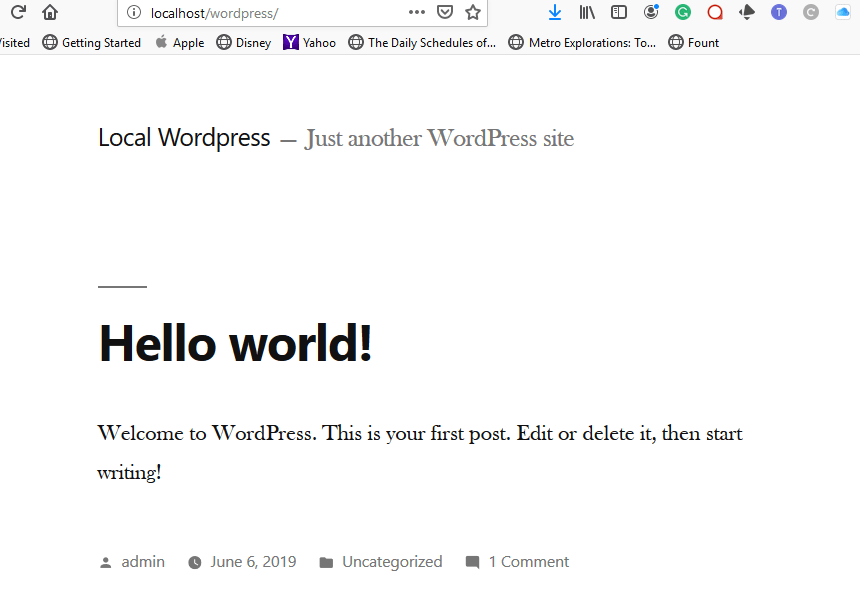
Go to your site URL – localhost/wordpress to see that your website is live.
Run WordPress locally with Local by Flywheel
As I noted earlier, it is a pain moving a local WordPress site to a production server – unlike other Content Management systems where you just zip and dump, WordPress requires a lot more tweaking and tinkering to run.
That is where Local by Flywheel comes in – it makes it a lot easier for developers building websites with WordPress to go from local to production plus.
Download a copy of Local by Flywheel here.
Install Local by Flywheel on a local computer.
Launch the downloaded file and follow the installation steps.
In the first step, click, LET’S Go!
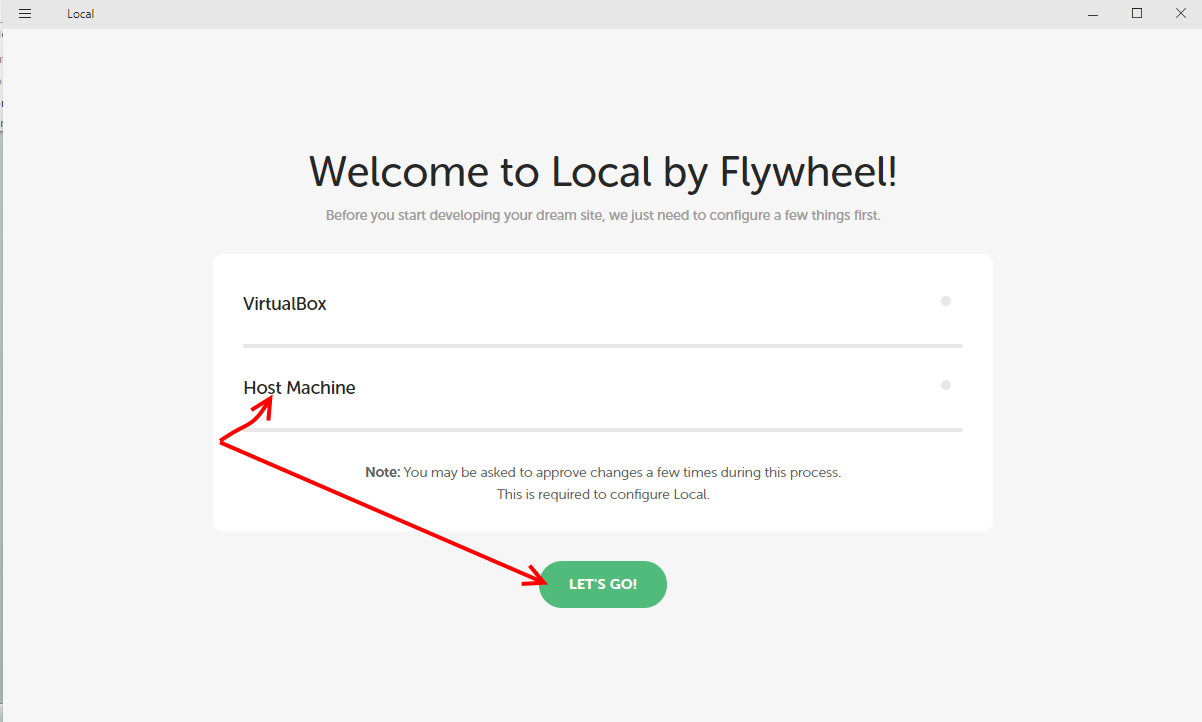
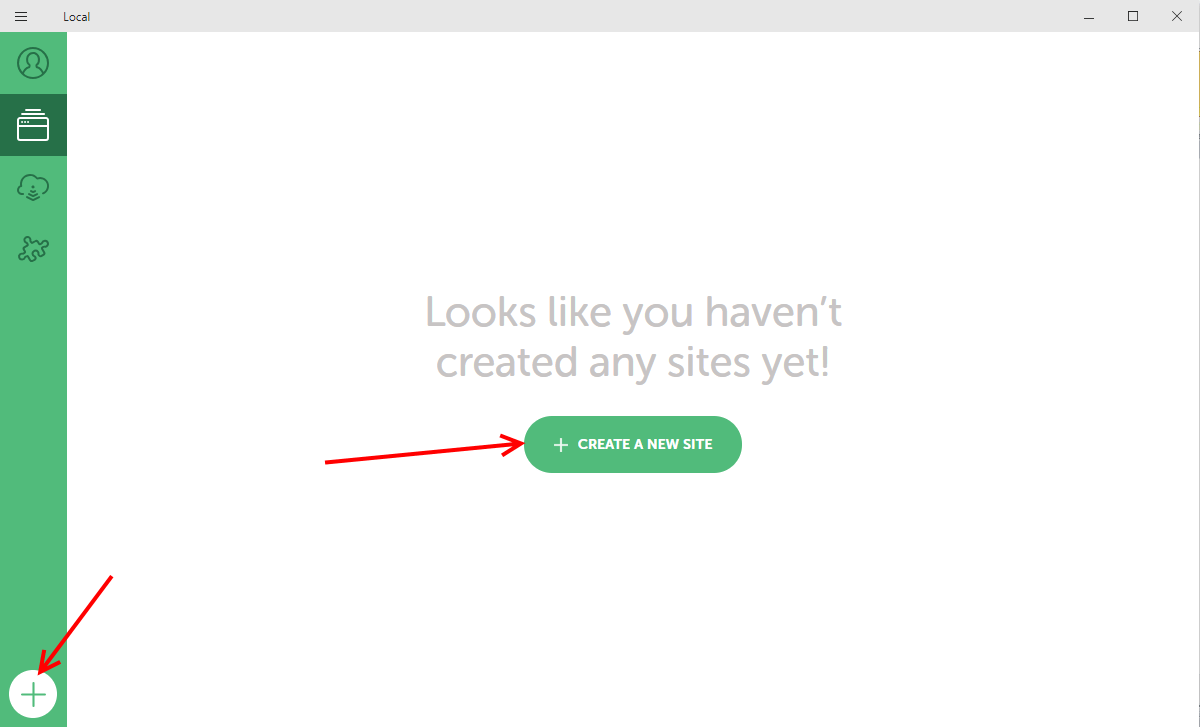
Once the installation is complete, you can create your first site. Click CREATE A NEW SITE.
For the next sites you add, click the + icon on the left.
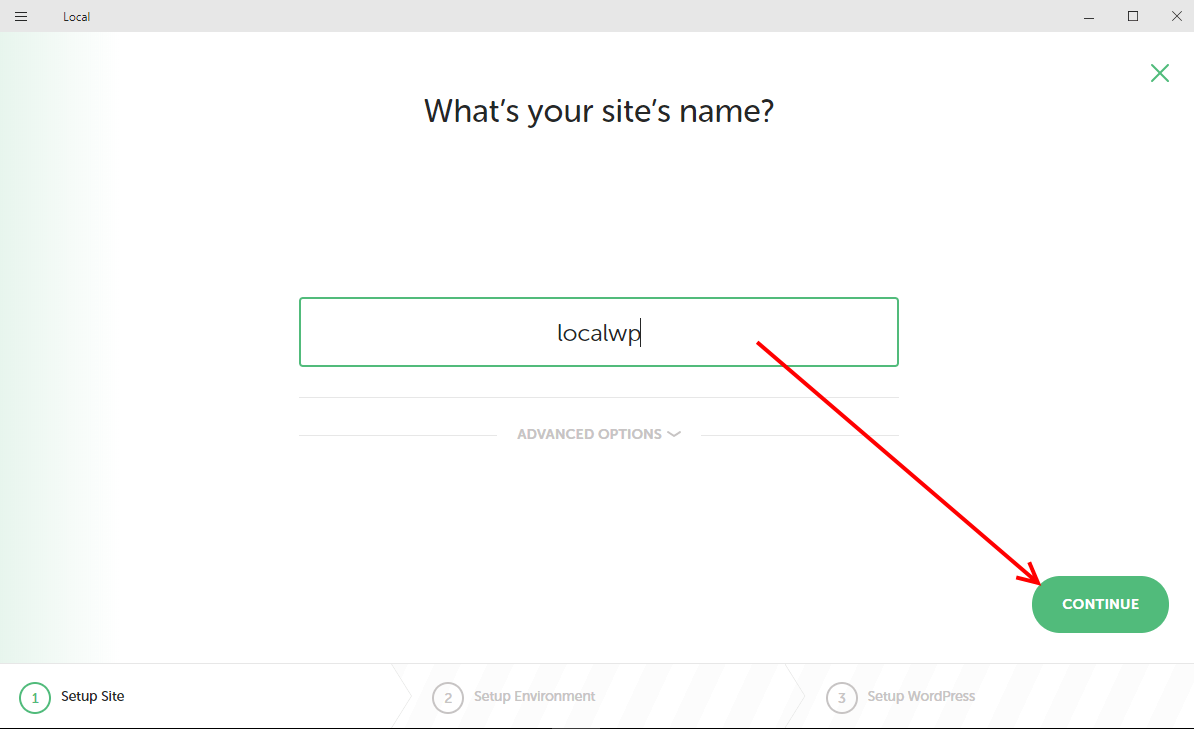
Now provide the site name and click CONTINUE.
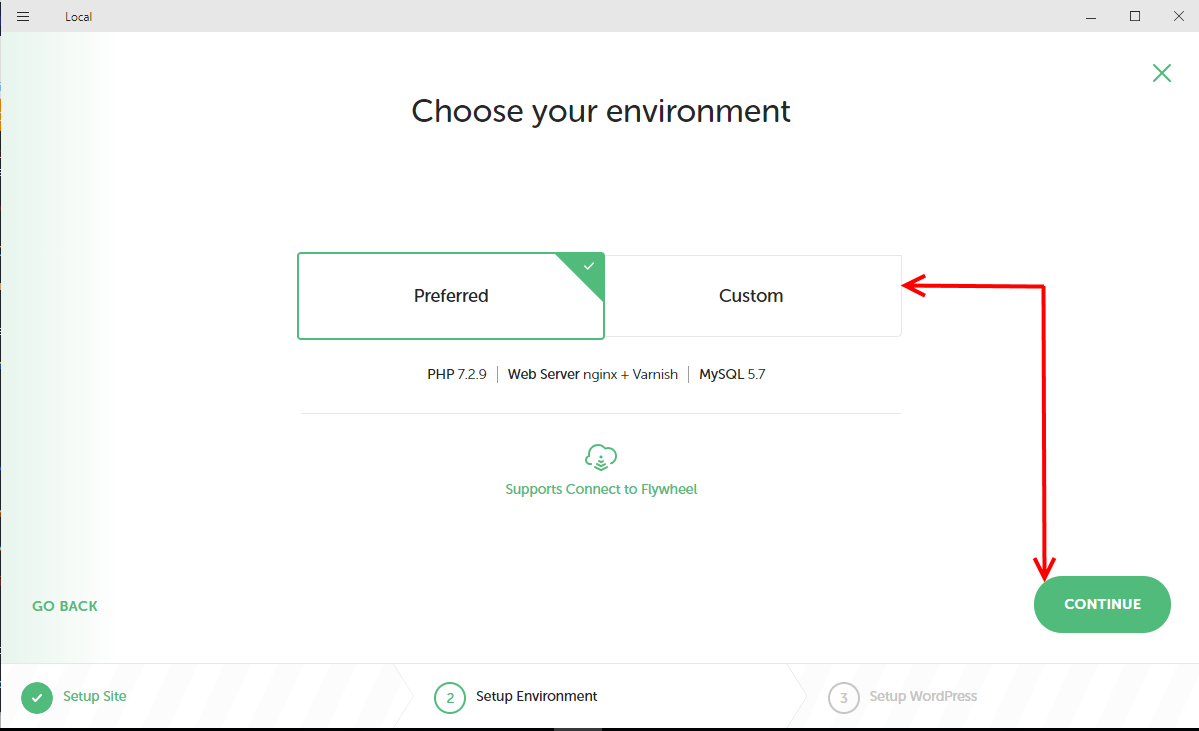
In the next step, choose your hosting environment.
I personally consider the environment of the production server. Nginx is preferred, but you can click Custom to choose Apache.
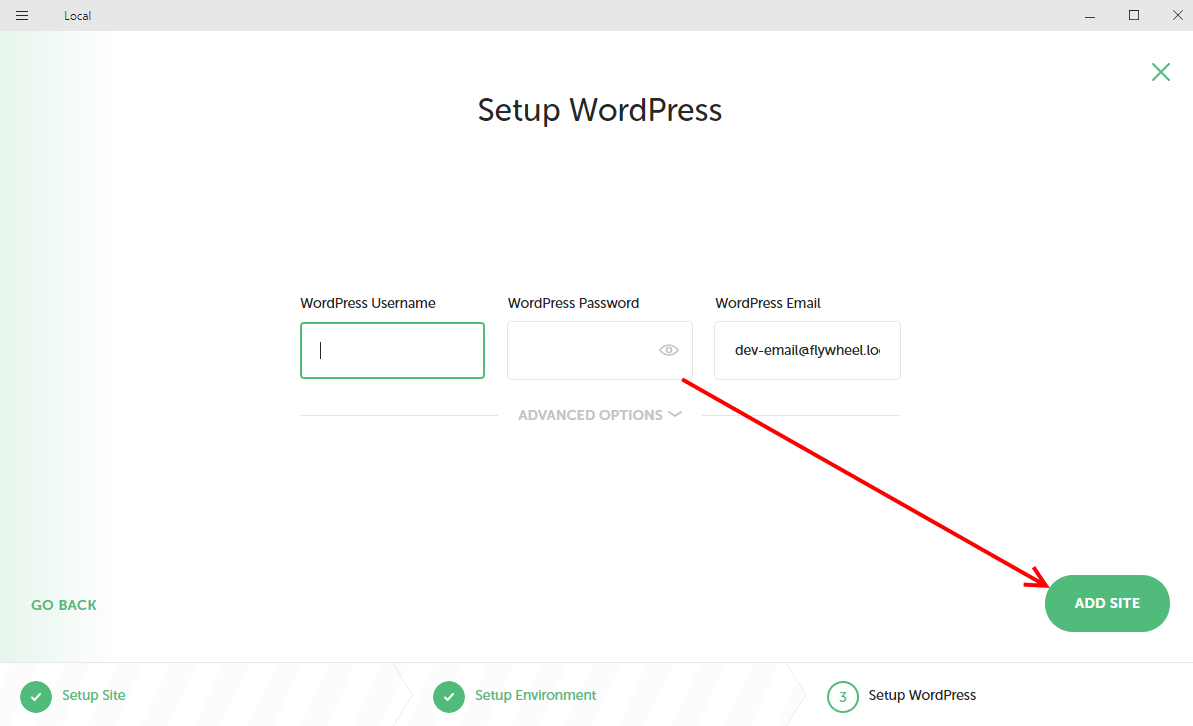
Now provide your WordPress Username, WordPress Password and email address, then click ADD SITE.
Next, the hosting environment is set up, followed by the installation of WordPress.
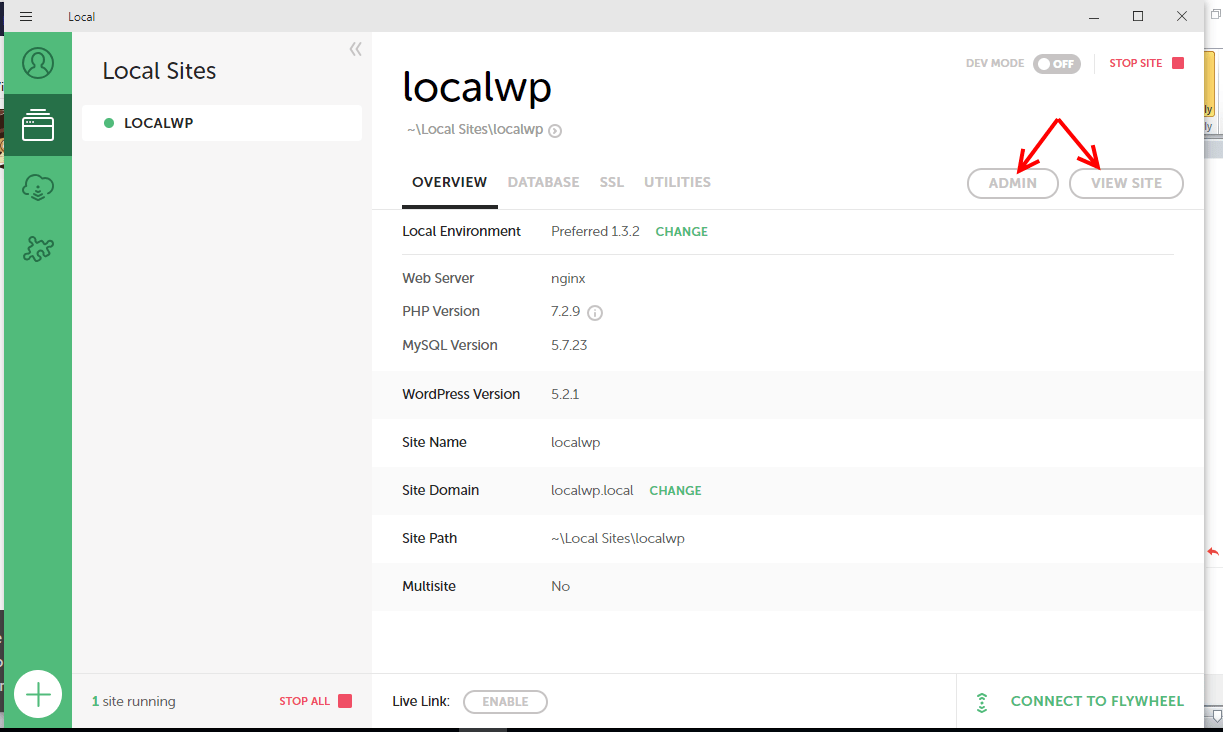
Once it is completed, you will see a screen with the details of your website.
Click the ADMIN or VIEW SITE to manage the website or view the site
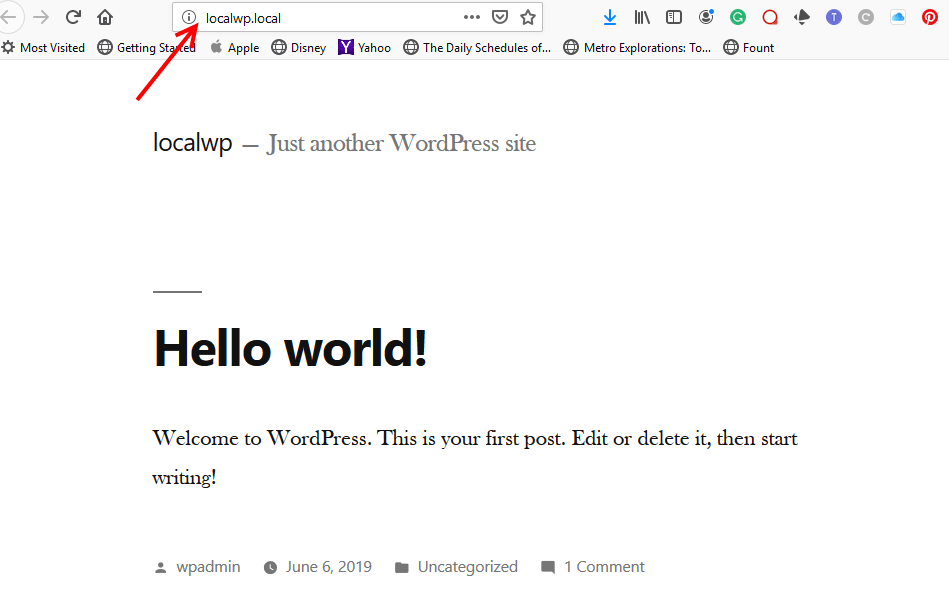
You live site should be visible from the address http://localwp.local/ on your browser.
Conclusion
As you can see, installing and running WordPress locally on your PC with Local by Flywheel is way easier than with WAMP. A lot of the processes are automated for you, plus you have a choice of the servers to run.
But, these are two different environments, catering for almost different needs.
As a guiding factor, if you build more than just WordPress websites, then WAMP may be for you, however, if WordPress takes the lion share of your web projects, then Local by Flywheel is what you should use.
Besides, the ease of setup – it makes it very easy to push your website to production servers without the headache that comes with WAMP or any other local server environment you available today.
Two ways to run WordPress locally on your PC, what is your pick? We shall appreciate your thoughts in the comments section below.
You may also want to move a WordPress site to a new domain or new server.