Do you find the default way WordPress displays your pages boring? Well. So do most of us, today we are going to learn how to create and manage a drag and drop page tree in WordPress.
Most of us are familiar with the ability to sort and move content around by dragging and dropping. Right?
Sometimes we wished we could do the same in our WordPress site, however, WordPress does not allow us to do that natively.
By default we have something like this.
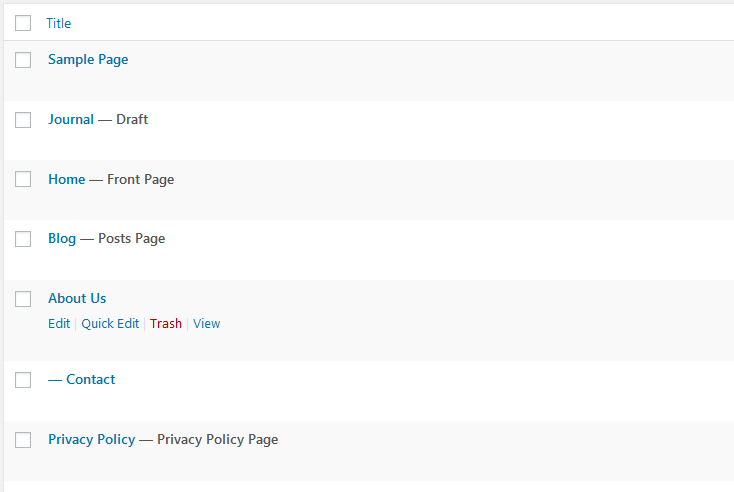
With WordPress plugins we can customize our content, create a tree page view and many more ways to our liking just to make our lives easier while managing our websites.
To create our tree page view we shall use a plugin called Nested Pages. A tool that allows you manage your pages or just about any content type using a drag and drop interface.
Nested Pages

Installing nested pages.

Install Nested Pages which every way you prefer.
Once it is installed and activated, by default the plugin will create a tree page view of your pages.
Just head to your pages, and take a look for yourself.
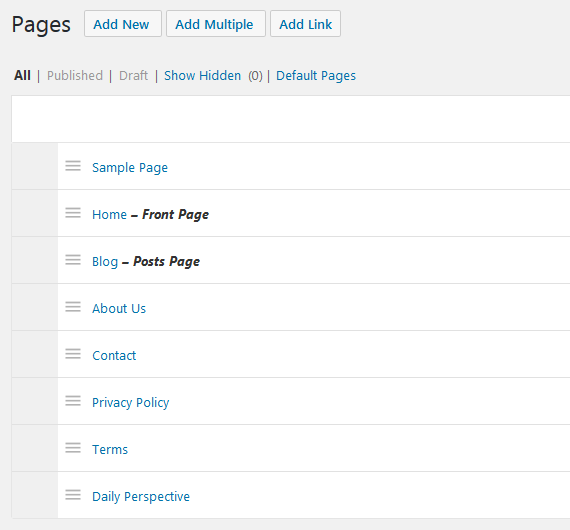
By just installing and enabling Nested Pages we have dramatically transformed the default look of our pages.
If we want to do more, say create a tree page view for our posts or any other content types in our WordPress website then follow along.
Let us go to the settings of Nested Pages
Nested Pages settings can be found on the left admin menu. Go to Settings, and then click Nested Pages.
The alternative route is going to plugins look for Nested Pages from the page and then click Settings as seen in the image above.

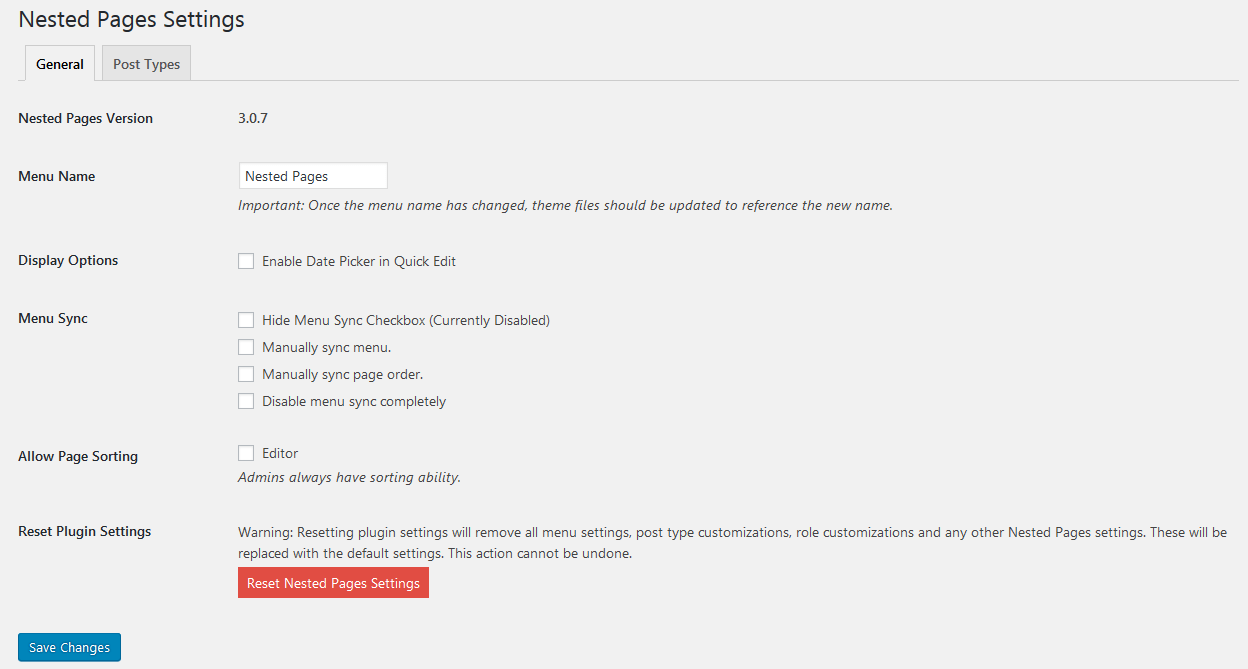
We have the General settings and Post Types.
From the general settings you can: change the default Menu Name that comes with the plugin.
Post Types
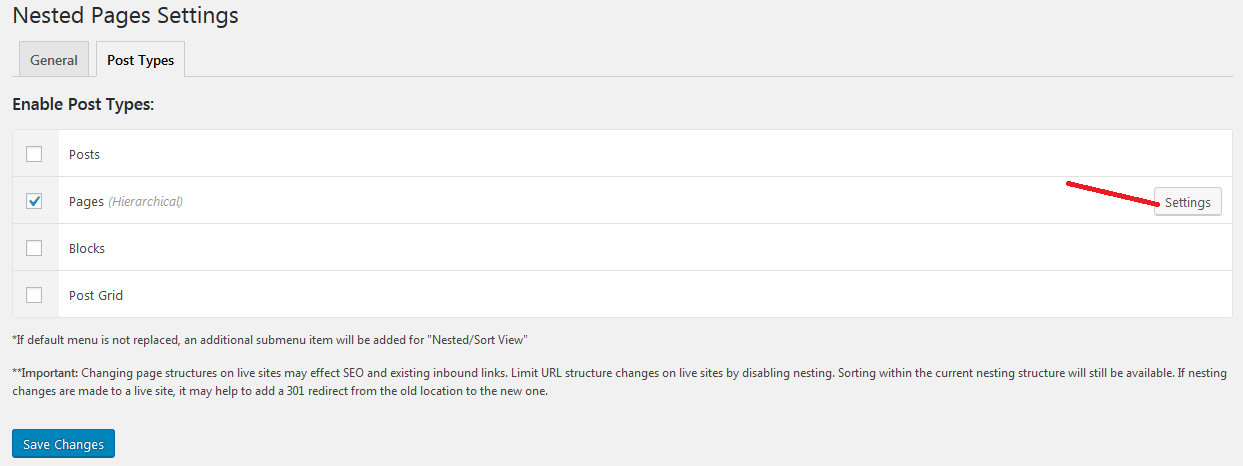
As we noted earlier, when you install Nested Pages, it only creates a tree page view for the Pages.
It is from the Post Types in Nested Pages Settings that you can choose to create tree page view for other content types on your website.
Check the check box besides the Post type you want to enable. On the right of the post type, Click Settings:
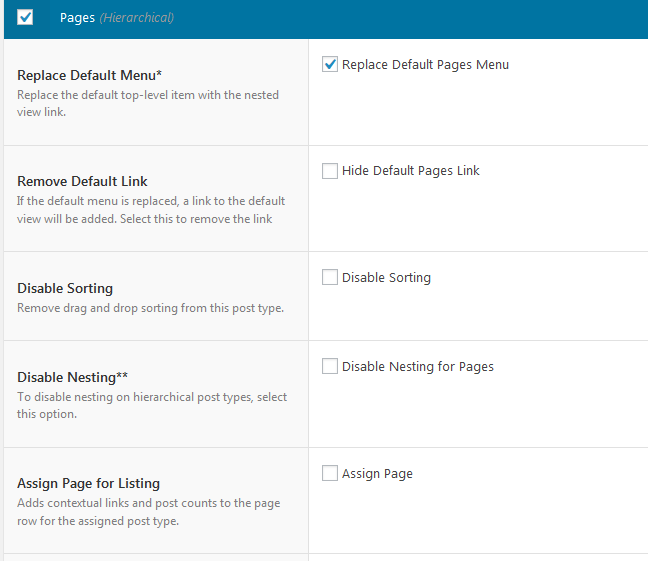
Check all the areas that apply to you.
- To replace the default menu.
- Remove or hide the Default Pages Link – the Default pages link as you will see later links to the default view of your pages without the tree or nested pages.
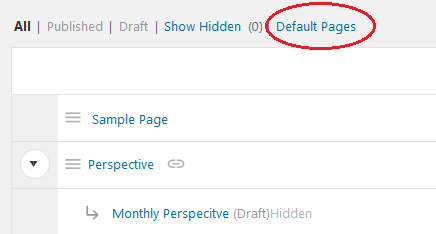
- Disable sorting – Nested Pages allow us to sort our pages by dragging and dropping them – you can disable that from here.
- Disable Nesting
- Assign Page for Listing
- Configure sorting by Authors.
You can explore this if the default options don’t work for you.
Okay now that we know how to change and modify settings, let us explore our newly nested pages.
Sorting pages
To sort pages, hover over the three lines next to the page name you want to move.

When you drag it up, the page will be moved up,
Drag it to the right to create a nested page – this is where the tree page view name comes from.
From the image above you can see we are nesting the Contact page to the About us page.
One thing to note, if you are going to use the Nested Pages menu, how you arrange your pages here will be the same hierarchal structure the menu items will take. The nested pages will become the sub menu items.
If you want to take it one step back, just drag it back to the left.
On the right of each page are more options;
![]()
The three dots, when clicked will bring a drop down with more tools you can perform with the page;
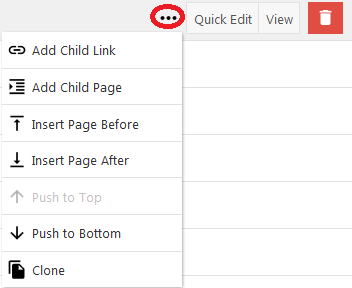
From here you can Add a child link, add a child page or choose placement.
The last option – Clone, allows you to clone or make a copy of that page. This is a pretty decent not so much talked of feature of the Nested Pages plugin, I can’t remember how many times I am building a website that I need to create a new page with the similar page structure as an existing one. With this you can duplicate any page without need of any extra plugin.
Quick Edit
![]()
When you click Quick Edit, a popup screen appears that will look like this.

As you can see, the options are the same as the old quick edit; however, this one is enhanced with a few more options are added to this.
Hide Nested Pages,
![]()
Check this option if you want to Hide the page from the pages view. You can always view it from the Pages menu > view Hidden Pages.
From here, you can also choose to add or not add the page to the Menu.

Click Menu Options > Hide in Nav Menu – if you do not want the page to show in the Main Menu.
![]()
The last two item are View and delete the page.
How to add a menu or modify a menu with Nested Pages
As you have seen so far, Nested Pages does more than just allow us to create tree page view of the different content types on our WordPress website.
With this plugin you can manage how your websites navigation will appear right within your pages. Cool isn’t it.
To View the menu, Go to Appearances, then Menus.
From the drop down box, choose Menu name you set earlier, in my case I left the default Nested Pages.

You will notice that by default the Menu is empty.
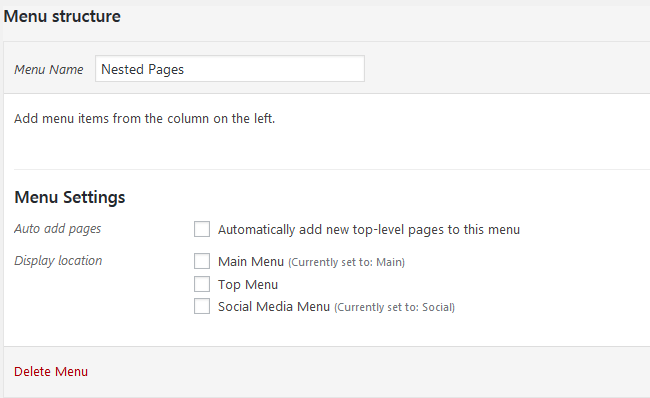
Don’t panic, go back to your pages, and on the Top right Corner, you will see Sync Menu, Click it to sync.

Then go back to the Menu’s to confirm that our menu items have been populated.
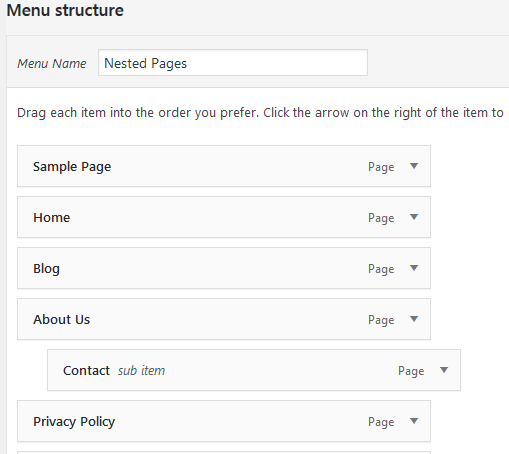
There you go From the Menu settings now you can assign your Menu.
One last thing that you can do with Nested Pages is create multiple pages in one go.

I think this is a decent feature if you are setting up a new website.
Being able to change the default way WordPress works is great for creating a working environment we love.
With Nested Pages we can shake up the default looks with a tree page view of your WordPress page structure. You may also want to display your posts as a grid layout.