Improve on the user experience and overall look and feel of your WordPress website when you add Google fonts to it.
You put in great effort to create just the right and valuable content for your audience, but, the look and feel of your website determines how many users will stick around longer to consume this content.
Simple, unique, beautiful fonts can alter the consumption of content tremendously on a website.
However, fonts – premium fonts are actually expensive. I know most website owners have never thought about this, and more have never bought fonts, but, for websites that value the visual appeal of their websites, they buy premium fonts.
This article is not telling you to buy a premium font; we are looking at how to add Google fonts to WordPress free – and at no cost.
What is Google Fonts?
Google Fonts is a library of 915 free-licensed fonts, an interactive web directory for browsing the library, and APIs for conveniently using the fonts via CSS and Android.
The service is used extensively with over 17 trillion fonts served, which means that each of its 915 fonts has been downloaded over 19 billion times, which means that each person on Earth has, on average, downloaded each font at least two or three times.
Popular fonts include Open Sans, Roboto, Lato, Slabo 27px, Oswald and Lobster. (Wikipedia)
Those are huge numbers, and they are that huge because of the value derived when you add Google fonts to a website.
What you are doing now is reading this article, and this article is made up of text, and like most websites text makes up over 80% and some even 100% of the content on the website.
Choice of a right font will help your content to appeal to readers as it makes the words clear besides that, since the form the most significant part of any webpage, they add to aesthetics of a website.
How to add Google Fonts to a WordPress website?
There are two ways to add Google Fonts to a WordPress website; Manually and Using a plugin.
We continue to explore the WordPress ecosystem, and in this article, we shall do the same, show you how to use a free plugin to add Google fonts to your website.
We will use Easy Google Fonts; with it, you do not need to worry about touching any line of code as the plugin takes care of that for you.
Installing Easy Google Fonts
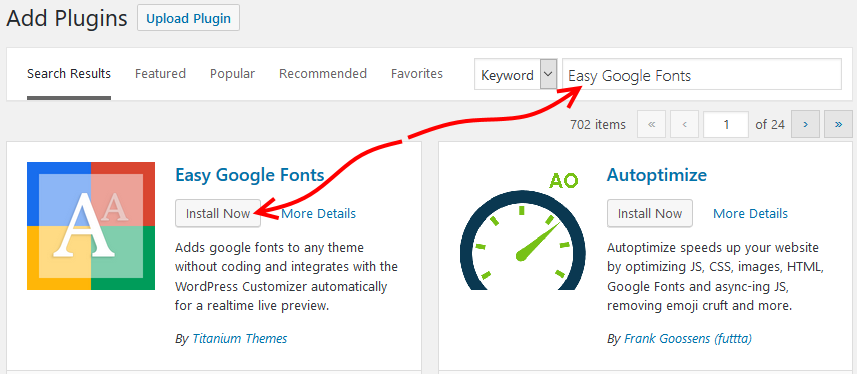
From your WordPress dashboard, on the left menu go to plugins and then click Add New.
Enter Easy Google Fonts in the search box, when results are displayed, click Install now, in a minute when it is installed click Activate.
Add Google fonts to a website
Easy Google Fonts adds a typography item to the customizer, it’s from here that you add Google fonts to your WordPress website.
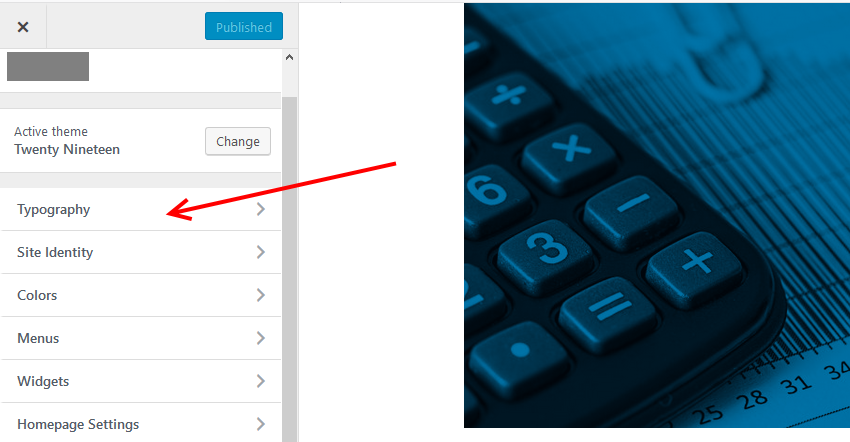
On the left menu under appearance, click Customize.

When the customizer opens, click Typography.
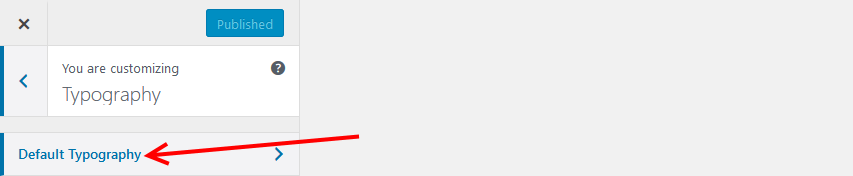
Next click Default Typography.
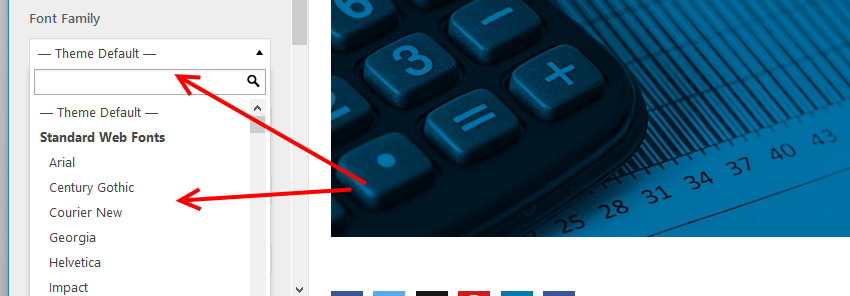
For each font category, click the drop-down icon to add a Google font to it.

Under the styles tab in the next screen click the drop-down icon to define it.
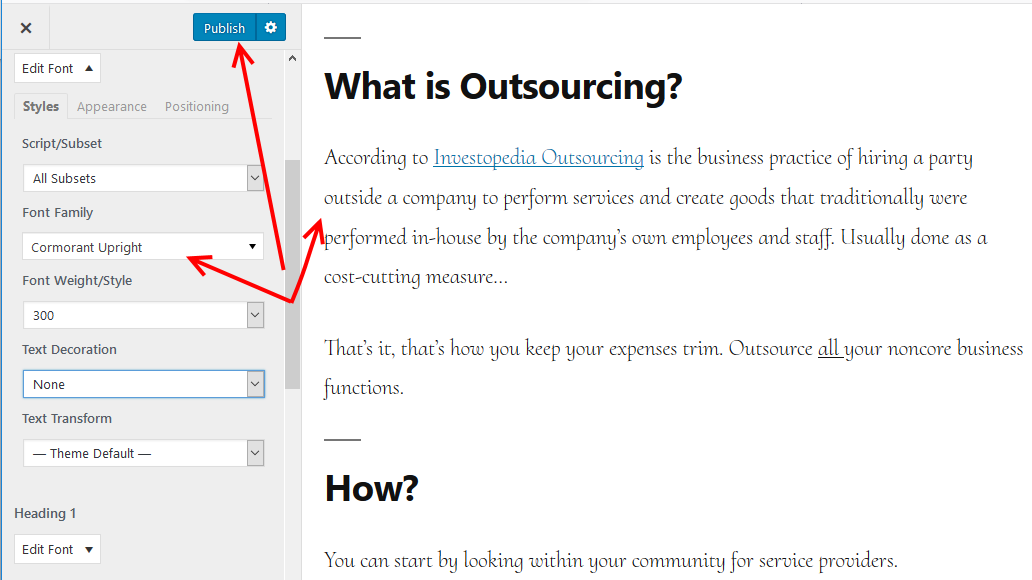
The final look and feel of the text on a webpage are composed of several things; you have the font family, the font weight or style, text decoration, and text transform.
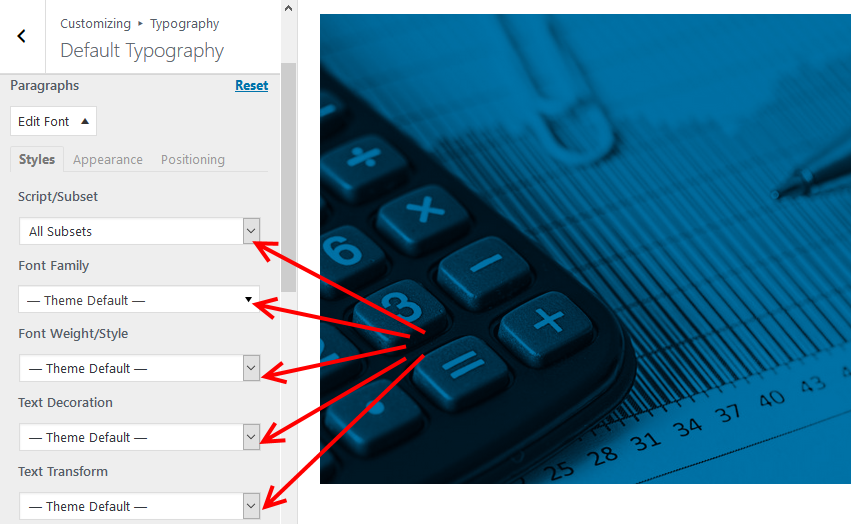
When you click the drop-down icon under font family, you can type in the font you are looking for in the search bar or scroll down for the particular font you want.
The live preview on the right will give you an idea of how the font will look like on the page.
After setting your font, define the font weight, the default font weight for the font you choose is applied automatically, but, you can specify it to your liking.
If you need to, you can also define the text decoration for underline, strike-through or overline and text transform for lowercase or upper case respectively.
Your theme has typography support. You can create custom font controls on the google fonts screen in the settings section.
When you are happy with the results, publish to save your settings. The publish button is on top of your page.
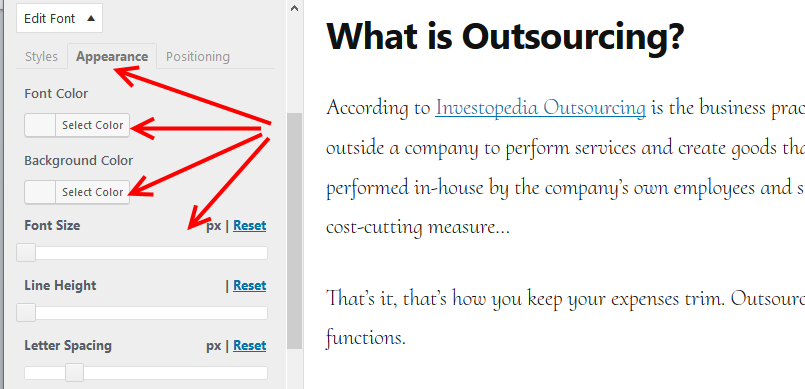
If you need to style or further customize how the font or text is displayed on a webpage, then click the Appearance tab for font color, background color, font size, line height, and letter spacing.
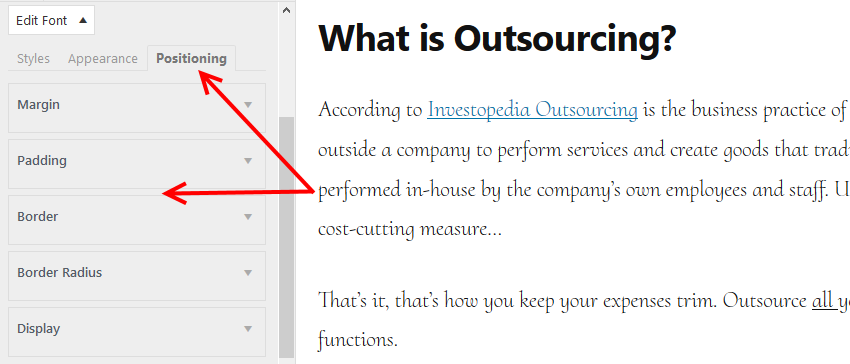
Finally, the Positioning tab for margin, padding, border, border radius, and display.
Conclusion
Was that hard or complicated? I bet not, and that is how you add Google fonts to a WordPress website.
To recap, we mentioned you could add Google fonts manually – this not covered in this article and with the use of a plugin.
In this article, we used Easy Google Fonts to add Google fonts to a WordPress website.
Easy and effective for its purpose.
If you, however, want to explore more options, then here are:
Similar plugins to add Google fonts to WordPress.
What’s your take on the role fonts play in general on a website? Have you tried Google fonts before, what plugin have used or plan on using?
We always love to hear your feedback and opinion, so share them with fellow readers in the comments section below.
You may also want to learn how to change the font size in WordPress to create engaging content for visitors.
References.
Google Fonts – Wikipedia, https://en.wikipedia.org/wiki/Google_Fonts (accessed May 10, 2019).