Truth be told, there is data or content that is just boring to read – a case is historical data – but, if you can create an event timeline things change.
There is data just typed out, and there is an appealing visual display of data. When you create an event timeline, you can beautifully showcase important dates or milestones in the case of this article events of your business on a WordPress website.
WordPress lets us explore our creativity with how we create content for our visitors with its rich database of plugins.
For instance, you do not need to get stuck to using the default classic calendar view for events on our websites – change things up, use timeline for once.
Today, we shall explore one more way: we shall create an event timeline and add some flavor to our data.
We shall use Timeline Express to create an event timeline.
So you know, you can do a lot more with event timeline than just create an event timeline, as long as your content has important dates or milestones you are limited by your creativity.
Here are some advertised areas where the plugin has been used besides the event timeline;
- Company History Timeline
- Personal Achievement Timeline
- Product Announcement Timeline (Roadmap/Release Cycles)
- Police/Fire History
- Twitter Feed Timeline
- Post/Page/Custom Post Timeline
- Customer History Timeline
This article should help anyone using this plugin and in need of creating a timeline for their content on a WordPress website.
How to Create An Event Timeline in WordPress?
Install and activate Timeline express.
We shall install Timeline express directly on the website.
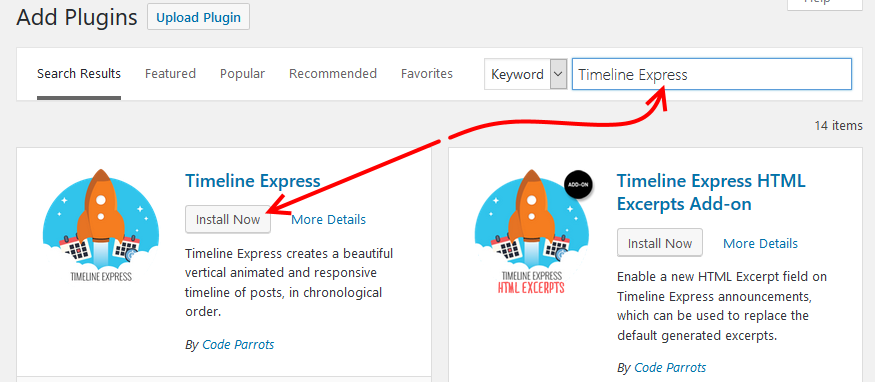
From your WordPress dashboard, go to the plugins and click Add New.
Enter Timeline Express in the search box.
Once the results are shown, besides Timeline Express, Click Install Now and then Click Activate to activate the plugin.
Create announcements
For whatever purpose you need this plugin, be it events or twitter feed timeline, you will use announcements to create the data.
From the left menu look for Timeline Express under it is New Announcement – click it.

On the page that opens supply the relevant information.
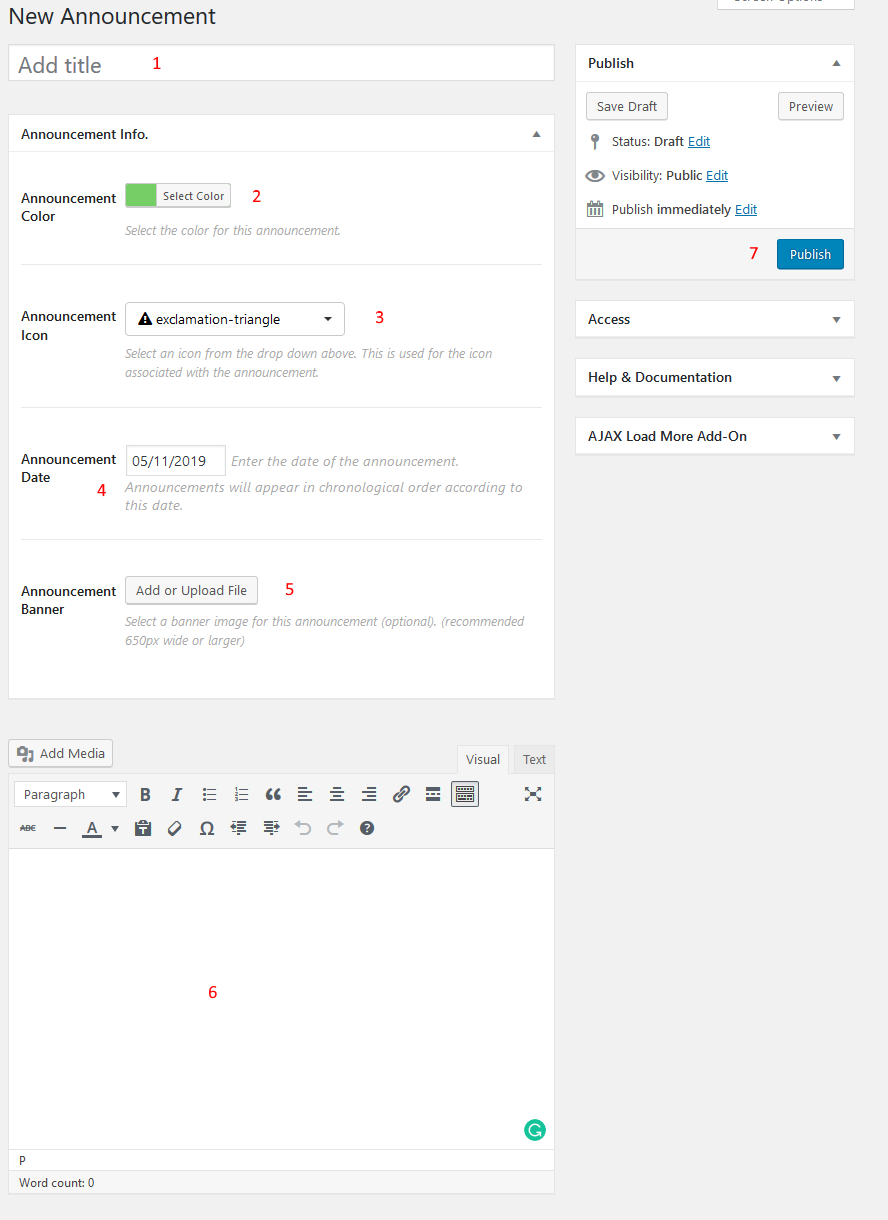
- Add a title to your timeline.
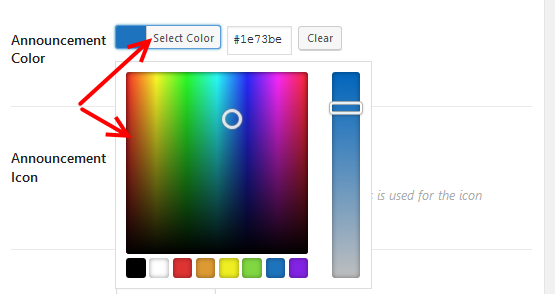
- Select your announcement color
- Select the announcement icon associated with the announcement
![]()
- Set the announcement date
- Provide the announcement banner – this is optional, but in case you choose to add it, it is recommended to use an image that is at least 650px
- Enter the announcement details in the text area.
- When you finish adding all the details, click the Publish button to save your changes.
Next, we insert the timeline to a page or post.
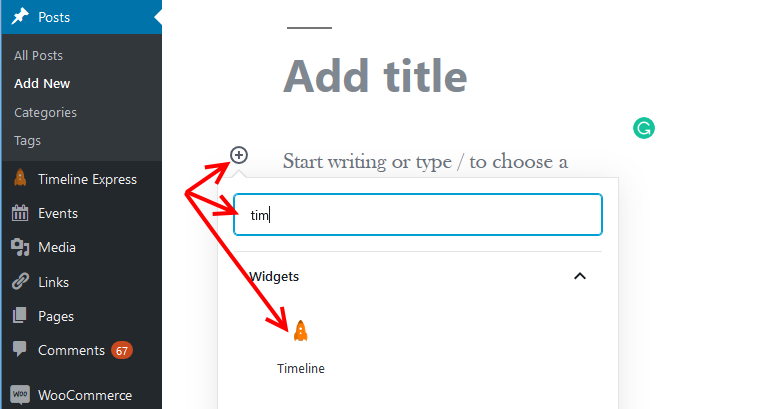
Create a new post or page or edit an older one, then click the + add blocks icon.
Under widgets or in the search area enter Timeline, then Click Timeline.
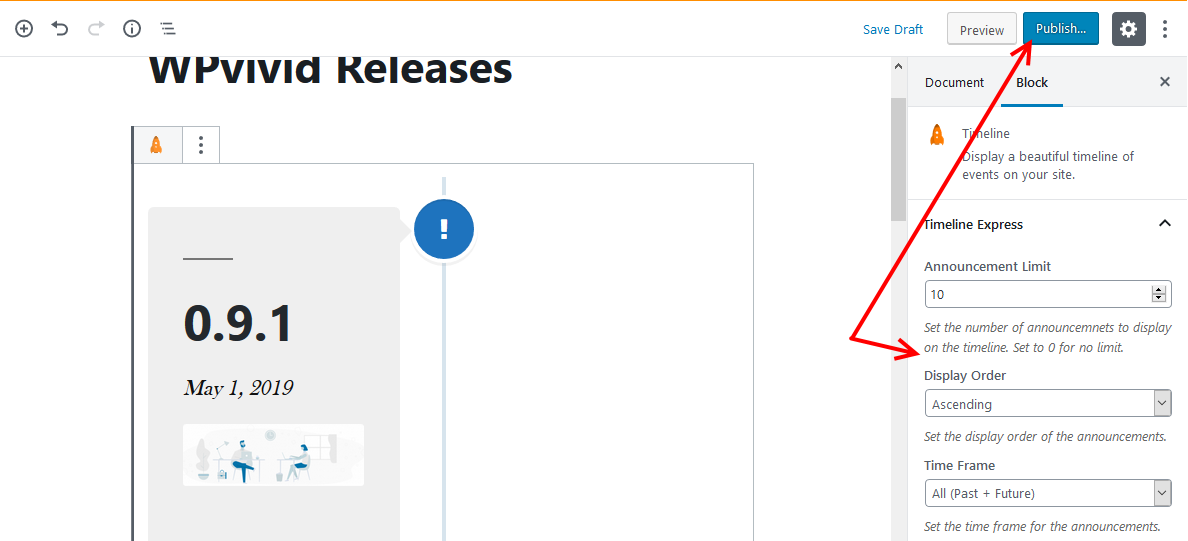
Next, in the timeline block or the right pane, define;
- Announcement limit – how many announcements to show on the timeline.
- The display order of the announcements – ascending or descending
- Timeframe – whether you want to show all announcements or only announcements in the future or from the past.
When that’s done, hit the publish button.
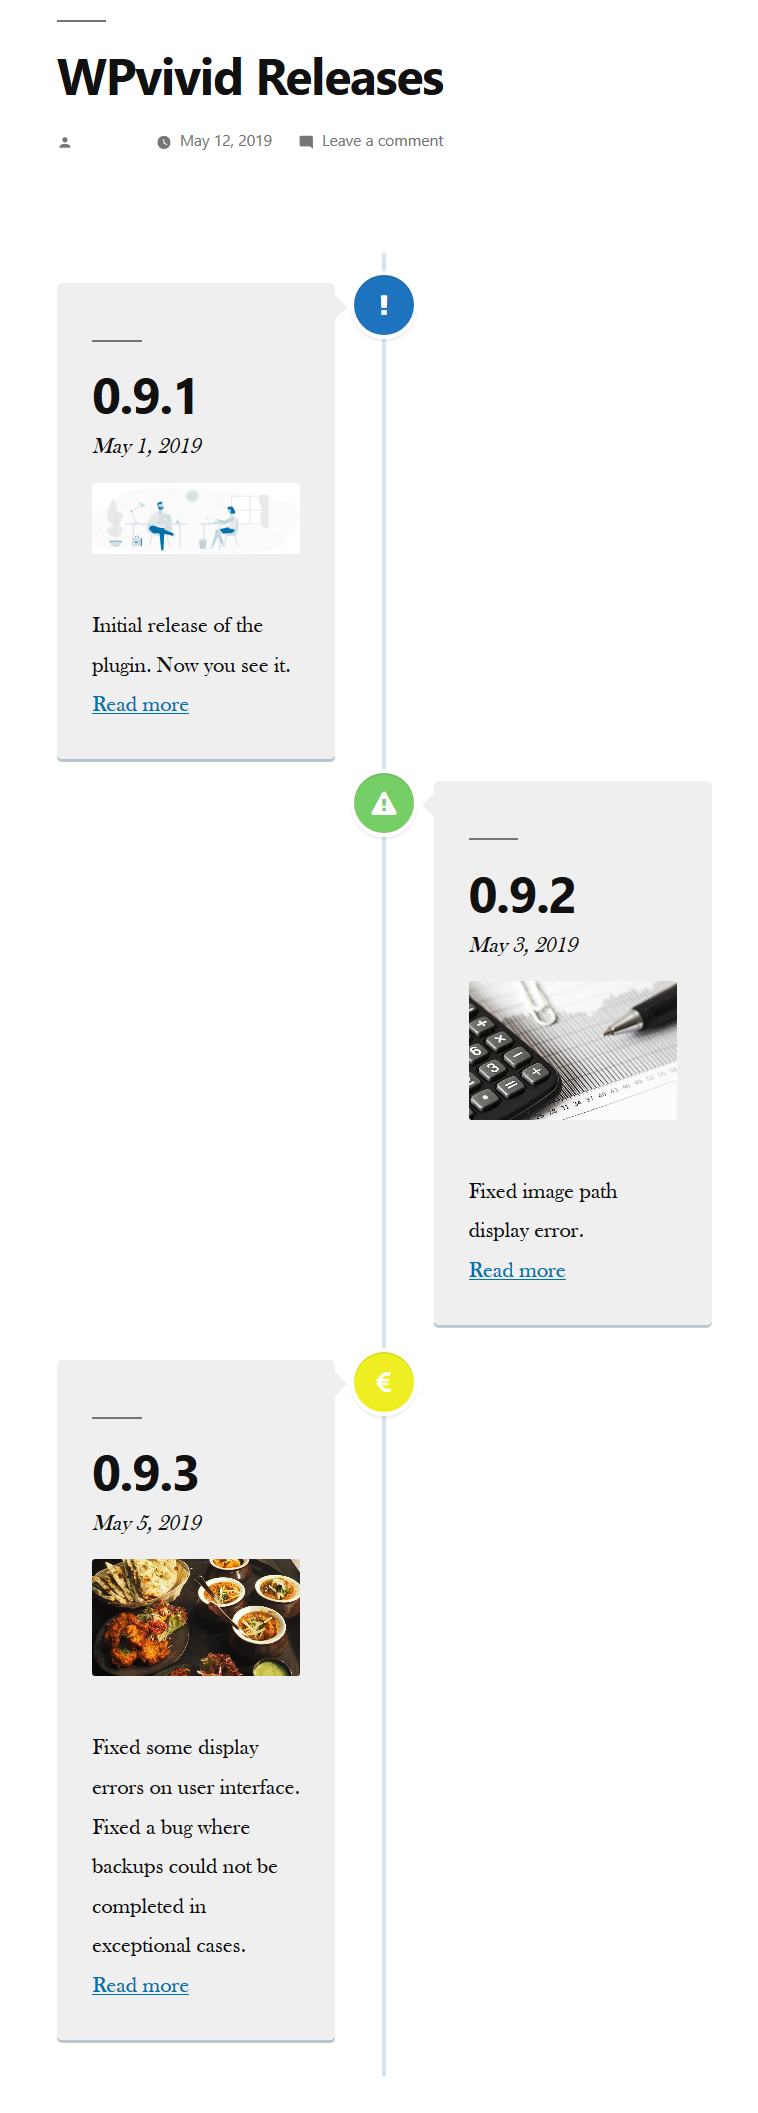
With that, you can create an event timeline. You can view it by going to the page.
Reminder: For consistency with the wording on the plugin, we have kept using announcement, but, that does not mean all you can create is an announcement in its literal sense.
You can as well replace the word announcement in your mind with the event, for instance, Twitter timeline, or just any chronological occurrence that can be plotted.
Since we now know how to add announcements and create an event timeline, you could want to change or modify your timeline.
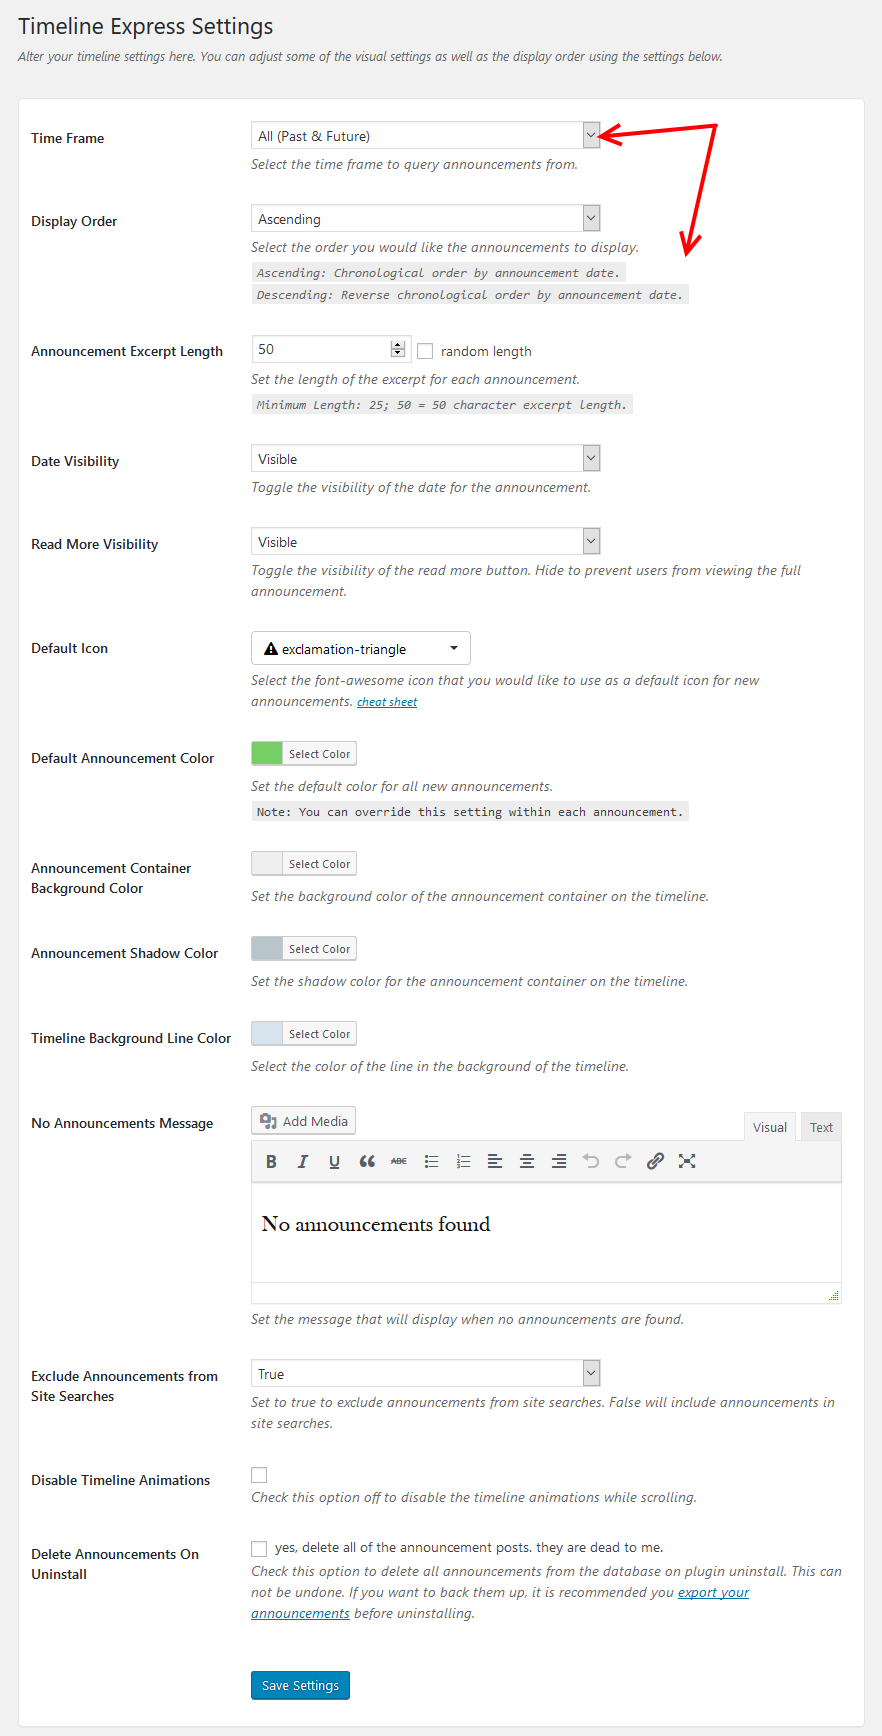
To do that you will need to head into the Settings Page to tweak how the Timeline is going to function and display on your website.
You can change the visual appearance of the timeline, the default order and period from which announcements should display.
To access the settings, on the menu go to Timeline Express, then Settings.
From the settings page, alter the areas as you see fit.
Conclusion
There is a myriad of factors that make content consumable.
Of course valuable and quality content tops it all, then there is how the content is laid out. It’s therefore not enough to create quality content, put effort into providing your users with awesome user experience.
Think of the fonts you use and in this article, chronological data can be displayed in a timeline.
So, if you have data like release dates, events, announcements, achievements, historical timeline, then, mix up how you display it.
With Timeline Express you are now able to create a visually appealing event timeline.
Give it a try and let us know how it goes.
You may also want to create an event calendar in WordPress to showcase your events online