No matter what kind of website you have, visual graphics are always more attractive than plain text.
If you are running a blog with WordPress, adding icons to your WordPress navigation menu is a great way to improve your websites visual appearance, you can either use a plugin to add icons to your navigation menu or you can simply add some code to your theme files.
It is highly recommended to avoid using WordPress plugins wherever possible. This is because often, they tend to slow down the website, have compatibility issues, take up space and consume vital memory. Adding icons to the navigation menu can easily be done by adding some code to your WordPress website. This may sound overwhelming at first but trust us this is easy to do and does not require a lot of technical expertise.
Before you start, you first need to decide which icons you are going to add. You can use custom images and upload them to your WordPress installation. Alternatively you can use an icon library such as font awesome. We recommend using font awesome, since it does not use background images but rather it’s created using an icon font. It uses css elements and adds a pseudo-element to anything with an icon class. We will look at both methods in this tutorial.
Why Add Icons to Your WordPress Navigation Menu?
A big part of establishing your online presence involves standing out from the crowd. Most WordPress websites have text links in their navigation menus. These can sometimes look rather plain. Adding icons to your navigation menu will not only enhance the visual appearance but can also improve the user experience. For example when you have a letter box icon next to your contact page, it makes it easier for the user to recognise it. Doing a visual search is easier for users than reading full texts of the links.
How to Add Icons to Your WordPress Navigation Menu in 2 Methods
Method 1: Using the Font Awesome Icons Library
Step 1: Editing the functions.php file
Login to your WordPress dashboard and under the appearance menu click on theme editor. This will take you to the theme editor page, search for the functions.php file in the left hand side, click on it to edit the file.
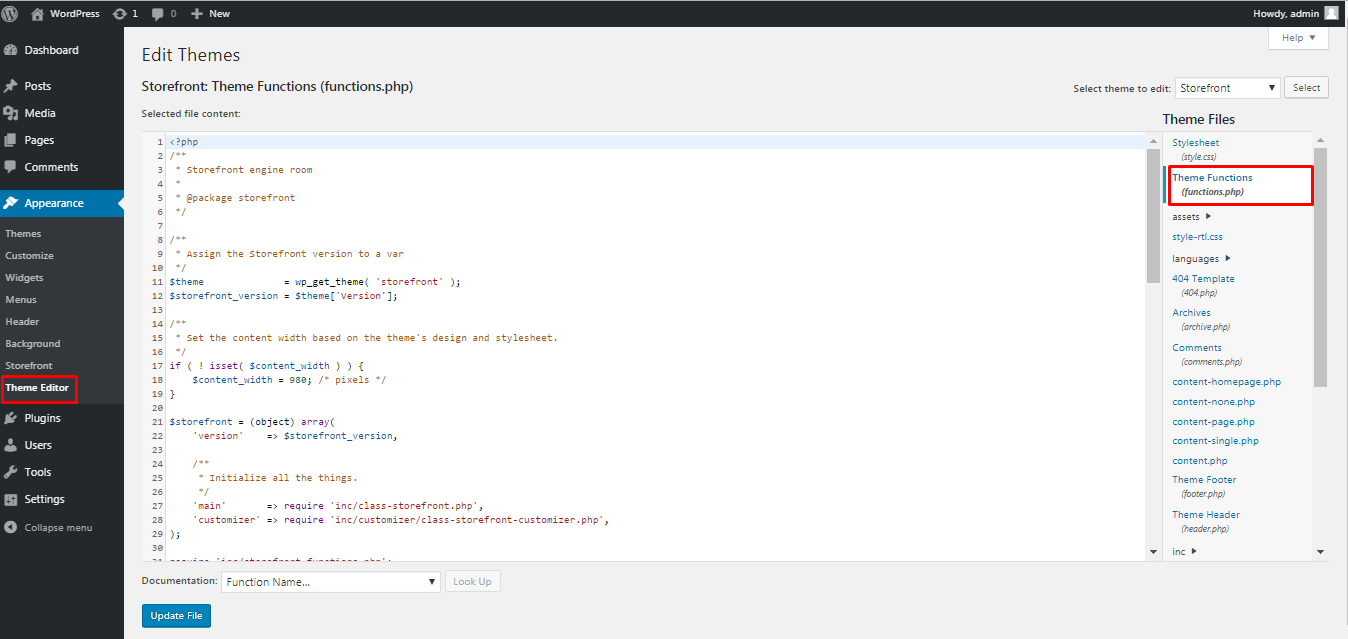
Step 2: Adding code to the functions.php file
At the bottom of the file paste the following code:
function wmpudev_enqueue_icon_stylesheet() {

wp_register_style( 'fontawesome', 'http:////maxcdn.bootstrapcdn.com/font-awesome/4.3.0/css/font-awesome.min.css' );

wp_enqueue_style( 'fontawesome');

}
add_action( 'wp_enqueue_scripts', 'wmpudev_enqueue_icon_stylesheet' );
The code simply creates a function that uses a font awesome stylesheet. The stylesheet is hosted externally and not on your website.
Once done click on update file.
Step 3: Adding Icons to Menu items
In your WordPress dashboard under the appearance menu click on Menus. You should find a list of menus that you might have already created. If you have not created any menus you will first need to create one. We now need to add a css class to each menu item. Click on screen options in the top left hand corner of the screen.
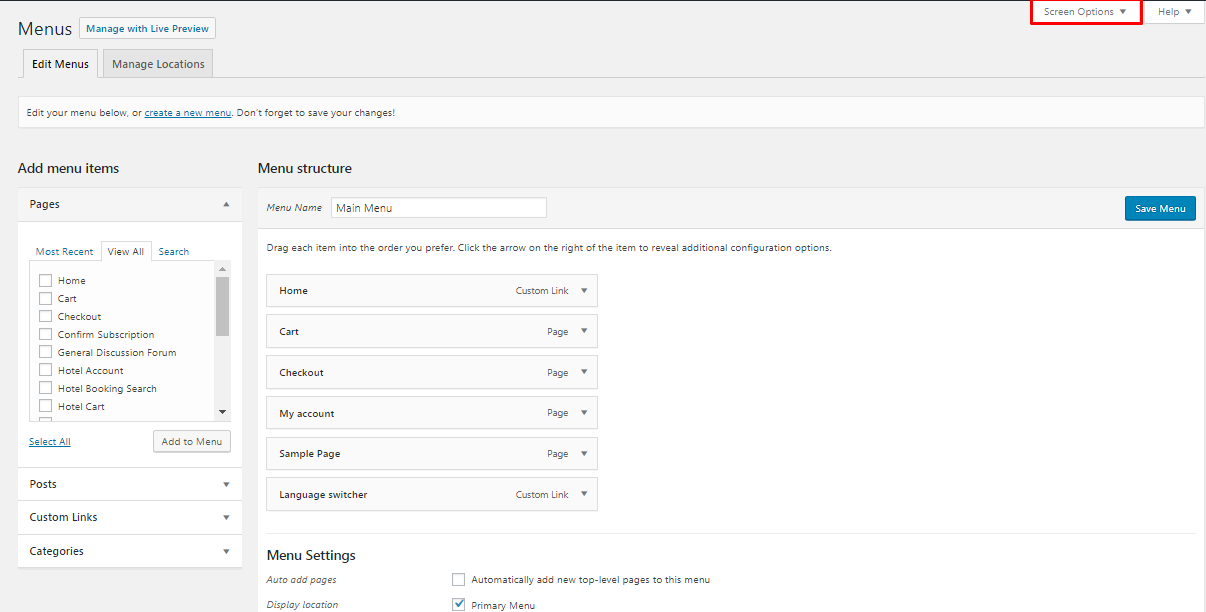
In the screen options make sure css classes is checked. This will allow you to add a custom css class for each menu item.

Starting with the first menu item, our menu has a link to the home page. We want to add a home icon next to it. Add the following code in the css classes meta box.
fa fa-lg fa-home
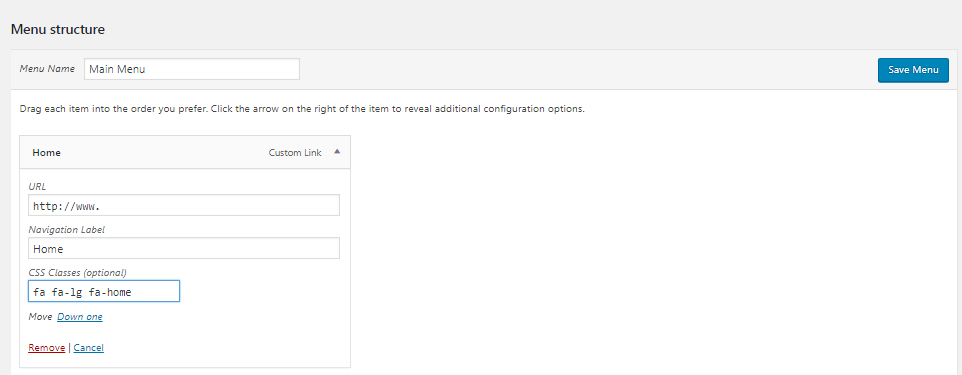
The three classes added to your menu item are fa (font awesome) fa-lg (defines the size as large for the icon) and fa-home (defines the specific icon to use)
For a full list of font awesome icons that you can add visit the font awesome website. https://fontawesome.com/icons?d=gallery
Here is a sample of a menu with icons
![]()
Depending on your theme you may still need some additional css code to style the menu items properly. Alignment and margin issues are common when adding icons.
Method 2: Adding Custom Icons Using Images
For this method you need to upload your icon images to your website.
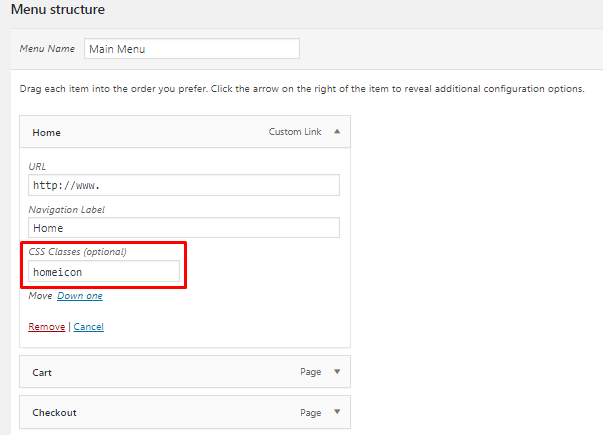
Step 1: Adding a CSS Class to a Menu Item
Login to your WordPress dashboard and under the appearance menu click on Menus. For the menu item for which you want to add an icon, define a custom css class in the css classes meta box.
Step 2: Adding CSS Code to the Stylesheet
Under the appearance menu in your WordPress dashboard, click on theme editor. In the left hand side of the screen search for stylesheet of your theme.
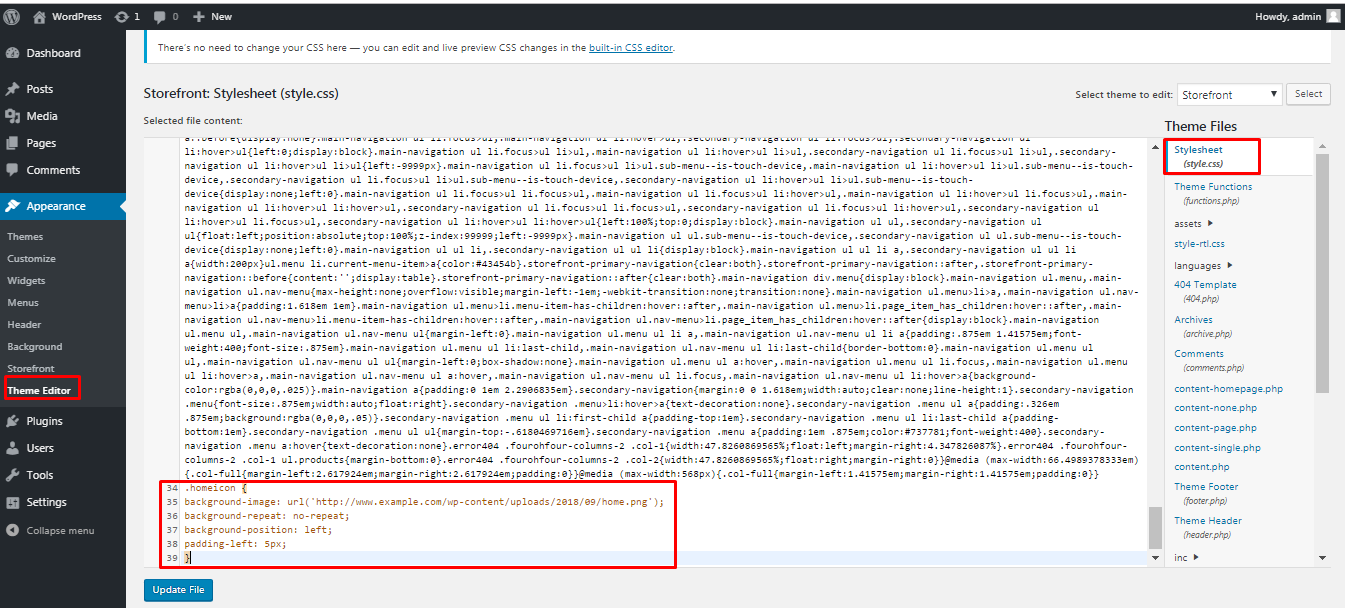
Add the following code to the stylesheet:
.homeicon {

background-image: url('http://www.example.com/wp-content/uploads/2018/09/home.png');

background-repeat: no-repeat;

background-position: left;

padding-left: 5px;

}
Make sure you change this url http://www.example.com/wp-content/uploads/2018/09/home.png with the url of your icon
Conclusion
With the second method you will have to add the css code to your stylesheet a number of times. You will also need to upload all the icons for each menu item separately. Remember to change the css class for each menu item. This can be slightly more tedious than using the font awesome icon library. However, if you don’t find suitable icons on font awesome you may be forced to use the second method.
Using any of these methods you can easily add icons to your WordPress navigation menu. While there are some paid plugins you can use to achieve this, both of these methods are free.
That’s it! I hope you found this read helpful, you may also want to check out our picks for the best responsive menu plugins for WordPress to better your onsite navigation.