Many business websites fail to convert visitors into paying customers because customers have unanswered questions. While you should optimize your page or website to convert, it is also necessary to allow visitors to communicate with you in case they have queries about your product or service. Contact forms are now a norm on almost any website. They are a great tool for communication and allow your visitors to quickly get in touch with you.
Why You Need A Contact Form in Your WordPress Site
Contact forms are a better alternative to having an email address on your website. An email will involve the user opening their email application and then contacting you. Contact forms on the other hand are a quick and efficient way of allowing your website visitors to communicate with you without leaving your website.
Contact forms also allow you to define the information you need by allowing you to create various fields. For example you can make fields such as a telephone number required. On email this would be optional.
Displaying emails on your website also makes it easy for spammers to harvest them and send you tons of spams. Contact forms can be secured with captchas and can fight off bots and spammers.
How to Create A Contact Form in A WordPress Site?
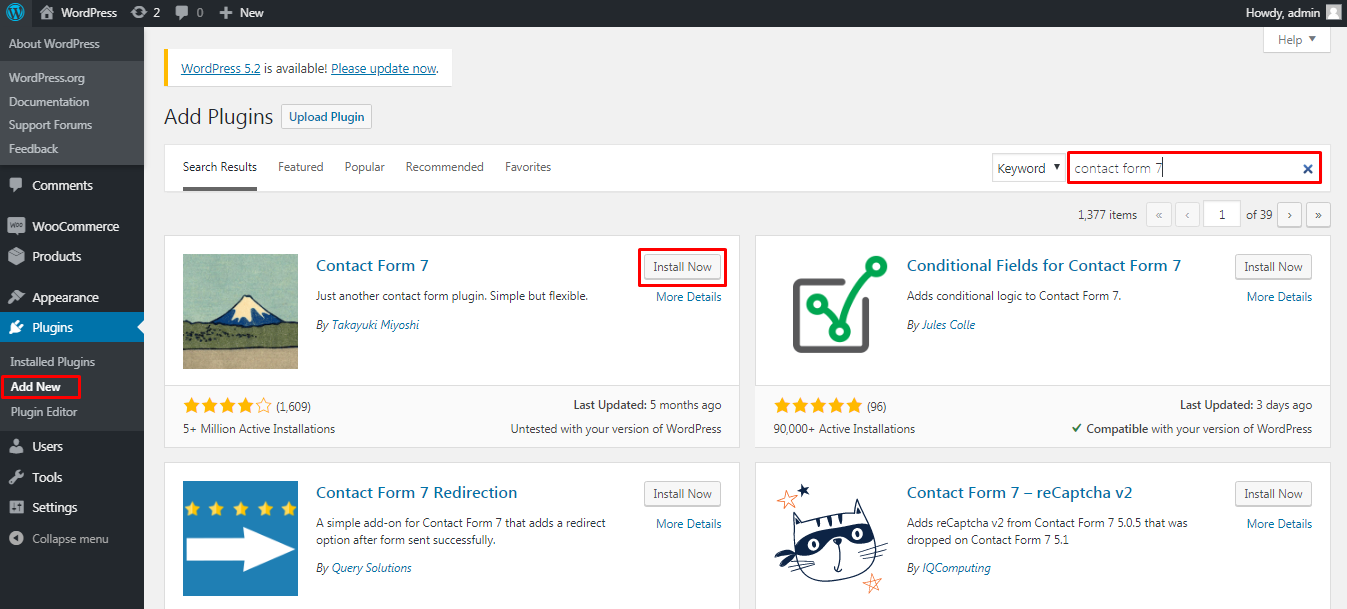
There are many WordPress plugins available if you are looking to add a contact form to your WordPress website. In this article, we shall use Contact form 7 to add a contact form in a WordPress site.
First, login to your WordPress dashboard, under the plugins menu click on add new. Search for contact form 7. Install and activate the plugin.
In your dashboard you should now have Contact as a new menu item. By default the plugin comes with one contact form already created.
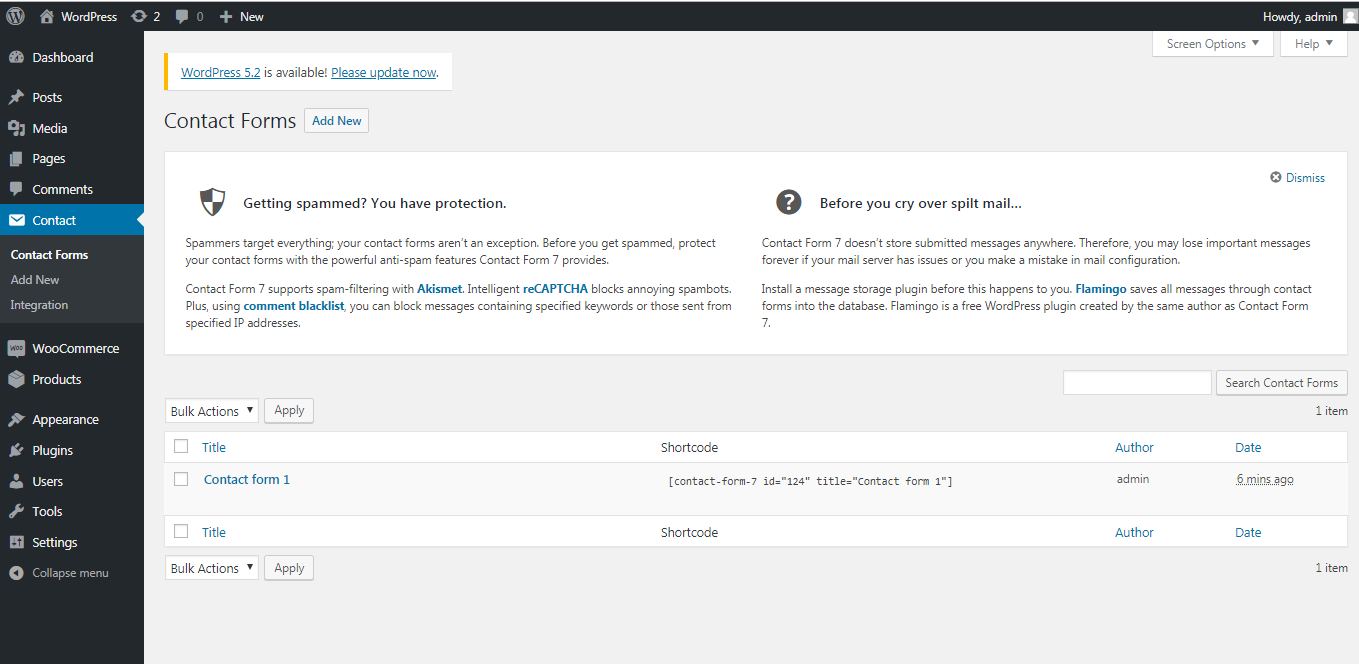
Click on Add New under the contact menu to create a new contact form.
Define a title for your contact form. You then need to setup the fields in your contact form. There are a number of fields you can choose. Some of the most commonly used fields are: Text fields, Number fields, Email Fields, Subject Fields and Message Fields. Other fields such as file upload and checkboxes can also come in handy in a number of situations. You can select any field that you wish to add by simply clicking on it.
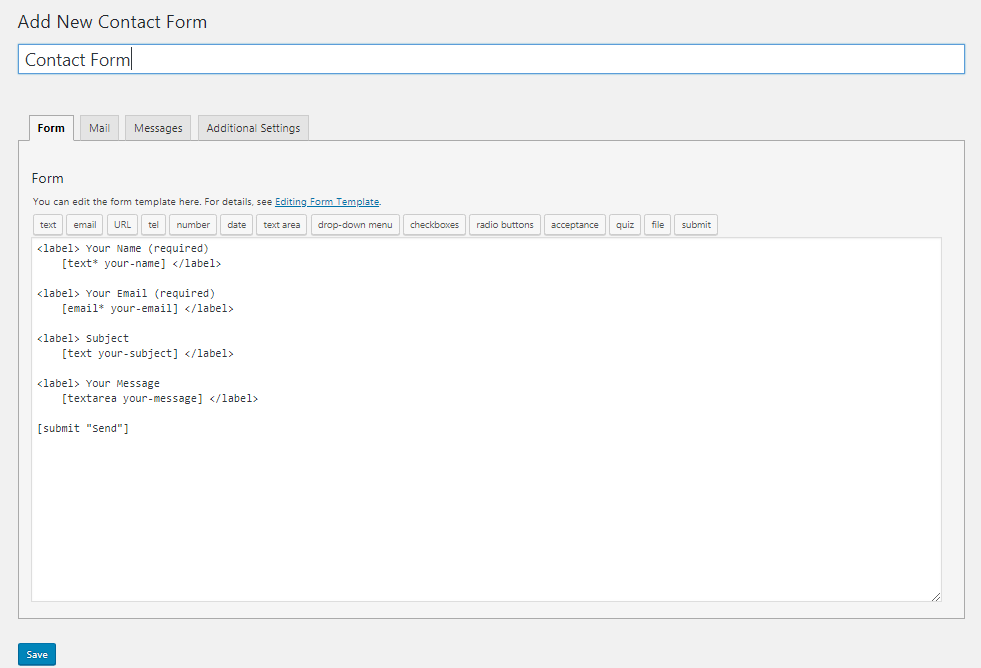
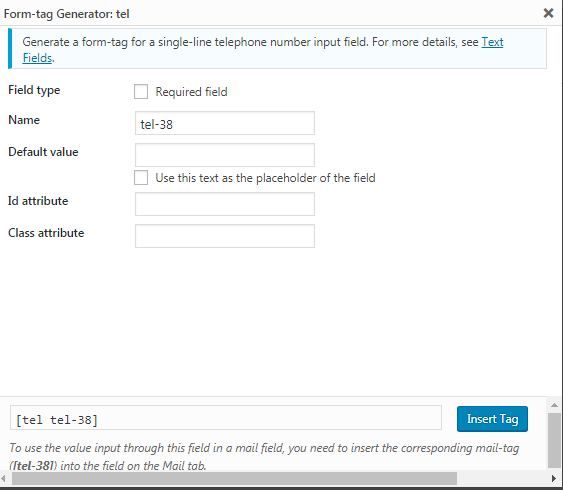
For demonstration purposes we will add a telephone number field. Click on Tel to add it. In the pop up that appears you can set various parameters for the text field. You can choose if the field is required or optional for users, you can set a name for the field and define a default value. You can also define an Id and class attribute. These will help you with the styling of the form. Click on Insert Tag
Once the field is added you need to define a label for it using the label tags: <label></label> This should be something simple that the users of the form can relate to.
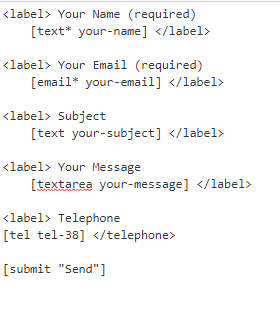
If you wish to reposition a field simply cut and paste the field to your desired position.
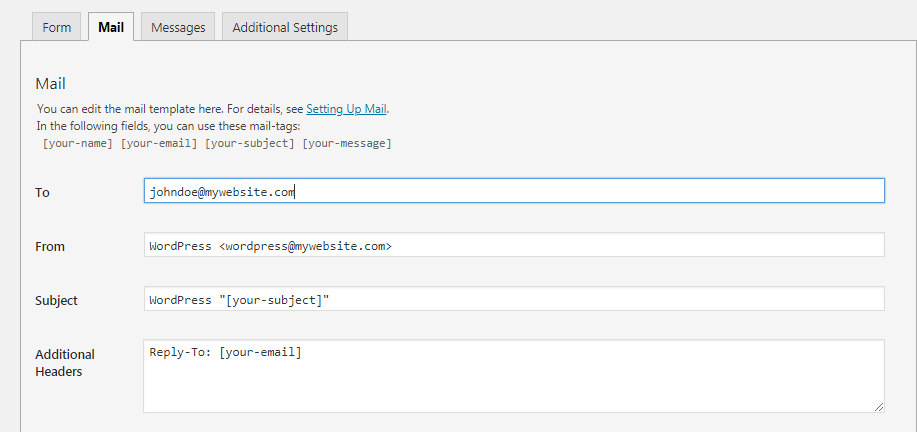
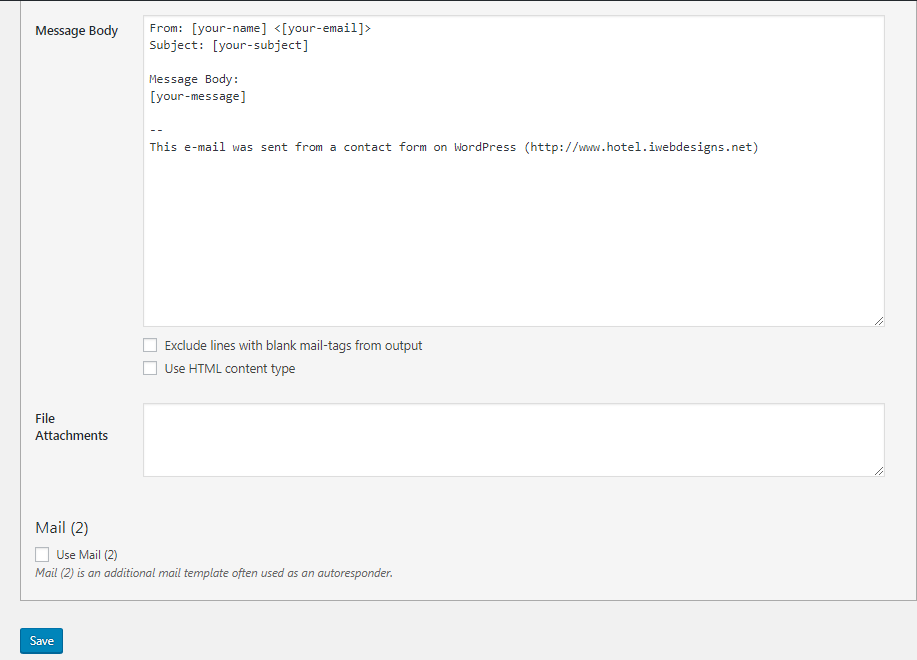
There are 4 additional tabs at the top of the page that you will need to configure. There is the mail tab in which you can define the email settings of the form. These include the receiver and sender address of the form, the subject of the email and the body of the email message. In the body of the message you should ensure you define all the fields that you created for your contact form.
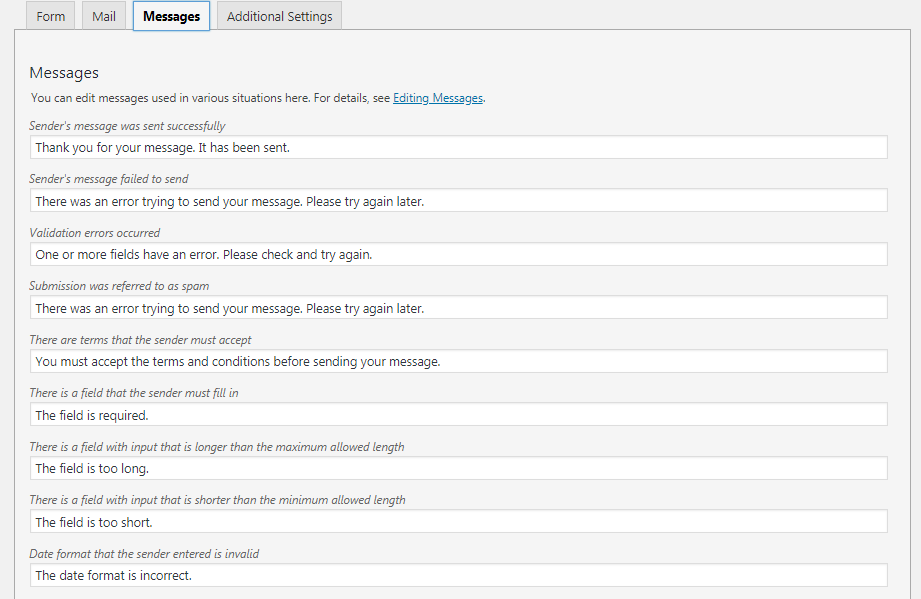
In the messages tab you can define various messages users receive upon submitting a form.
In the additional settings tab you can include additional settings to each contact form by adding code snippets.
Visit https://contactform7.com/additional-settings/ for documentation on the additional settings.

Once you are done configuring the contact form click on save to finish creating the form.
Once you have saved the form the plugin will generate a shortcode as shown.
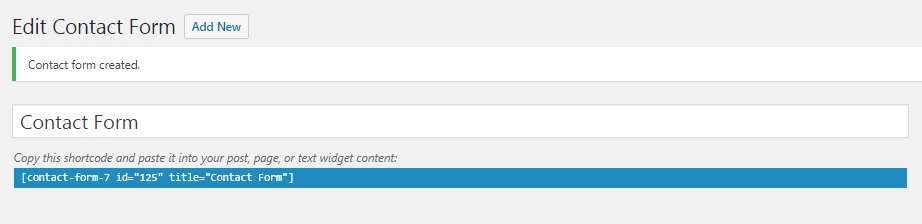
You can copy this shortcode to any page or post on your website and display the contact form in your desired location.
Conclusion
Adding a contact form to a WordPress website is easily done. However, you need to take in to consideration some security measures to ensure it is not abused. Forms are the most common starting point for attackers and spammers. They can be used for sql injection and also for propagation of spam. Other plugins or addons such as google recaptcha should help overcome this.