Do you want to convert your WordPress site into a mobile app?
If you are a trend follower, which you should be as a business, then you should know that we are amid the mobile revolution.
With more mobile devices than the people on earth today, a lot more digital content is consumed on mobile.
The statistics on mobile usage are staggering and way beyond the scope of this article.
What is certain however is that if you want your content in front of your target audience, then it is imperative that you deliver it in the format and channels that your audience is most active in.
The fallacy has always been that it is expensive, beyond the realms of smaller businesses or individuals to build a mobile app.
Well, that can be true as we have seen apps built with budgets north of $100,000.00
But, you do not need to fork that much if all you need is to deliver your web content through a native Android App.
I will show you in a moment how to convert a WordPress site in a mobile app.
We shall specifically convert it to an Android app.
Using Androapp – Native Android mobile app for a WordPress site you can build a fully customizable native Android mobile app with features like Push Notifications, Deep Linking, App Monetization, Infinite Scroll, Fast Image Rendering, Inbuilt Whatsapp, Facebook, and other sharing channels, among other features.
How to Convert A WordPress Site into A Mobile APP?
Installing and Configuring AndroApp
Search for Androapp in your plugins page, then install and activate it.
Go to AndroApp on the main menu, and then click AndroAPP

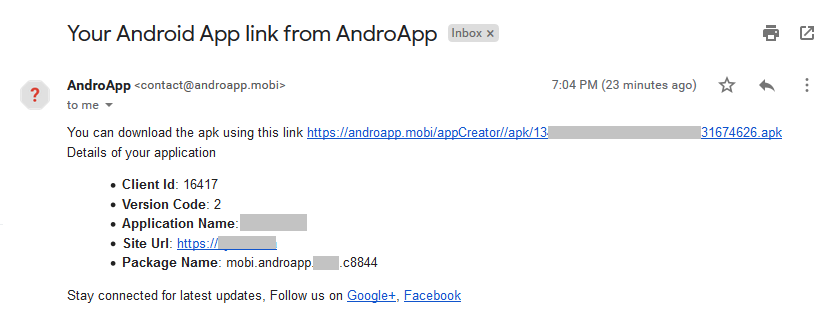
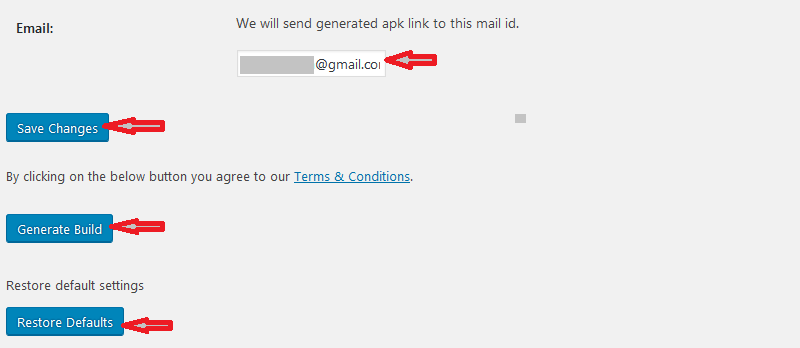
Generate the APK to convert your WordPress site to a mobile app. The link is sent to the WordPress admin email. If you want the link sent to a different email, then go to the Look and Feel tab and set your new email address there.
Click Send me my APK link Now

A link will be sent to your email to download the APK
Next, configure the look and feel of your app. Click the Look & Feel tab
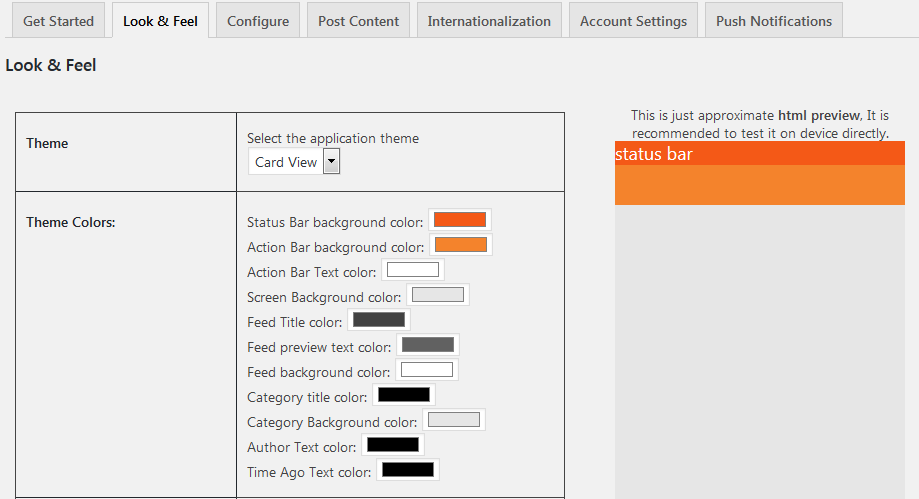
What you need to do here is, select the application theme and then set the theme colors
Next, give your application a name, this is what appears on the play store

Enter your site URL here; it is usually pre-populated with your site’s URL; you may not need to edit it.

![]()
If you need to, you can specify a different notification icon. By default, the Application icon is used unless this one is specified.
![]()
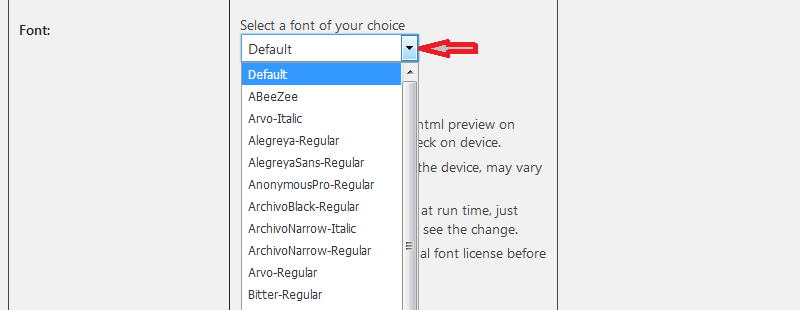
From the dropdown menu select the font for your app. A couple of things to note, the default font varies between devices, before using a font, check its licensing details.
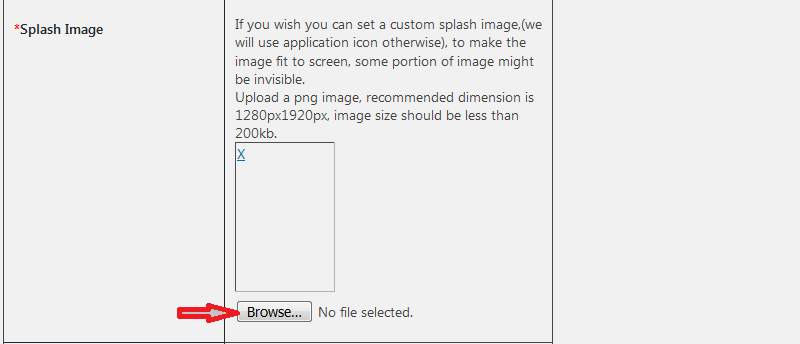
The splash Image is also optional if you intend to use the Application Icon. However, if you choose to use it, then upload a 200kb 1280px1920px png image.
You can have your app show only particular posts or pages from your website.
You add them here in deep linking.
Leave it blank to disable deep linking.

Note from the app developer: Application Name, Site Url, Application Icon, Notification Icon, Splash Image, and Deep linking settings go into your mobile app and can’t be changed once you publish your app in Google app store.
You have to publish your app every time you update these settings, so carefully fill these before generating the build.
Still, on the Look and feel tab, you can set a different email to which the APK download link is sent to.
The Generate Build button will generate a new APK, and it will be emailed to you.
Configure Google and Ad accounts
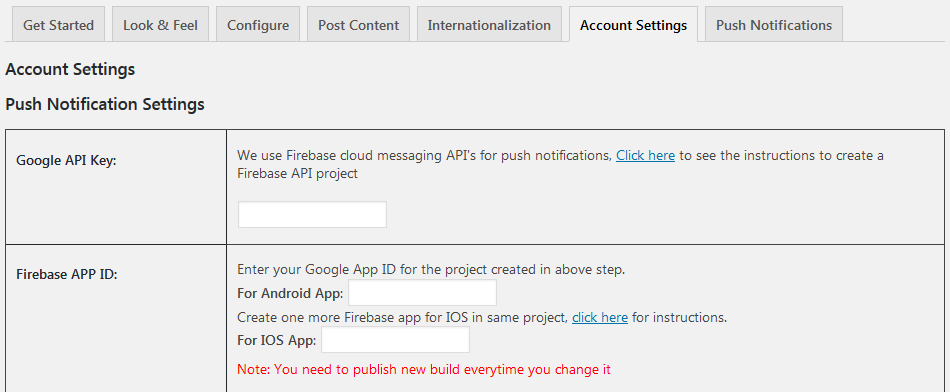
AndroAPP uses Firebase cloud messaging API’s for push notification; here is the instruction on how to create a Firebase API project.
Once you have created the API, come back and supply the detail here. Then go back to the Look and feel page to generate a new APK.
Enable the notifications and then add your Google analytics tracking ID to track your app usage.

If you intend to monetize your app, then create publishers account on Admob, Mopub, and Appnext and enter the ad id’s here.
You can also learn more about the ad guidelines and settings from the developer’s site.
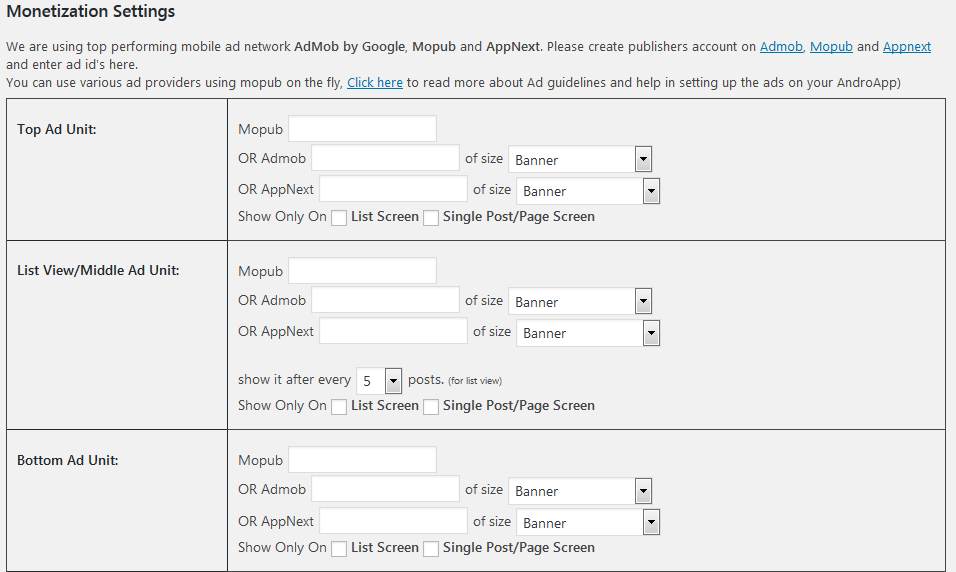
If your website is running Google Adsense ads, then you will need to remove the Adsense units on the mobile app pages to comply with Google Adsense terms and conditions.
Click Save changes when all is set.

After saving, head back to the Look & Feel tab we went through earlier and generate a new APK
Publish your app to the Google Play store
There are two ways around this;
- The first is self-publishing. This will cost you a onetime fee of $25
Create a new account on Google play developer console and submit your app.
While uploading your app to google play store remember to not sign up for App Signing since the App developer handles this on your behalf.
- Let the App developer publish it on your behalf
Your app can be submitted from their account; you can always transfer ownership to yourself any time later.
This is what you will be required to provide the app developer.- One Application Icon of 512×512 size, the same icon you used earlier.
- One feature graphic of 1024×500 size
- The App Description
- 2-3 app screenshots
- APK link which you tested
- A $10 payment.
Annual Renewal
AndroApp is completely free for the first month; after that, you need to purchase an annual subscription.
The contact details to the app developer are available on the AndroApp plugin page on your website.
And that’s a wrap for this article; I trust you are enlightened now on how to convert a WordPress site into a mobile app
A Similar plugin you can use to convert a WordPress site into a mobile app is Blappsta Mobile App Plugin – Your native, mobile iPhone App and Android App. This one converts your WordPress site into a native mobile app for both iOS and Android devices.
We would love to hear your experiences on trying to convert a WordPress site into a mobile app in our comments section below.
You may also want to add Google AMP to your WordPress site to improve your mobile site speed.