In itself WordPress works great out of the box for a regular blogger, but, every often as a developer your client requires a lot more than the out of the box features to capture and display a lot more information. When that happens you need to get your hands dirty; you need to add custom fields to a WordPress.
Custom fields provide developers a sane way to add extra information to a WordPress post.
Consider a blogger who is legally obligated to disclose to his or her readers if a post is sponsored or an event planner who needs to add details to their events.
For one or two posts or events, the blogger or event planner can get away with manually adding that information – however, if they are dealing with hundreds of posts or events then going about this manually will drive them insane.
That’s where custom fields come in handy. By adding extra fields to a post, you can capture all the required information and then modify your theme to display the information.
Note that modifying themes require some coding knowledge.
Beginners Guide: How to add custom fields in WordPress?
1. Use the WordPress Custom Fields feature.
WordPress provides custom fields to its posts and pages
In Guttenberg editor, you can find this on the Post or Page you want to add a custom field to by clicking the tools and options icon (the three vertical dots) on the top right corner of the editor.

Then Click Options in the more tools and options dropdown.

Under Advanced Panels, Check the Custom Fields checkbox.
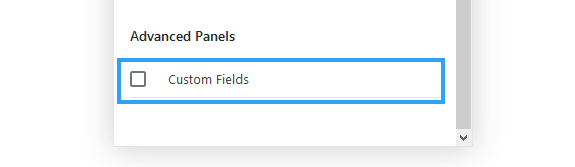
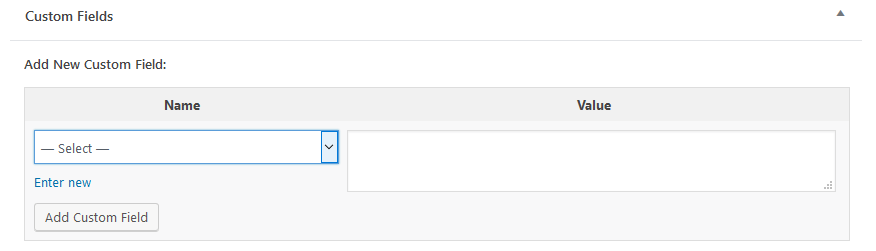
You can now see the custom fields at the bottom of your post.
2. Using Advanced Custom Fields
Advanced Custom Fields provides a developer with a simple yet powerful way to add metadata to their posts, pages and any other content type in WordPress that the native WordPress custom fields does not handle.
It is feature-rich with extensive documentation to make building any wild idea into your content types an easy feat.
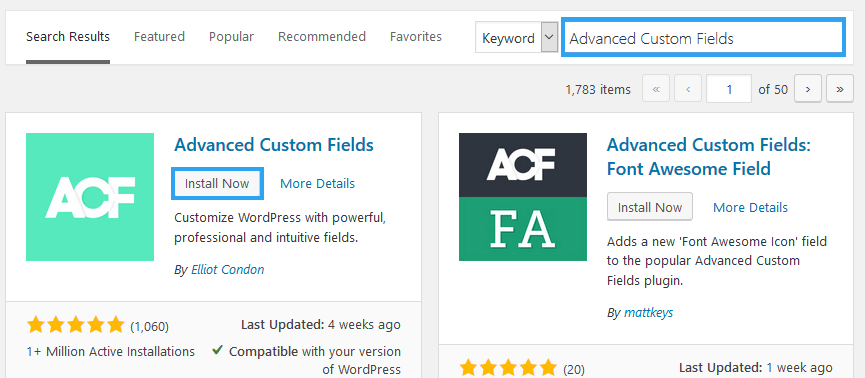
First, you need to install and configure Advanced Custom Fields in your WordPress admin panel.
Under Plugins click Add New and search for Advanced Custom Fields.
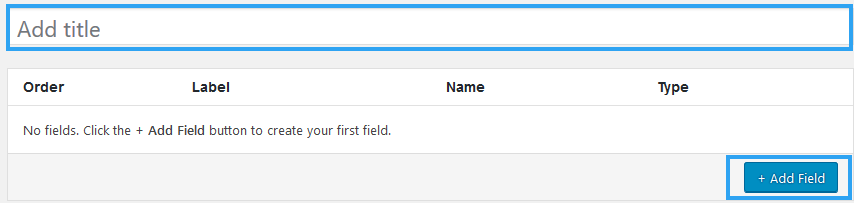
Second, create a new Field Group.
You do this under Custom Fields and click Add New.

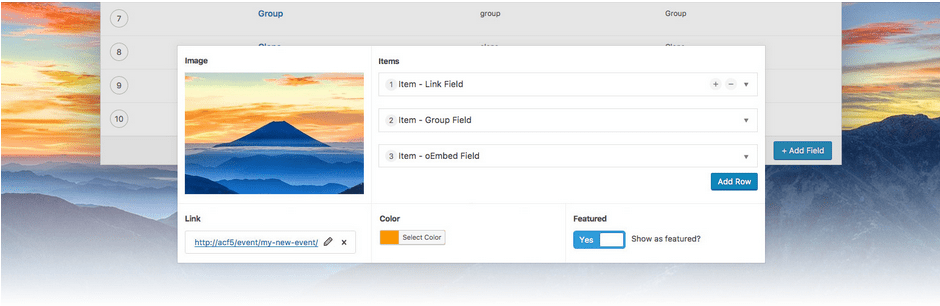
- Add the title and Click Add field.
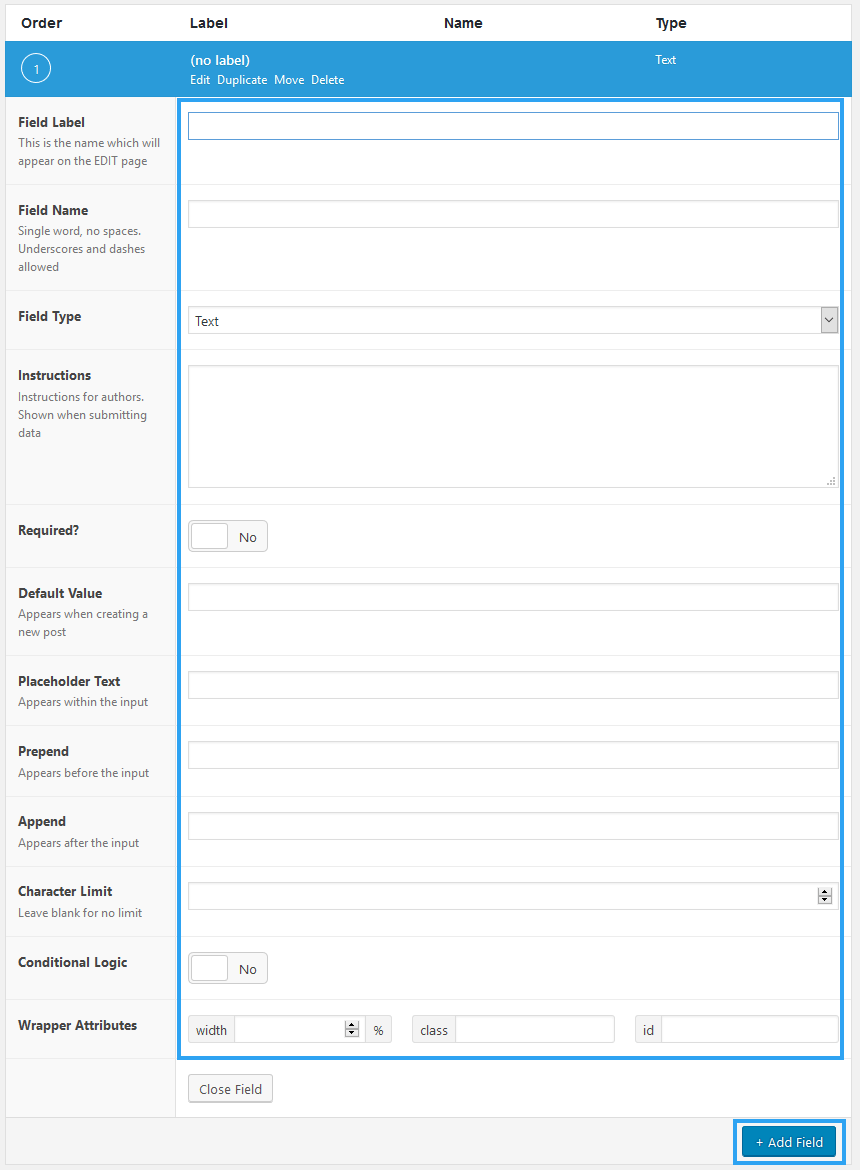
Supply the information to the appropriate fields and click Add field if you need to add a new field to your group. For instance, If you are adding a custom field for a photo gallery, you may need a title field, image field, photographer field, and more.
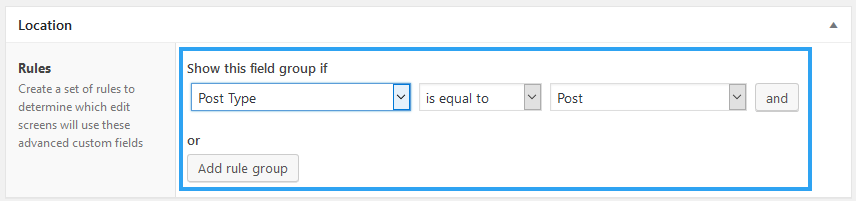
- Add location.
From the location field, create the rules that will determine which screens the custom fields are placed.
- Settings
From here, you can control the placement and style of the custom fields group.

That’s how you add custom fields in WordPress.
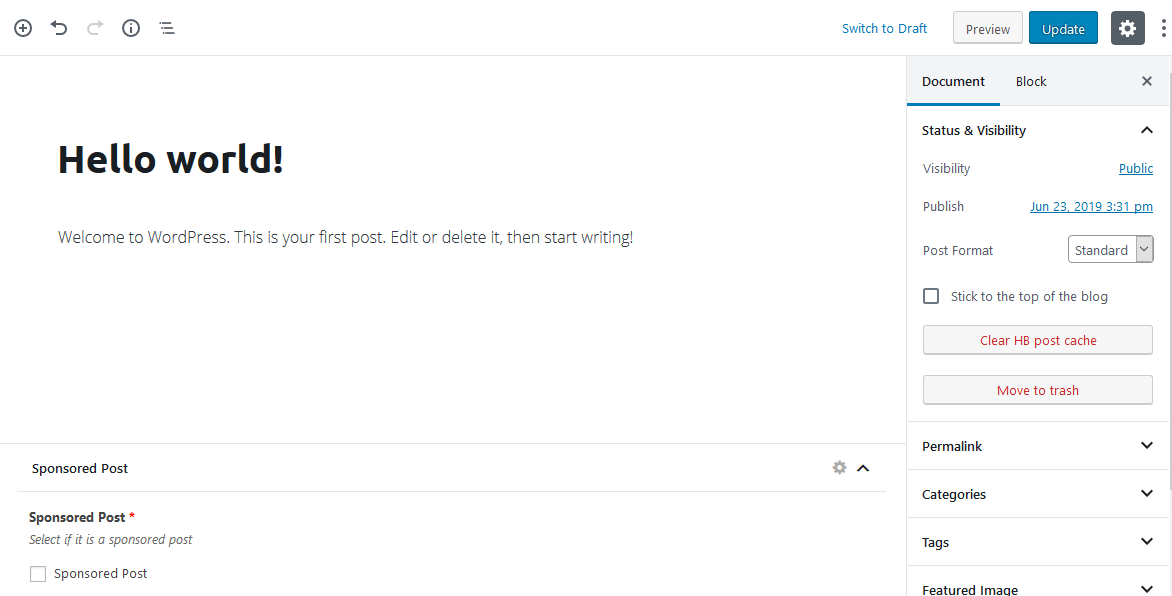
You can now go to your post, page, or any other content type you set your custom fields to appear in.
- Go to the post
At the bottom of the editor, you should see the advanced custom field.
- Output your data to a page.
Now is the time to get your hands dirty and output the data captured by the advanced custom fields into your theme.
Here is a link to how you can learn how to output your data to a theme with advanced custom fields. And, you can use this link to learn how to modify a theme to output data with the native WordPress Custom Fields.
Recommendations before you modify the theme
Use a child theme
It is good practice to make any modifications to a child theme. A theme update often overwrites the existing pages. Any change you make to those pages is lost when there is an update.
Backup your website
As a developer, I would assume you know the importance of creating a copy of your files before tinkering with them.
If you are not familiar with who we are, then this is the perfect opportunity to introduce you to our flagship product – WPvivid Backup and Restore plugin. Every other day we see website owners installing it on their websites, for a simple reason. It is easy to use. It is feature-rich. It just works. Also, it is free.
Add it to your arsenal.
Conclusion
I hope this article has introduced you to the Custom Fields in WordPress plus exposed you to the Advanced Custom Fields plugin.
Other plugins you can use to manage custom fields are;
- Meta Box plugin– allows you to create custom meta boxes and custom fields.
- Piklist– allows you to create custom meta boxes and fields everywhere in WordPress.
With these tools, you can embark on any customer project without fear of getting lost into coding.
You can share your thoughts and ideas about this article in the comments form below.
You may also want to learn how to build tables with a custom field in WordPress.