One reason you expect from your website is interaction with your visitors, one way that happens is through the contact forms you add to it, but, not every host allows you to send emails in WordPress with a custom domain name. This could be intentional where providers block SMTP ports as the case with most cloud hosting platforms that require you to purchase a mail solution or due to bad configuration on some servers.
If your WordPress website falls into any of those brackets, you are stuck and wondering how to get emails going out, then this article is for you.
The WordPress Mail SMTP Plugin sorts out email delivery problems in WordPress websites, by moving reliance of mail delivery from the default PHP mail function to a third party SMTP server configuration.
Step by Step: How to Send Emails in WordPress with A Custom Domain.
1. Install WP Mail SMTP Plugin
To get started, you will need to install and activate WP Mail SMTP.
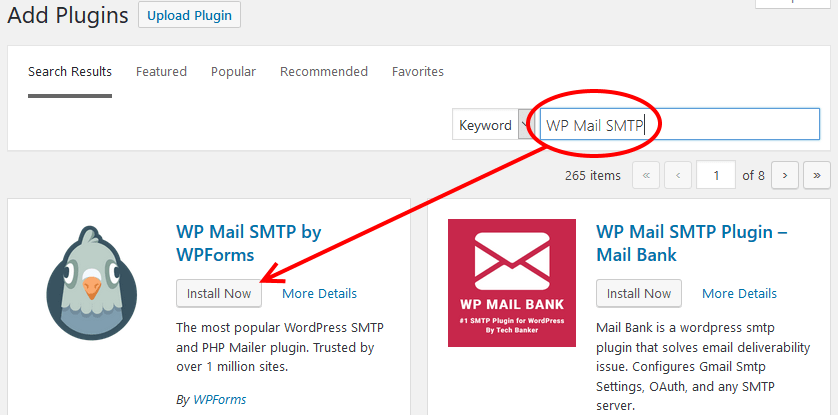
Log in to your dashboard, and then go to Add Plugins, under Plugins on the left menu.
Search for WP Mail SMTP.
Once the results are displayed, click, Install Now, and then Activate.
2. Configure the SMTP Settings.
Once the plugin is activated, a new menu item is added to your menu – WP Mail SMTP. Go there and then click Settings.
Under the General tab, you will need to supply the required information.
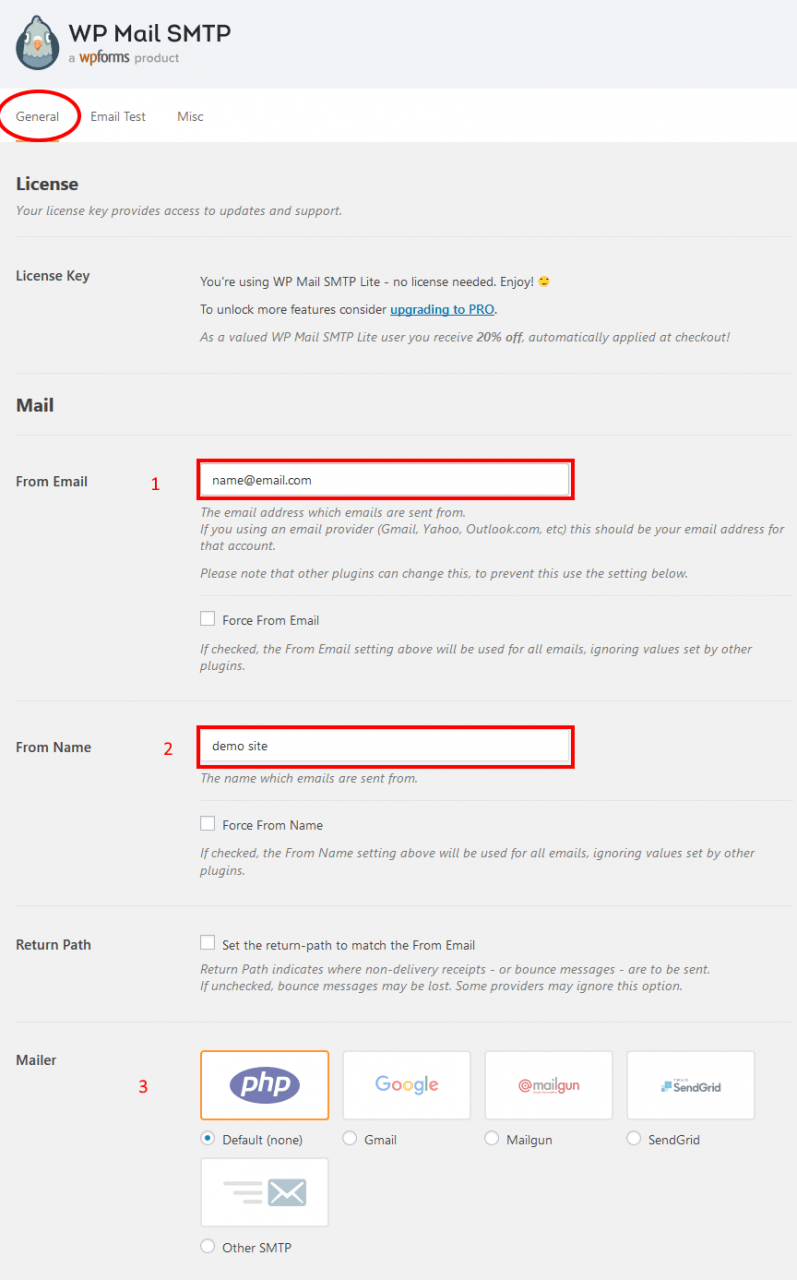
- Enter the email address from which emails are sent – this should be the email address with the custom domain name you want to use.
If you want to enforce a site wide use of this email address, then the Force From Email.
- From Name – by default the site title is used as the From Name. You can change this to something else if you need to.
You can also force this on all other plugins. It works best, if you are forcing all emails to use the From address you set above.
- Configure the Mailer.
WP Mail SMTP allows you to use a number of Mailers to send out email in your WordPress website, including, Gmail, Mailgun, Sendgrid and Other SMTP.
Using the first three options, will send out emails using the domain names provided by those email providers unless if you have the premium plans that use custom domains for sending emails.
For a small blogger, you may look at using Other SMTP to send emails with a custom domain.
This is what you will need, to configure the mailers.
Gmail
You will need a Client ID and a Client Secret.
This integration uses the Google API to improve email delivery issues while keeping your site secure.
Read the Gmail documentation to learn how to configure Gmail or G Suite.
Mailgun
Mailgun is one of the leading transactional email services trusted by over 10,000 website and application developers. They provide users 10,000 free emails per month.
You will need a, Private API Key, your Domain Name, and the endpoint you want to use for sending messages
If you are operating under EU laws, you may be required to use EU region. You can learn More about this on Mailgun.com.
Read the Mailgun documentation to learn how to configure Mailgun.
Sendgrid
SendGrid is one of the leading transactional email services, sending over 35 billion emails every month. They provide users 100 free emails per day.
You will need to supply an API Key
Read the SendGrid documentation to learn how to set up SendGrid.
Other SMTP
Use the same credentials you use on an email client like Outlook or on your phone. These SMTP details are provided by your hosting provider or email service.
If you are not sure of them, login to your hosting control panel, navigate to Emails.
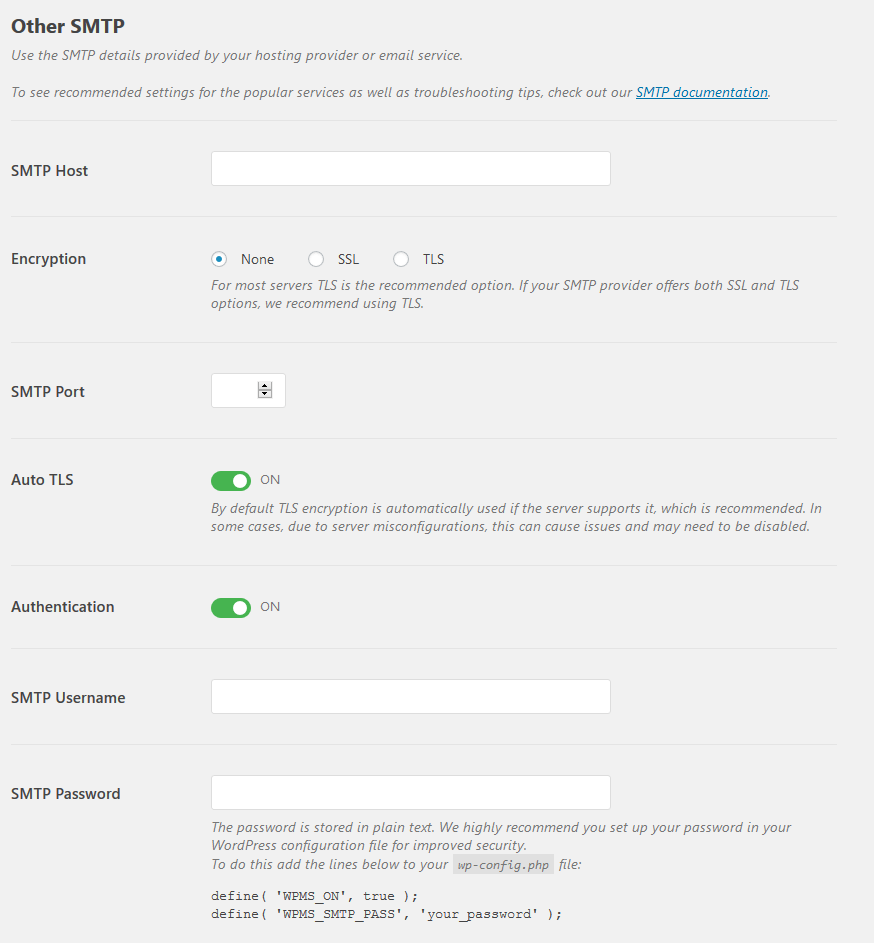
You need to set the SMTP Host, Encryption type, SMTP Port (Most providers use 587 for this), the SMTP username and the SMTP password.
In the form above, the password is stored in plain text, it is recommended to that you set up your password in your WordPress configuration file for improved security.
To do this, login to your hosting account, edit, and add the lines below to your wp-config.php file:
define( 'WPMS_ON', true );

define( 'WPMS_SMTP_PASS', 'your_password' );
To see recommended settings for the popular services as well as troubleshooting tips, check out the SMTP documentation.
Do not forget to save your settings after entering the details on whichever mailer you prefer to use.

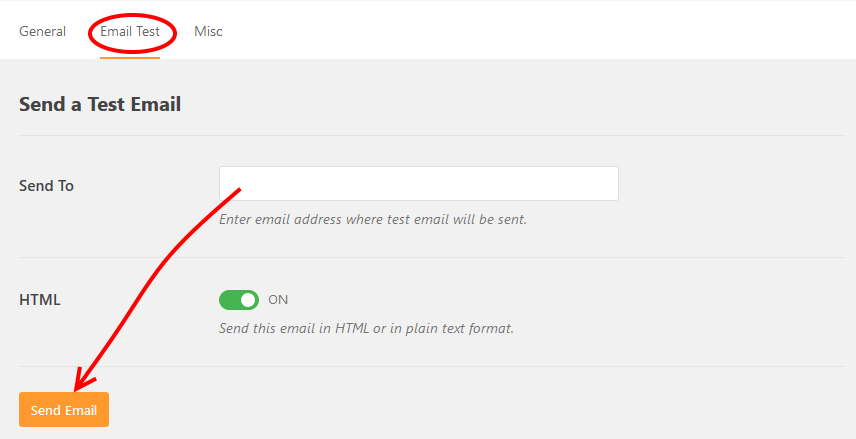
3. Test your settings
When you are done with the configuration, go to the Email Test tab to test your settings.
Supply an email address and then click Send Email.
Conclusion
And that’s how you send emails in WordPress with a custom domain.
Your forms are now functional; both you and your subscribers can now get notifications from your WordPress Website.
Beside enabling sending out emails from your website, you also improve on the chances of email delivery with a custom domain name. Some hosts send out emails using one email address – in cases of spam, every website using the same address is affected. With a custom domain name you avoid that. With WP Mail SMTP, configuration is a breeze.
Try that out, and share with us your views how it goes.
That’s it! I hope you have found this helpful. You may also want to check out our top picks for the best SMTP plugins for WordPress to help improve email deliverability.