If search is an important tool in your website traffic generation arsenal, then you need to add your WordPress website to Google Search Console.
If you arrived at this article through a search on a search engine like Google, then you already know what Google Search Console is, for the rest wondering what it is and how important it is to your performance on SERPs, then let’s answer the question in your head.
What is Google Search Console?
Google Search Console formerly known as Google Webmaster tools, is a free service provided by Google to help webmasters measure and monitor the performance of their website so as to perform well on Google’s search engine.
It provides webmasters with several tools to;
- Submit and check a sitemap for any errors
- List internal and external pages that link to the site
- Discover pages that are blocked in robots.txt accidentally.
- And a host of other tools.
All these tools generate data that then provide webmasters with reports that have in-depth insights on how their websites are faring in the eyes of Google and then learn how to optimize them for better search performance.
Why Should We Care about Google Search Console?
Who does not know Google? Google is almost synonymous to the internet and the web more so. Google commands over 70% of all global search traffic. So do you care about search for your traffic? Then the question would be, why shouldn’t you care about Google Search Console?
Step by Step: How to Add A WordPress Website to Google Search Console?
1. Signup to Google Search Console
Head over to the Google Search Console website to create an account.
You need to sign in to Google account to access Google Search Console. If you have a Gmail email address or if you have access to any other Google services, then you already have a Google account.
Log in with that account.
2. Add and Verify your website
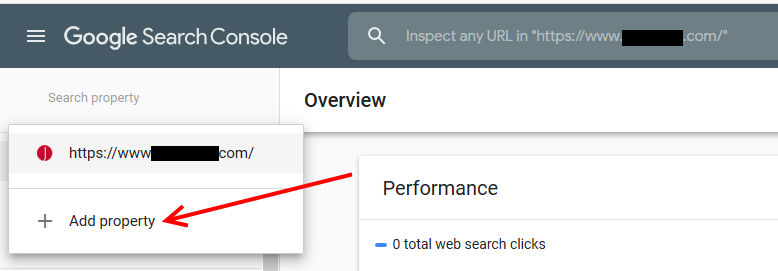
Once you are in, you will need to add your website; you do that by adding a property.
Under search, property click Add property.
Next, choose the property type then supply the relevant information and then click CONTINUE.
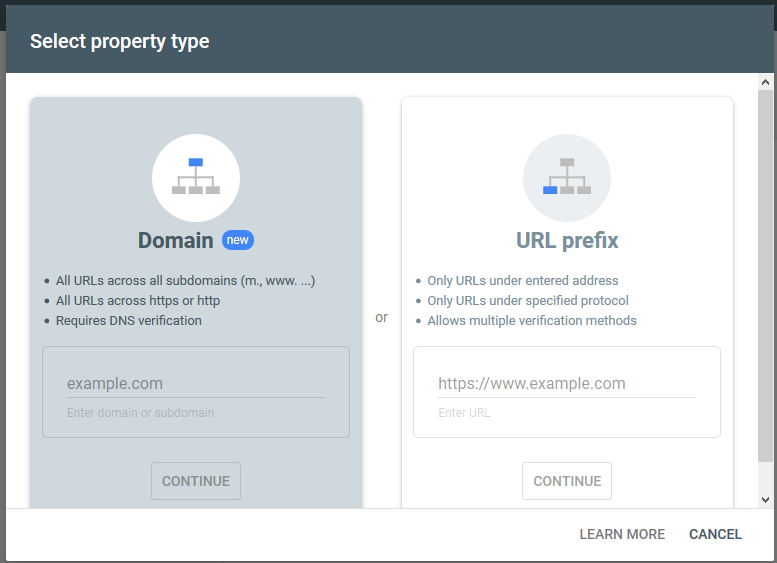
Domain Property type – requires DNS verification for those who have access to your DNS management interfaces – every website owner should have this. Your domain registrar usually provides this, but sometimes it is also within your hosting account. For the case of cPanel, you can find this in the Zone editor.
With this property type, all you do is add your domain name and all URLs across the domain are managed.
If you opt for this property type, then supply your domain name, then click continue.
On the next screen, copy the verification code, then head to your DNS manager and add a text record with what you copied.
Once you’ve done that, return and click VERIFY.
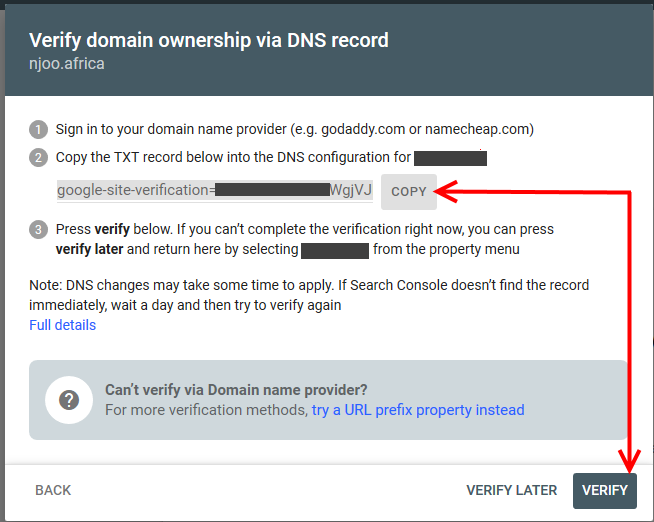
If verification is not successful immediately, you can give it up to 24 hours then try again.
URL prefix property type – will require you to add each URL you want to add to the Google search console.
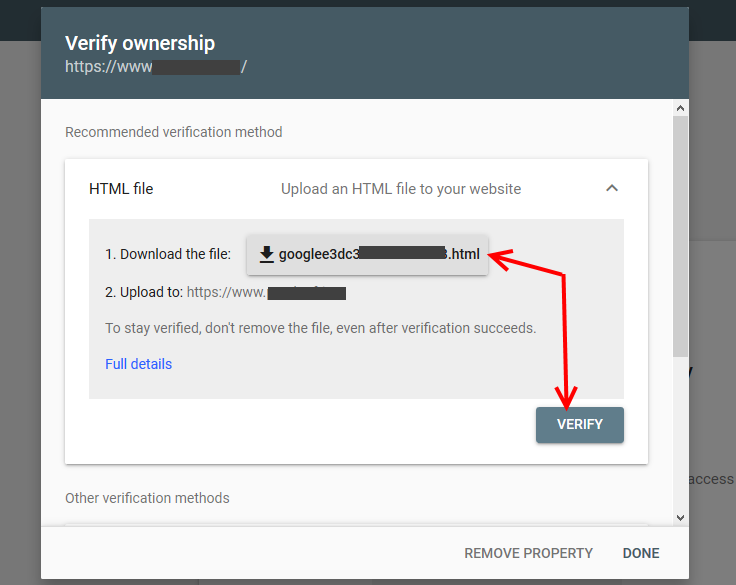
With the HTML method of verifying with a URL property, you will download the provided file, then upload it to the public_html directory of your website, then click VERIFY.
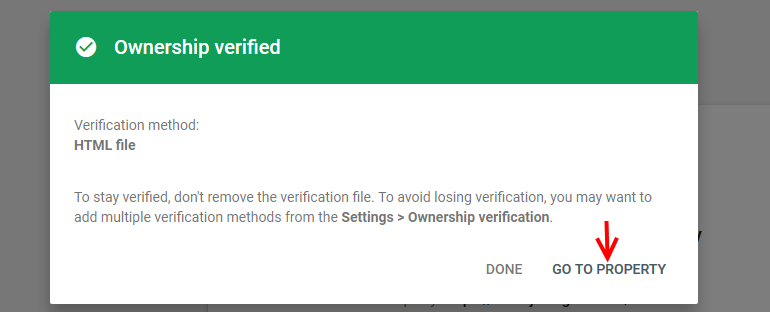
Once ownership is verified, you can click DONE or GO TO PROPERTY.
Other Verification Methods
Add a meta tag to your site’s home page
- Copy the meta tag below, and paste it into your site’s home page. It should go in the <head> section, before the first <body>
It should look like this.
<meta name=”google-site-verification” content=”fsdjflksiwoeurlskfsnkldfjskfdpseprwo;sf-0″ />
Most themes provide you with a place to add such code to your header. Check your theme details or documentation for details.
- Click Verify below.
To stay verified, don’t remove the meta tag, even after verification succeeds.
Use your Google Analytics account
- You must be using the gtag.js tracking code.
- Your tracking code should be in the <head>section of your page.
- You must have the “edit” permission for the Google Analytics property.
The Google Analytics tracking code is used only to verify site ownership. No Google Analytics data will be accessed.
Use your Google Tag Manager account
- You must be using the container snippet.
- You must have the “manage” permission for the Tag Manager container.
The Google Tag Manager container ID is used only to verify site ownership. No Google Tag Manager data will be accessed.
Associate a DNS record with Google
For whichever method you prefer to add and verify your website, you will have the same dashboard with the same tools.
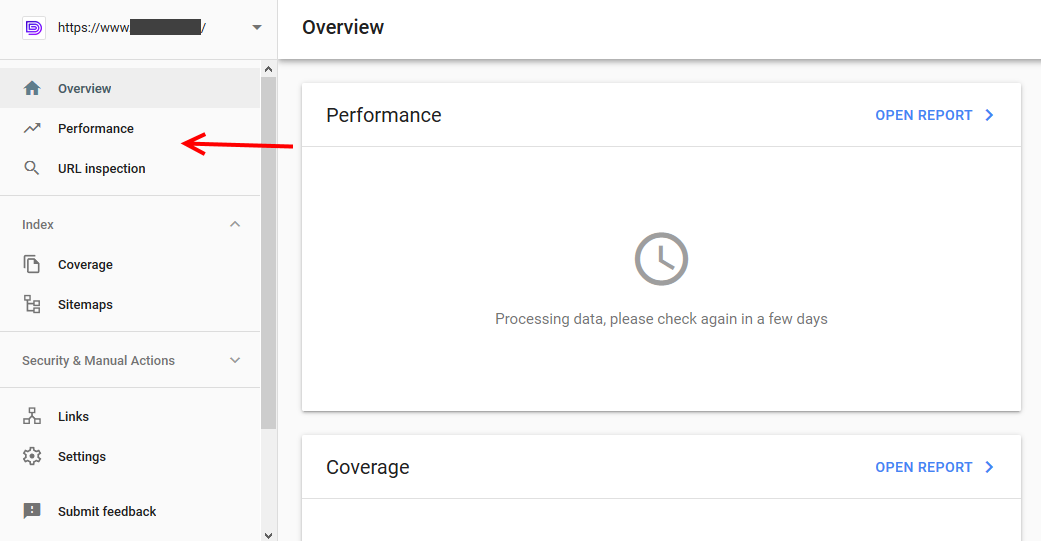
It will take some time for data to show up on the Search console, but, that is how you add a WordPress Website to Google Search Console
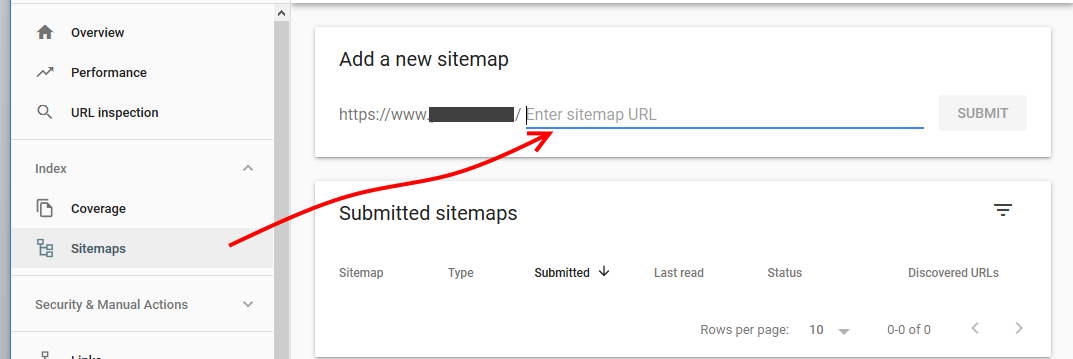
In the meantime, you start by adding a Sitemap to Google Search console.
Click Sitemaps from the left pane, then enter your sitemap URL and then click SUBMIT.
Conclusion
Ranking on the first page of search engines is rarely attributed to luck, you’ve got to pull up your socks and actually do the work.
Google Search Console is kind of cheating your way to Google’s first page since it provides a webmaster with the tools and reports needed to improve on their website for better ranking.
Besides Google Search Console, there is Google analytics; I hope you are all ready on that too. Connecting these two accounts provides you greater leverage with more detailed insights from data gathered from your website.
So why not jump into the wagon?