Push notifications are increasing in popularity among web masters. Adding push notifications to your website can increase repeat visitors and website reach. Push notifications are notifications that show on your devices screen. For example when you receive a new email on your phone you will usually get a notification on your phone. These are not annoying as they are less intrusive unlike pop ups. They are displayed in the notification area of devices. On desktops this is usually in the bottom right corner. On phones and tablets they show in the notification areas usually on the top of the screen.
On WordPress you can easily setup push notifications on your website through a free plugin such as OneSignal – Web Push Notifications. Once you set it up users will receive push notifications even after they have left your website and thereby making them keep coming back. The plugin is easy to setup and has a number of robust features.
Why You Need to Add Web Push Notification in WordPress?
When you create a new website gaining visitors can be a hurdle, but with a good plan in place you can easily overcome this hurdle. A good SEO plan, combined with some marketing and social presence can easily start driving traffic to your website. The next hurdle comes in which is how do you start getting repeat visitors? There are a number of techniques that you can use to get repeat visitors such as collecting emails and sending out newsletters. You can also use retargeting ads if you are doing some social media marketing. However, newsletters and retargeting ads can be pricey at times. Push notifications on the other hand can be set up easily and for free. They are also more effective than newsletters and have shown to have a higher click through rate.
Step by Step: How to Add Web Push Notification in WordPress.
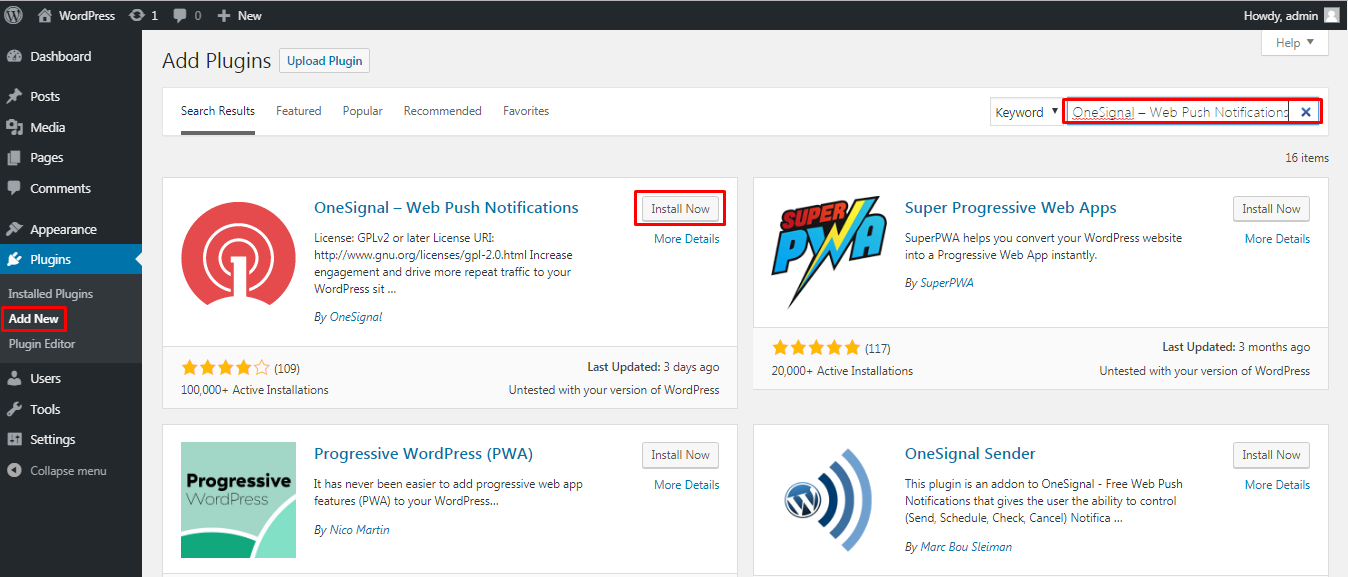
1. Installing OneSignal – Web Push Notifications plugin
Log in to your WordPress dashboard, under the plugins menu click on add new. Search for OneSignal – Web Push Notifications. Install and activate the plugin.
2. Setting up / using the OneSignal – Web Push Notifications plugin
Once activated you will find a new menu item in your WordPress dashboard: OneSignal Push. On the settings page there are 2 tabs one for plugin setup and the other for configuration of the push notifications

As shown, there are 3 steps to setting up the plugin. You will need to create an account on OneSignal (https://onesignal.com/) and obtain an APP ID and REST API Key.
Copy the app ID and the API key to the plugin setup page.
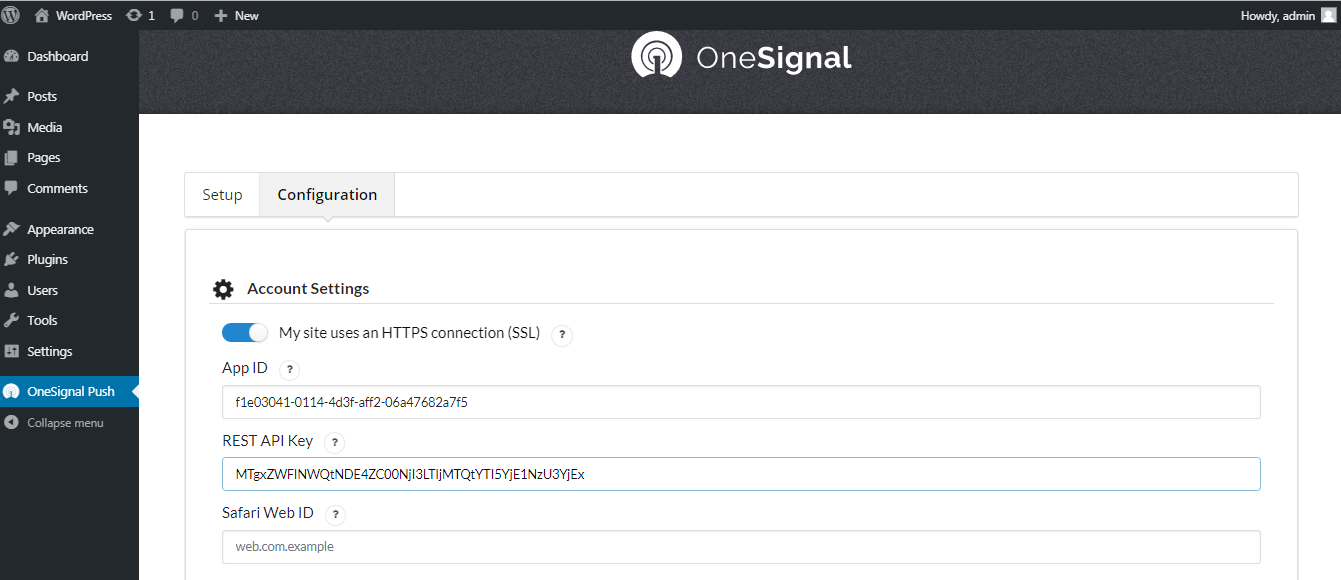
This will only work for Google Chrome and Firefox browsers. For Safari you need to create a Safari Web ID. The Safari Web ID can also be generated on the One Signal website.
Click on save once you are done.
Notification requests will now show on your website.

3. Other Configurations
There are a number of options that you can set up under the configuration tab.
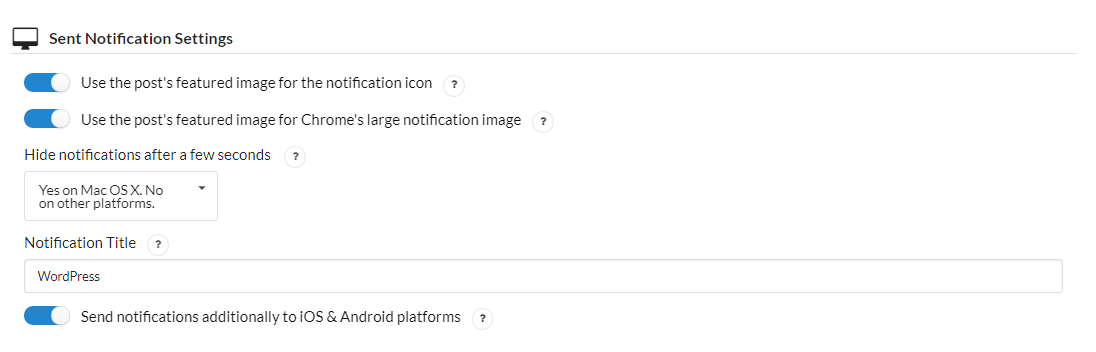
- Sent notification section – here you can configure if you want to use the featured image of the post in the notification. You can also set the notification title and configure sending of notifications to iOS and Android platform.
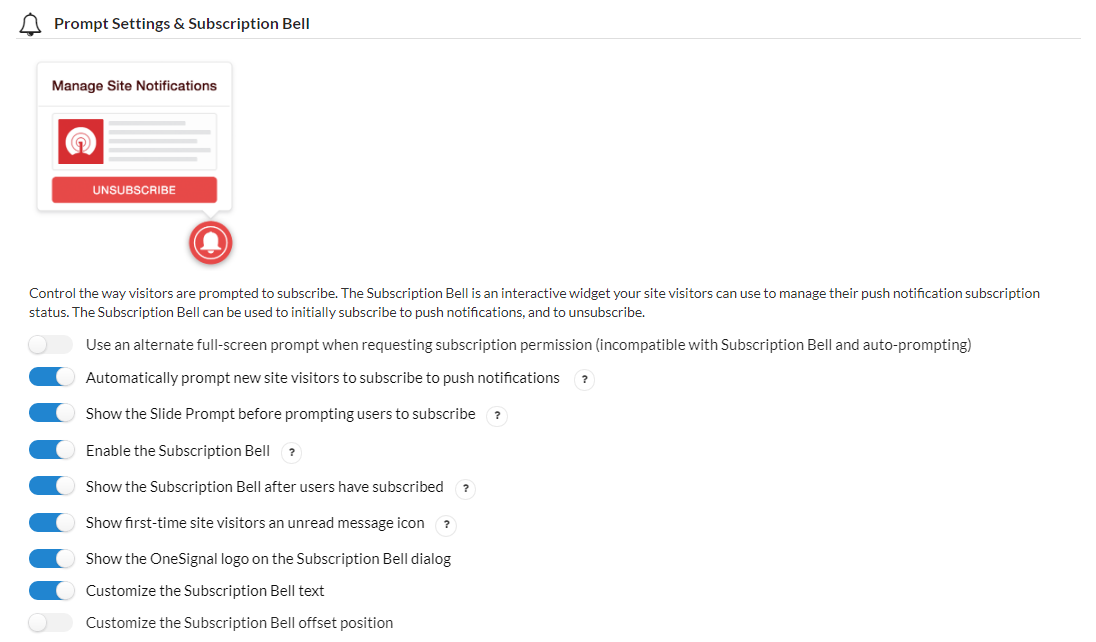
- Promp Settings and Subscription Bell – This section controls the way visitors are prompted to subscribe. You can also define subscription and un-subscription messages.
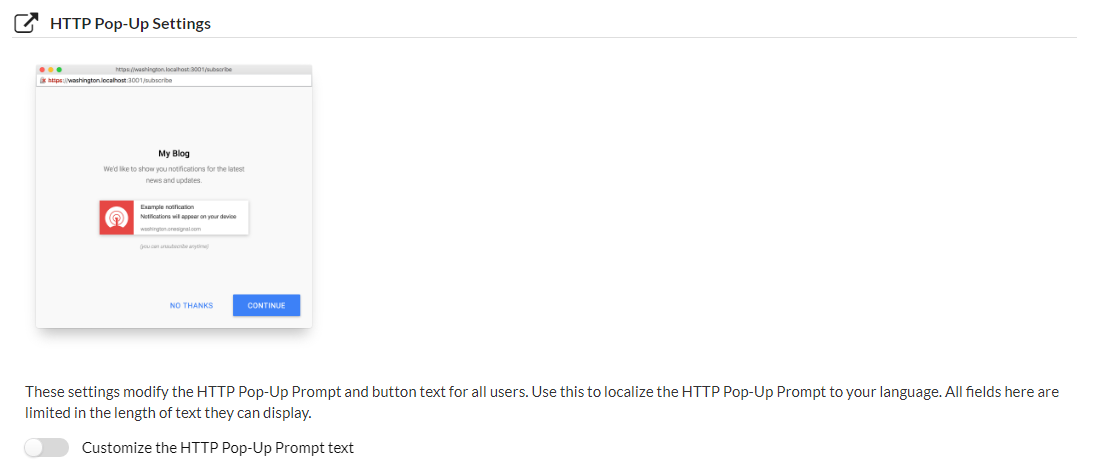
- HTTP Pop-Up Settings – Another way of asking visitors to subscribe is using a pop up. You can configure the pop up and change its design and messages here.
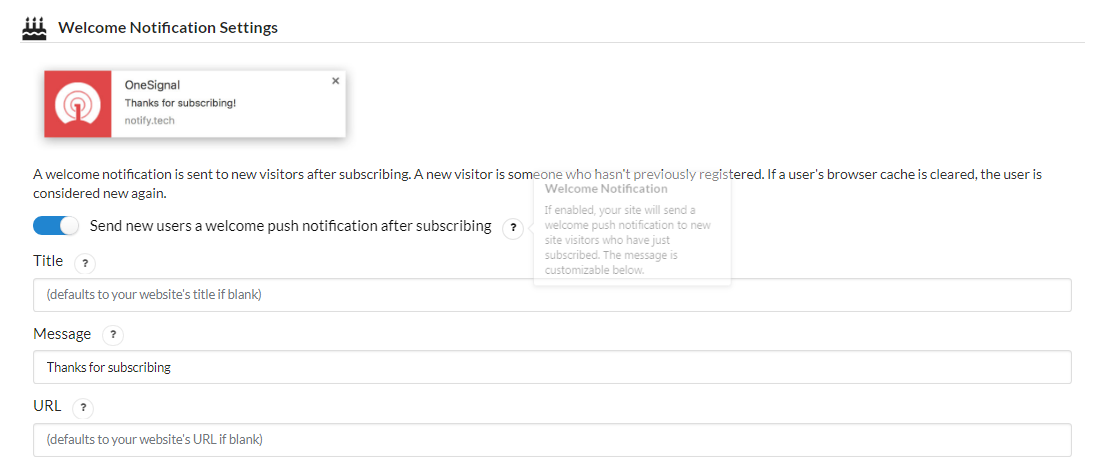
- Welcome Notification Section – Here you can set up a welcome notification for new subscribers.
4. Sending Push Notifications
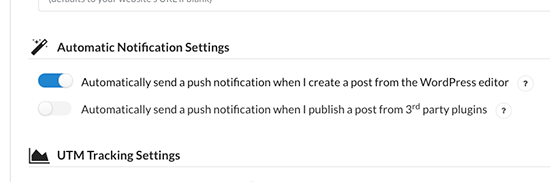
Once you are done configuring and customizing the notifications you now need to send push notifications to your subscribers. By default the plugin will automatically send push notifications each time you publish a new page or post.
You can disable this in the configuration tab if you don’t want to send automatic push notifications.
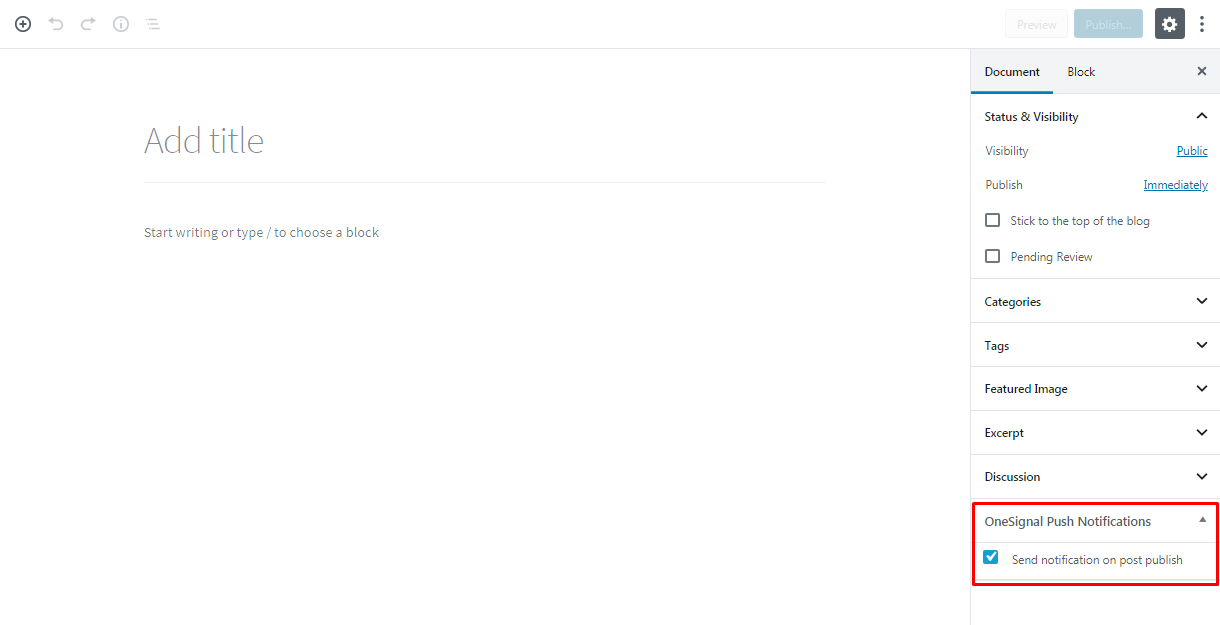
You also have the option to manually send push notifications when you create a new page or post. You will find a new OneSignal push notification section that will allow you to send push notifications after the post or page is published or updated. Simply check ‘Send notification on post publish’.
Conclusion
Push notifications are the perfect way to keep your subscribers up to date. Push notifications that are well set up can easily increase your subscribers and repeat visitors. Remember it is much easier to sell to hot traffic than it is to sell to cold traffic. People who have already visited your website and are aware of your brand are more likely to purchase or convert than people who land on your website for the first time. It is therefore important to keep getting repeat visitors and keep engaging them.
The Onesignal Push Notifications plugin is an all in one solution, for anyone looking to leverage the power of push notifications. If you’d like to explore more options,you can have a look at our handpicked list of the best free WordPress notification plugins.