Here is a quick guide on how to display random posts on a WordPress website.
Content is not created to fill up the website with stuff; it is created to offer readers, and audiences value ideas and solutions to their problems.
In a buyer’s journey, a website or blog is just another touch point a customer has to interact with before they make their purchase.
Besides that, random posts also site-wide interlinking on a website, something that search engines love.
If that is the purpose of the content of a website, it should be every website owner’s desire for that content to be discovered easily.
WordPress and most theme widgets only display posts in ascending and descending orders of dates created, that means that for many content-rich websites, most of that content disappears requiring one to dig deep searching for a particular topic or article.
Display random posts from your website in a widget; this is not dependent on the dates posts are created the way the default ascending and descending ordering works.
There are two routes to this, you can manually edit your WordPress code to randomly display posts or use a WordPress plugin.
To make it easy for you, we shall use a plugin – Advanced Random Posts Widget.
Step by Step: How to Display Random Posts in WordPress?
Install and activate the plugin
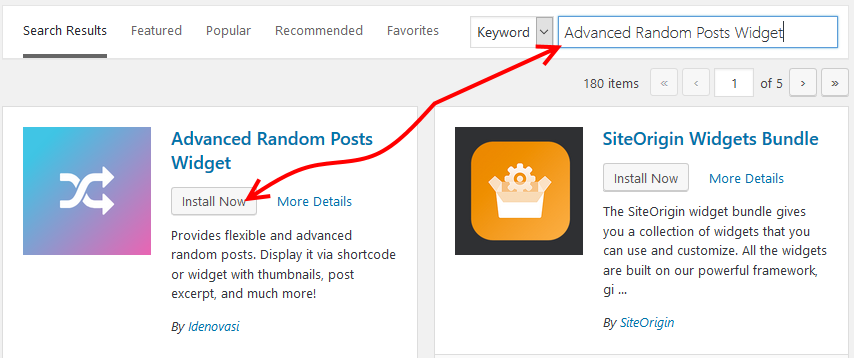
From your dashboard menu, go to plugins then click add new.
Search for Advanced Random Posts Widget, install, and then activate it.
To display posts, go to the widgets.
You can find them under appearance on your menu.

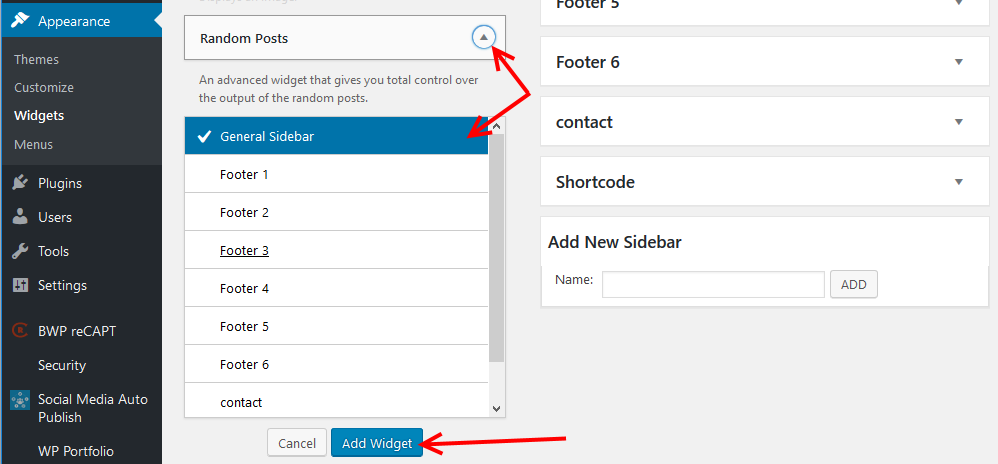
In the widgets page, search for Random Posts, choose the sidebar you want to add the random posts to and then click Add Widget.
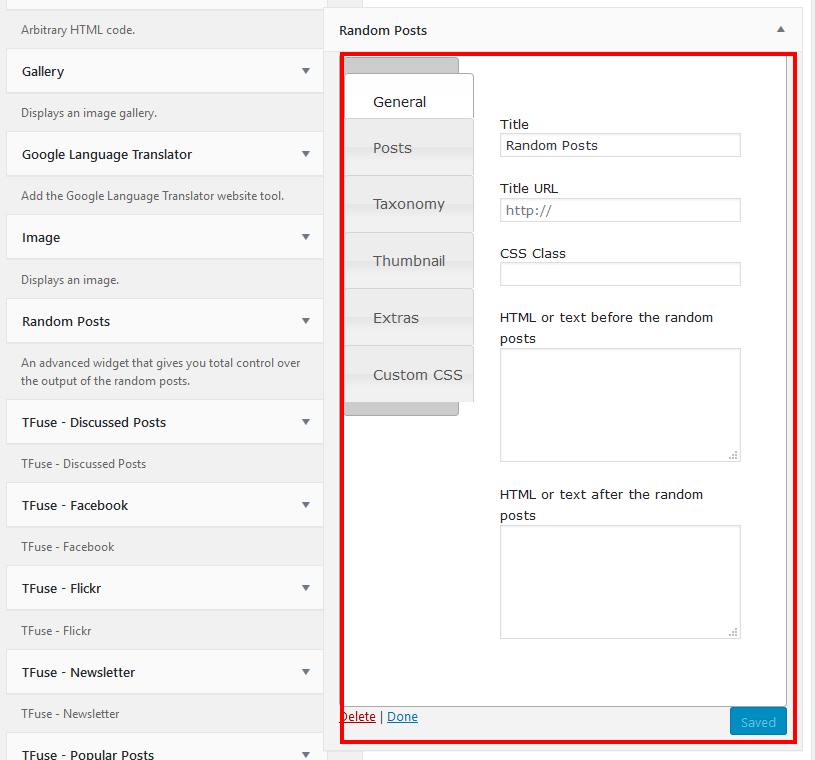
Configure – Advanced Random Posts Widget
- Under the General tab, provide a title, a title URL, if you want to add a notice or information before or after the posts, then enter the text in the respective text areas. Plus, you can also add your custom CSS code to style it.
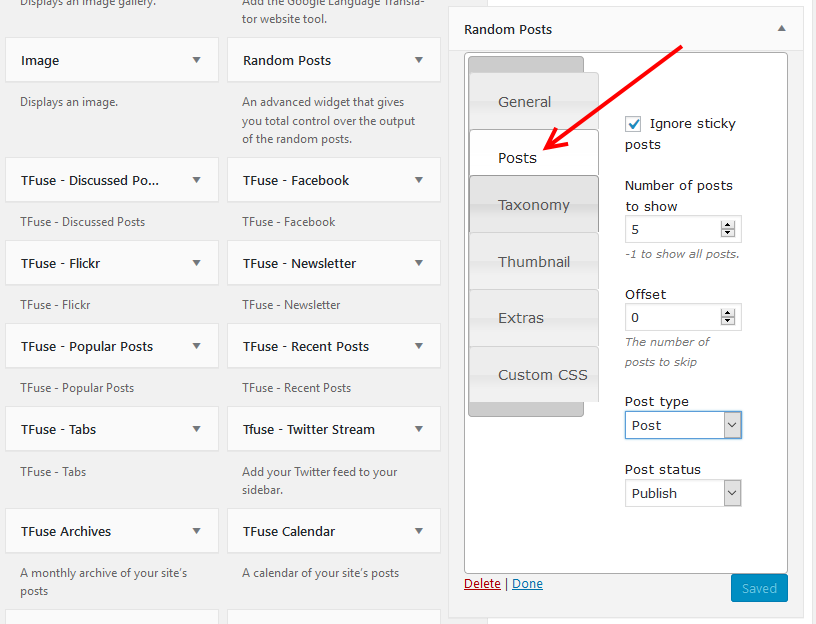
- Under the Post tab. Choose the number of posts to show in the widget, the post type – takes from the post types both native and custom post types in your website then set the post status and then save.
- Under the Taxonomy tab. If you chose to display posts in the post type as seen above-which is what this article is about – then in the taxonomy tab, you can select the categories from where the posts are pulled. You can also limit them further by the tags and the taxonomies. Hit the save button once you are done.
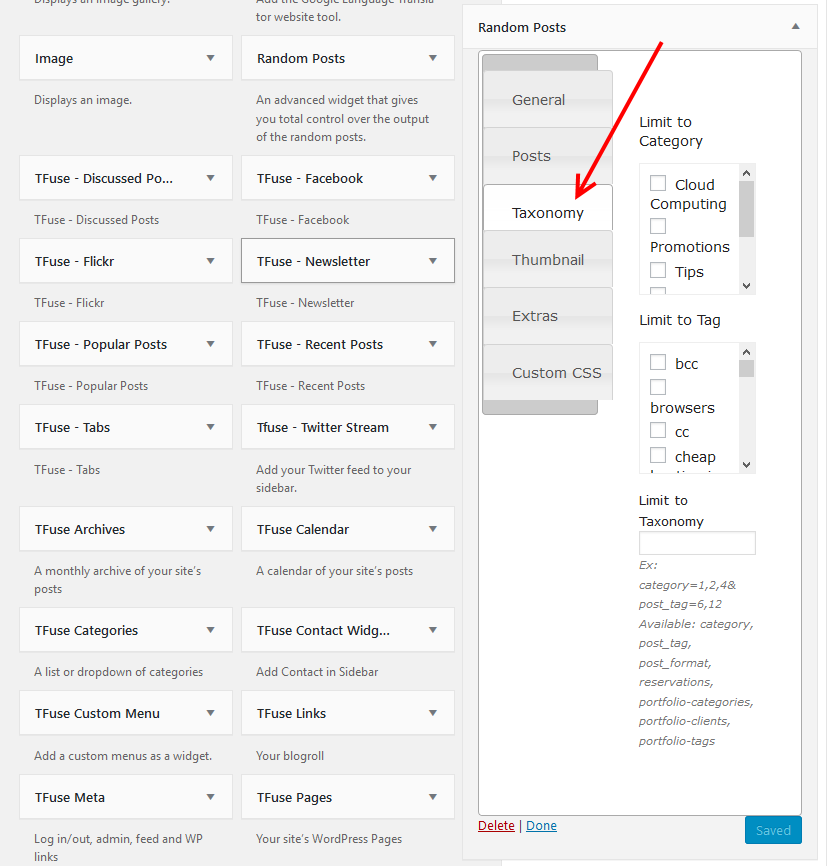
- From the thumbnail tab, one can set to display thumbnails beside the posts. Note that this depends on your them, so if your theme does not support the thumbnail feature and you need it, then go to http://codex.wordpress.org/Post_Thumbnails to learn how to activate it in your theme.
- Under the extras tab, fine-tune how the posts are to show. Select if you want to display the full post or the only display an excerpt of the posts, for the later, set its length.Then, choose whether to display the date – by default, the date when the post was created is displayed, if you prefer to set it to the modified date, then select Display modified date. You can alternatively also display the relate date – something like, three days ago – instead of the dates. Save to capture your preferences.
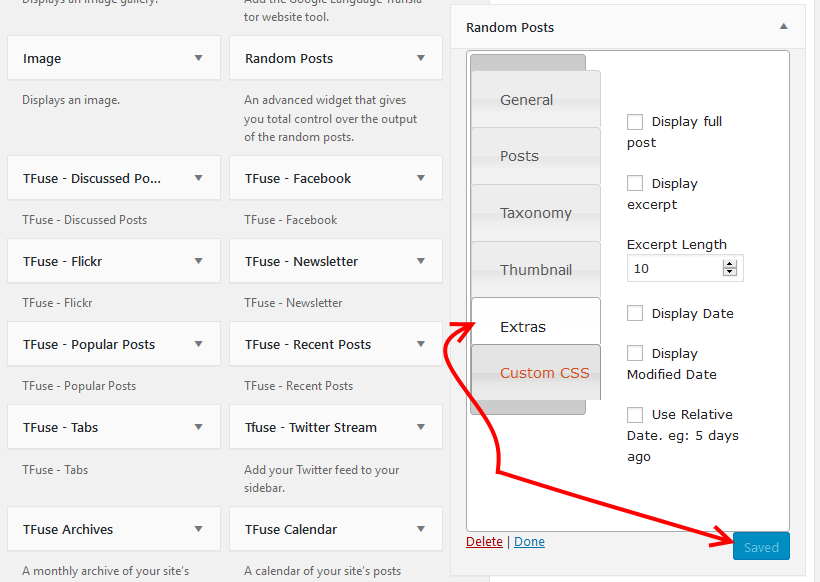
- If you a custom style sheet, you can paste under the Custom CSS tab.
That will be it for the settings and configurations.
Now head to your website, and on the sidebar, you added the widget to, you will see the random posts.
To be sure that the posts are displayed randomly – refresh your browser.
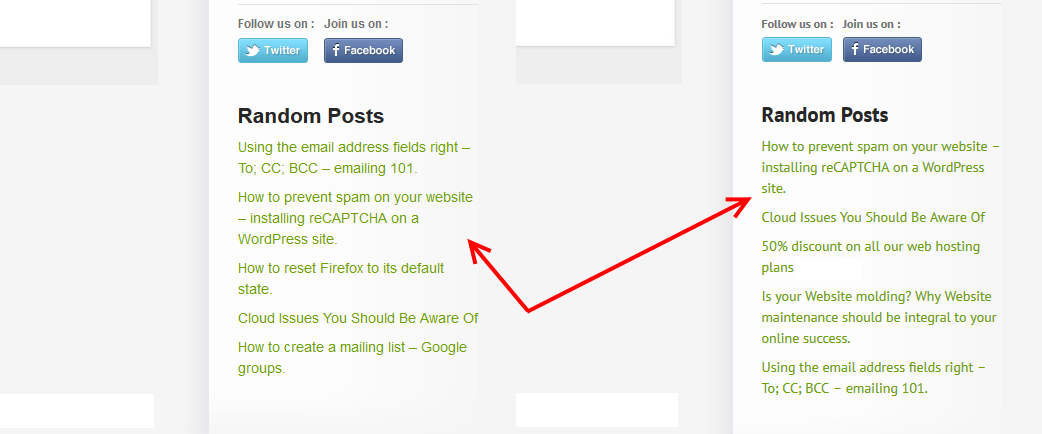
Now you can display random posts on a WordPress website.
This guide has introduced you to a great plugin (Advanced Random Posts Widget) that you can use to display random posts using a widget to your website.
We also walked through how to configure the widget and then attach it to a sidebar.
I hope you find it useful; you may also want to revive your old posts on social networks and drive traffic to your site.