If you are running a WooCommerce based shop online, here is a quick and easy way to add a custom wishlist in WooCommerce to enhance your WooCommerce store and increase your e-store sales.
We shall achieve this with the help of the free version of a WordPress plugin – Ti WooCommerce Wishlist.
It is known that customers may not usually buy the first time they view a product on a website.
The internet has made it easy for customers to “window shop” without shame. And so they will browse and click and go, and one in maybe 100 will buy. That’s okay.
Adding a wishlist increases your odds to sale more, as this feature caters from the typical procrastinating and indecisive customer by allowing them to save the products they like on your site and later return to complete their transactions.
Ti WooCommerce Wishlist is a simple yet powerful WooCommerce plugin that can help you to convert your site visitors into loyal customers.
This plugin makes it easy for your visitors to add products to a Wishlist, which tends to make customers buy a lot more than they planned.
In addition to that, visitors can share their wishlist with friends on social or by email. By sharing their Wishlists, they are bringing you new potential customers.
I can smell money.
Alright, let’s get started.
Note that, as an extension to WooCommerce, the WooCommerce plugin needs to be installed and activated on your website prior to activating Ti Woocommerce Wishlist.
Step by Step: How to Add A Custom Wishlist in WooCommerce
Step 1. Install and activate Ti Woocommerce Wishlist
In your WordPress website admin area, go to Plugins and click Add New.
In the search box, enter Ti Woocommerce Wishlist to search the WordPress plugin database.
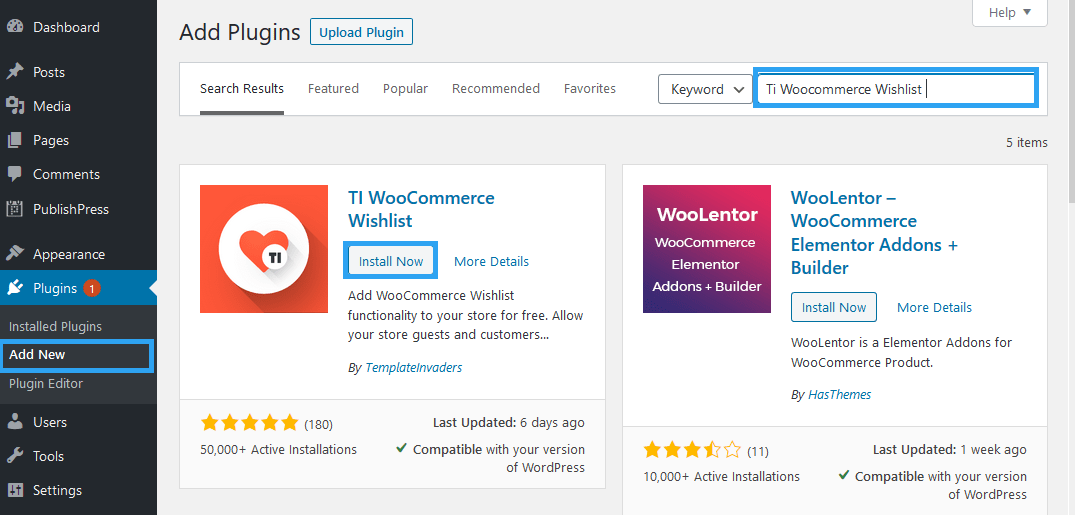
When the results load, click the Install Now button, and then click Activate.
Step 2. Run the initial Setup Wizard
After activating the plugin, you will see a welcome notice to the WooCommerce Wishlist plugin.
From there, click the Run the Setup Wizard button to configure the plugin for your website.

Under the Page Setup tab, define your default wishlist name.
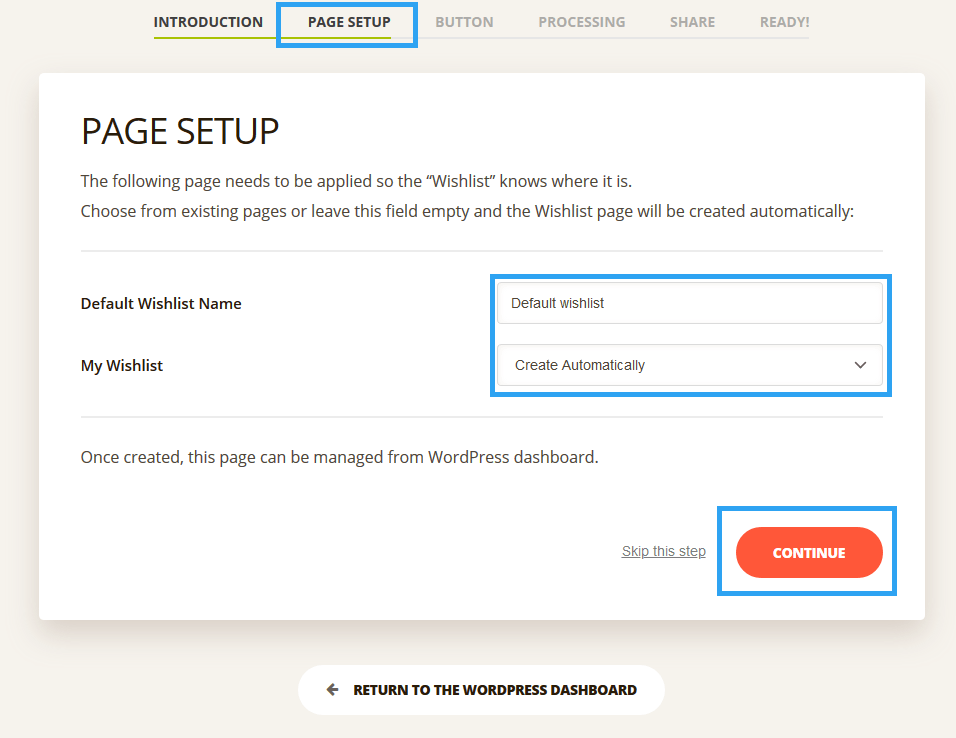
After setting your Default Wishlist Name, select the page for your wishlist.
If you have do not have the page yet, which I assume you don’t, then let the page be created for you automatically – leave the default option.
Then, click Continue.
If you create a page manually, ensure that you add [ti_wishlistsview] shortcode into the page content. That is the page you select instead of creating it automatically.
You can also always change this page in the plugins General Settings section where you apply this page as a “Wishlist” page.
Step 3. Define the wishlist Button settings
In the next window, you are to define the wishlist Button settings.
From here, you can define the button position, the “Add to Wishlist” text, and also set whether you want to show the wishlist in the individual product listing.
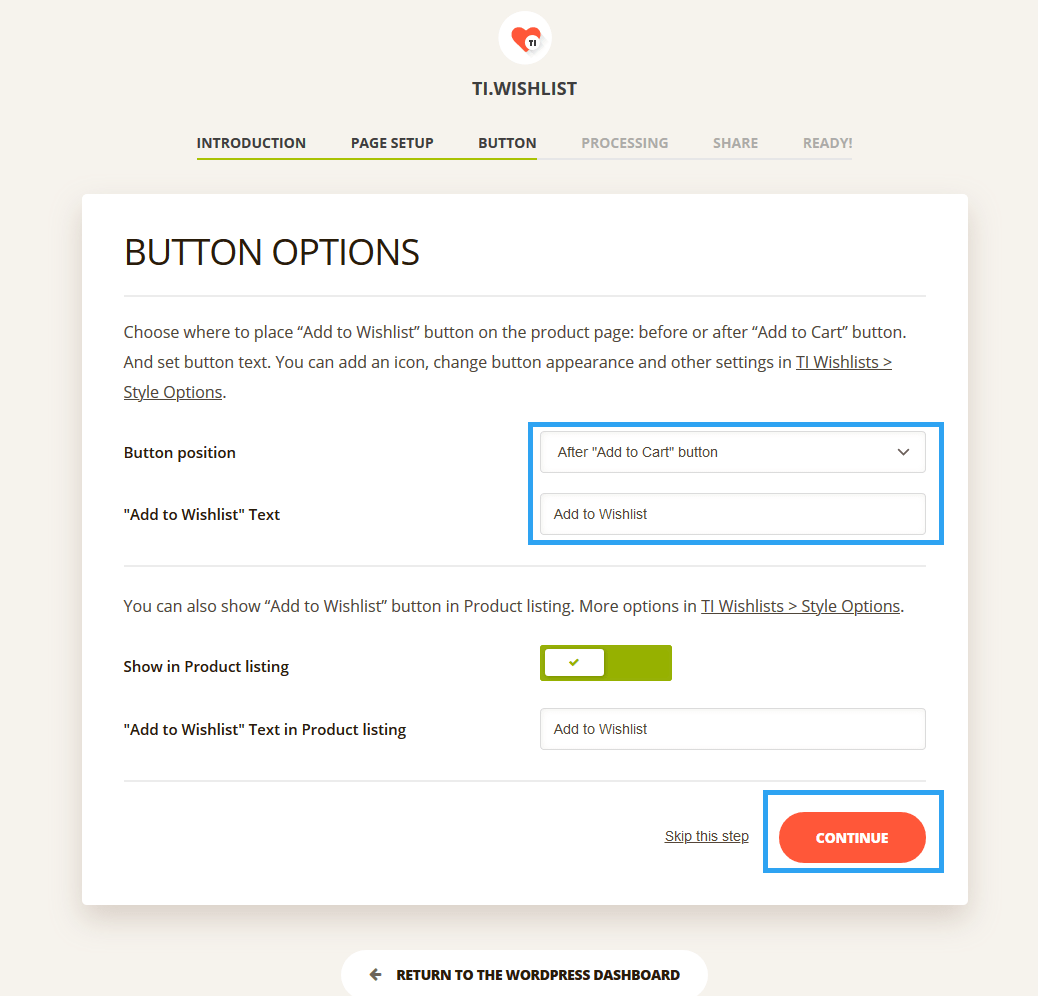
Choose where to place “Add to Wishlist” button on the product page: before or after “Add to Cart” button.
And set button text.
You can always add an icon, change button appearance, and other settings in the plugins settings page. You find it on the left menu TI Wishlists and then Style Options.
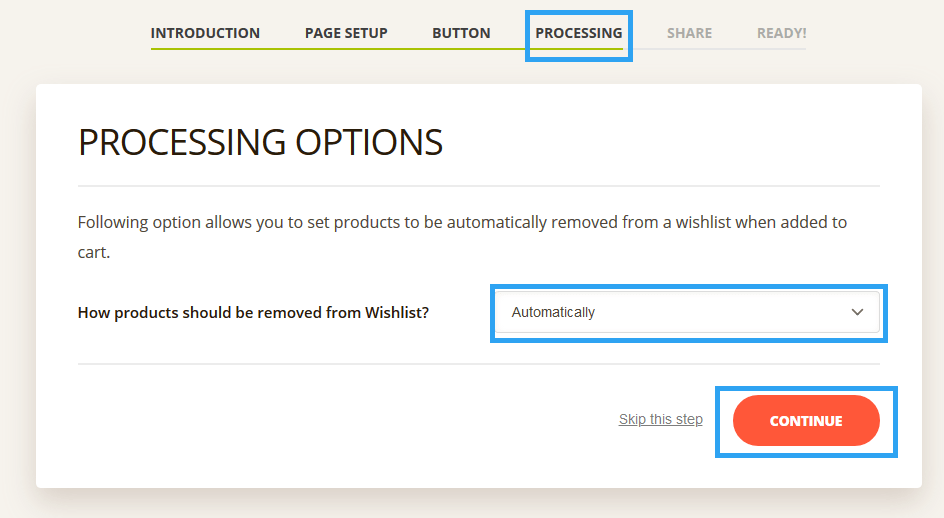
Step 4. Define the processing Options
This allows you to set products to be automatically removed from a wishlist when added to the cart.
On the next tab, you can allow people to share their wishlists on social or by email.
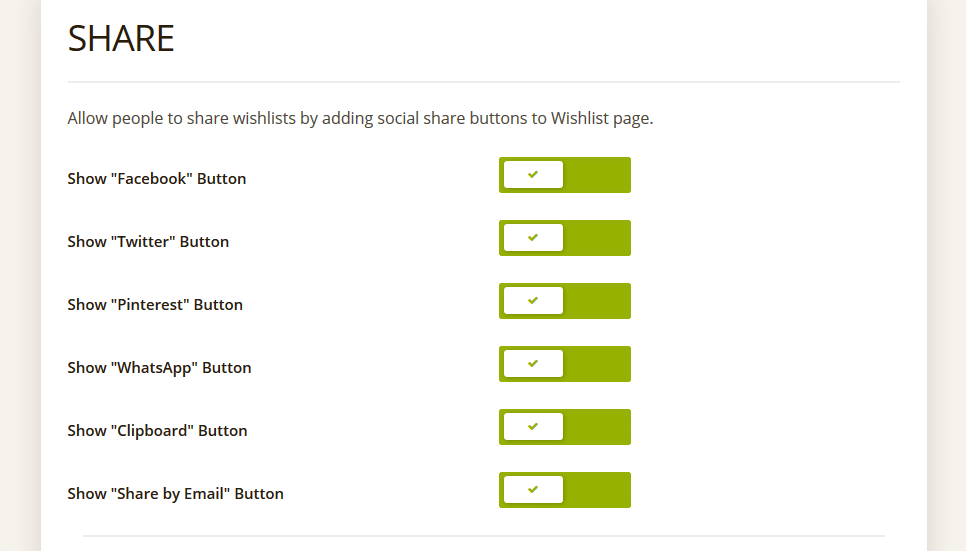
You can add social share buttons to Facebook, Twitter, Pinterest, WhatsApp, Clipboard, and Email.
Once you go through all that, your wishlist is ready for the world. The basic settings here have all that you may need. If you want to make more in-depth plugin changes, you can make it in the plugin settings page under Ti WooCommerce Wishlist Plugin Settings.
You can also learn more about the plugin and peruse through its detailed Online Documentation.
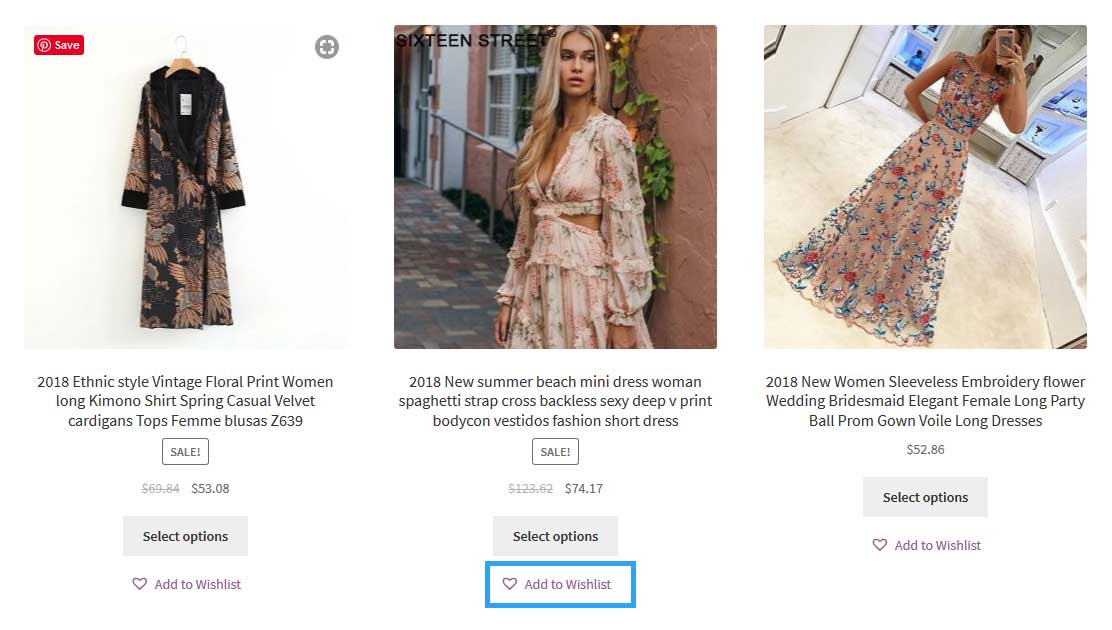
Go to your shop now. You should find the Wishlist button in the general shop or products page and also on the individual product page.
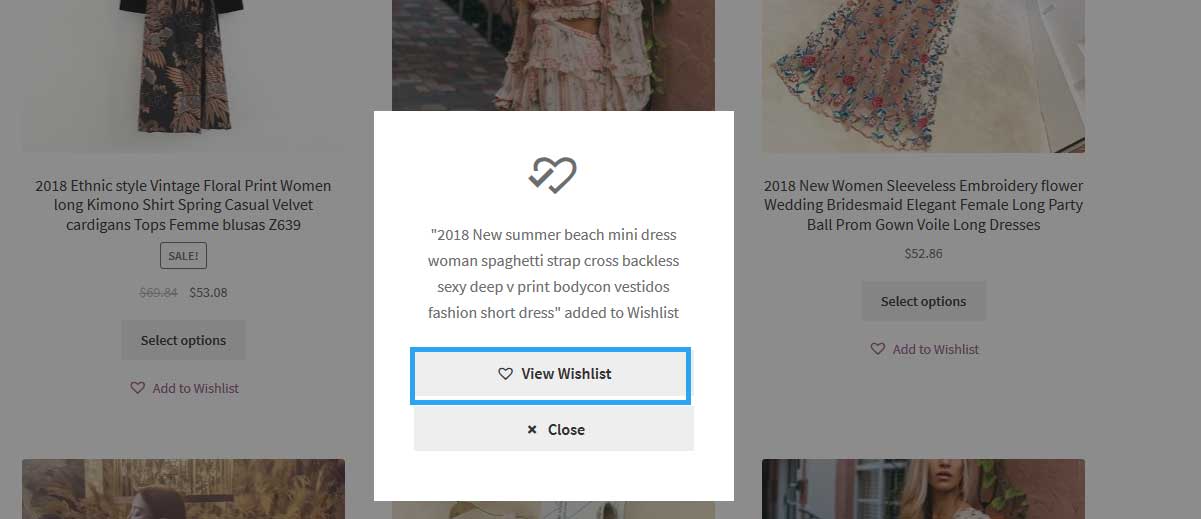
When someone clicks the button, a popup appears, and they can click the View Wishlist button – to view their wishlist.
And this is how the wishlist looks like.
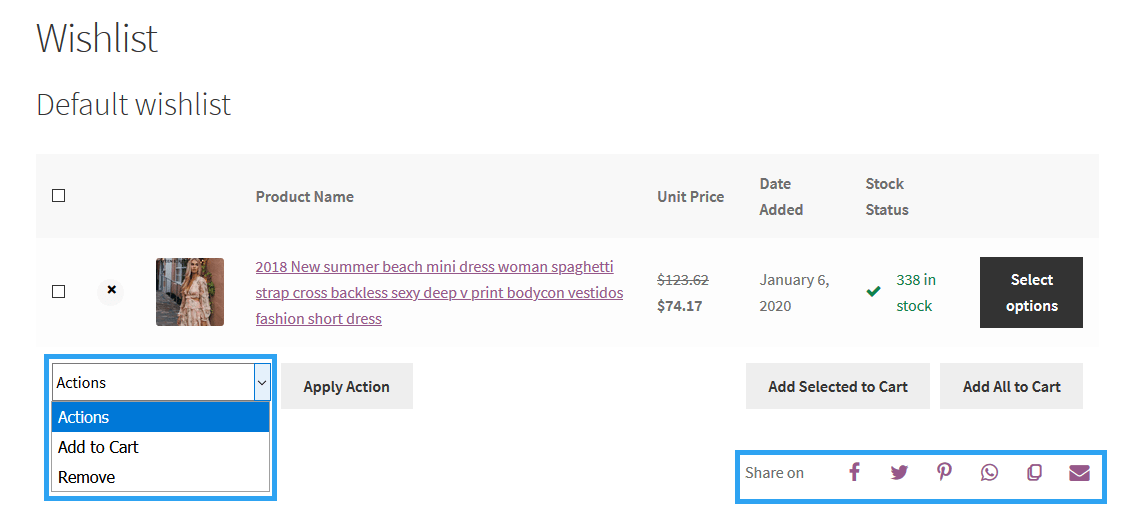
The customer can manage their wishlist from here.
Add it to a cart, share the list with their friends or just, remove a product from their wishlist.
Conclusion
That’s it for this article.
You can now supercharge your WooCommerce based shop with this article that has hopefully been easy to follow as you add a custom wishlist in WooCommerce to enhance your WooCommerce store and increase your e-store sales.
I hope you have found it helpful.
If you did, share the love and share this article with your friends or follow us on Twitter for more helpful articles like this.
You may also want to learn how to apply free shipping on a single product in WooCommerce.