WPvivid Backup Pro is our flagship plugin that has been trusted by more than 10,000 customers. It comes with an extremely wide range of advanced customization options, thus giving you full control over your website backups, migration, and restoration.
This article will give you a great overview of how the WPvivid Backup Pro plugin works.
Install WPvivid Backup Pro
Check out this step-by-step guide to install and activate WPvivid Backup Pro on your websites.
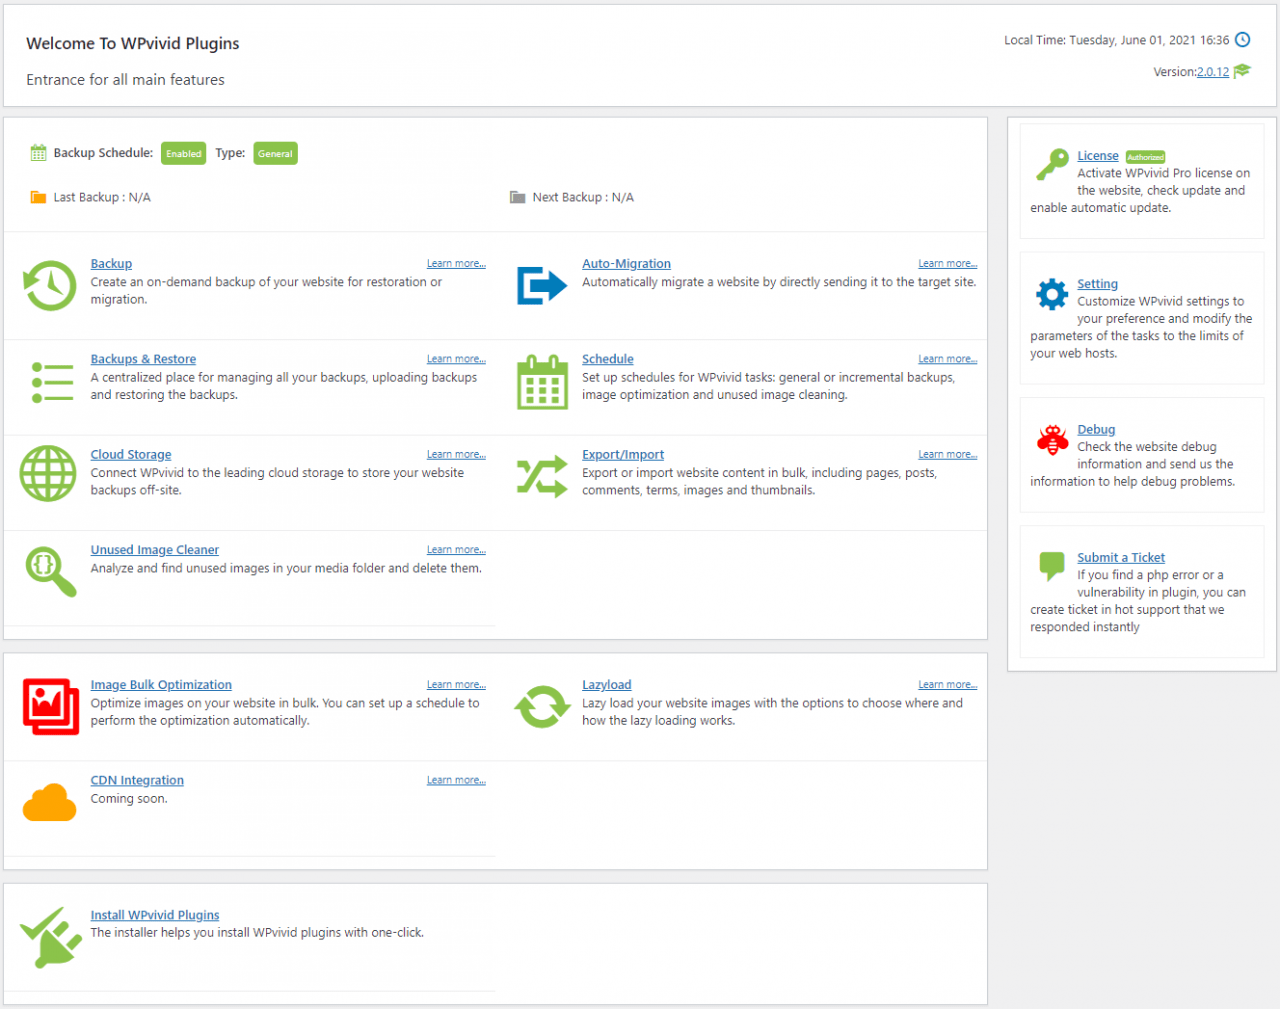
Dashboard
The Dashboard serves as an entrance of all WPvivid main functions that gives you a direct access to the features pages. It also shows your backup schedule information including the schedule status, type, last backup, and next backup.
Manual Backup
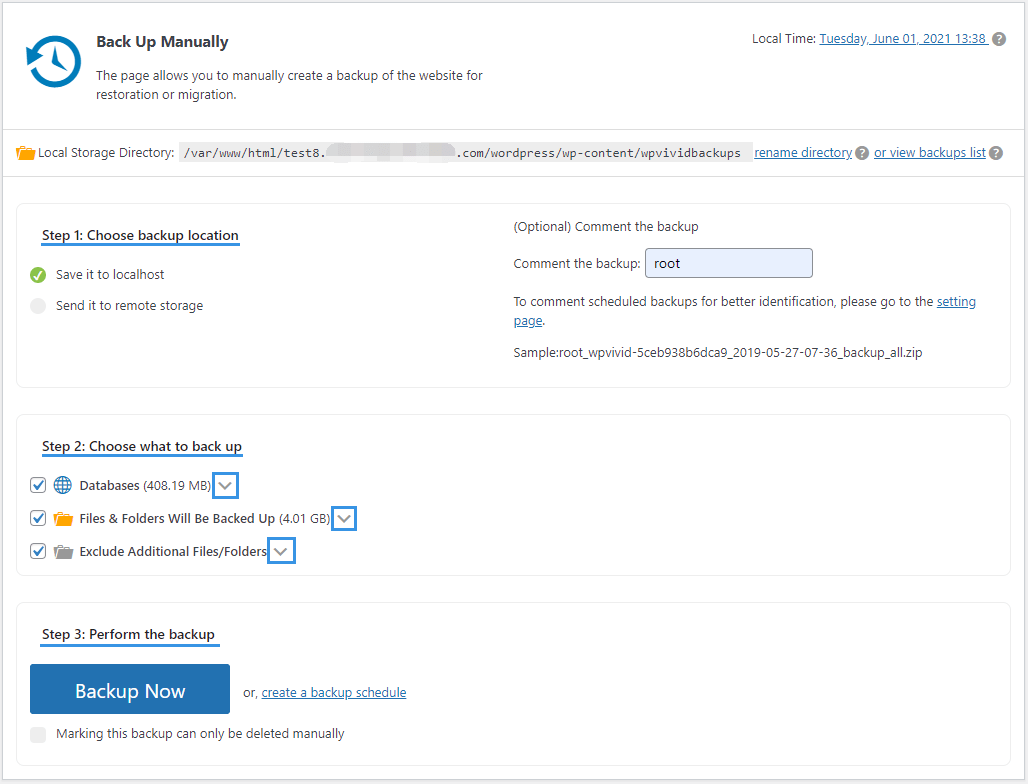
The ‘Back Up Manually’ page allows you to create on-demand backups as needed, the backups can be used for restoration or migration.
You need to go through 3 steps to perform a manual backup:
Step1: Choose backup location, to localhost, or remote storage. You also have the option to add a prefix to the backup for easier identification.
Step2: Choose what to back up. In the step, you can include or exclude files/folder and database tables from the backup. Click on the down arrow icon to expand options.
Step3: Perform the backup. Once you are done with the settings, hit the ‘Backup Now’ button to start the process. You can choose whether to lock this backup or not.
Auto Migration
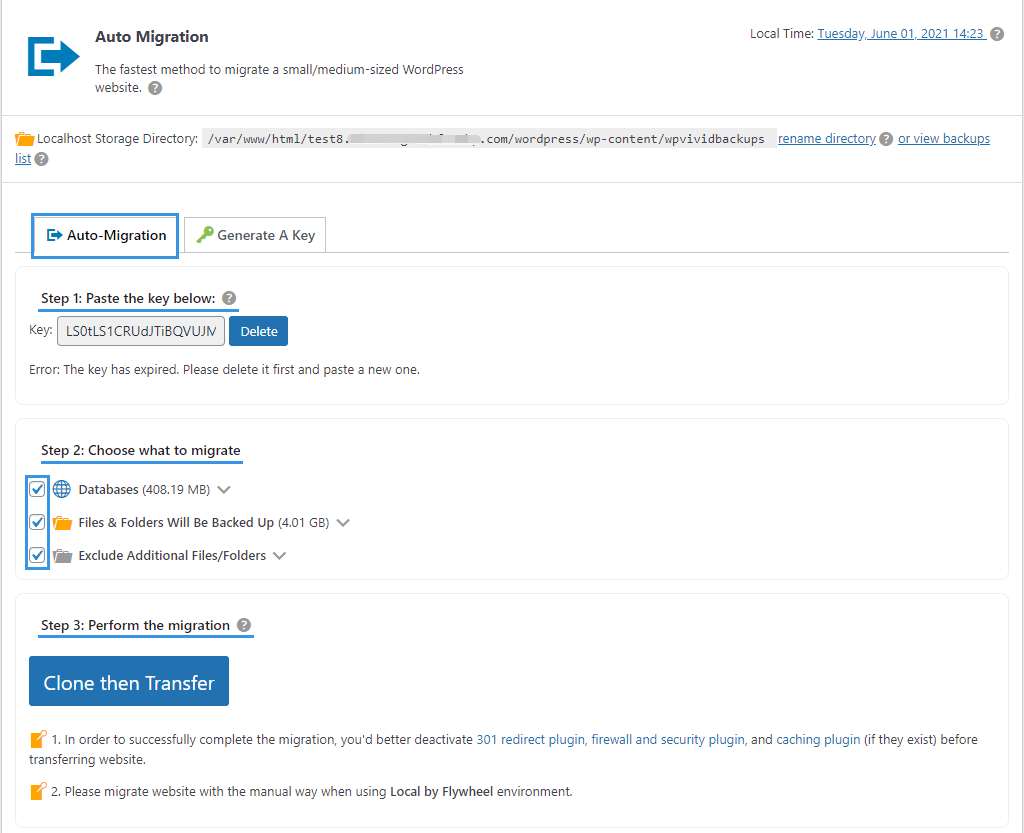
From the Auto Migration page, you can perform website migration automatically using a key and generate a key.
You can perform auto migration in 3 steps:
Step 1: Paste the key. Paste the key you generated on the destination site on the field.
Step 2: Choose what to migrate. Select files/folders and database tables you want to migrate.
Step 3: Click the ‘Clone then Transfer‘ button to start migration.
Schedules
The Schedule page is where you can create general backup schedules or incremental backup schedules.
In order to save server resources, only one of the two schedule types can be activated at the same time. So, you will need to Enable the schedule first.
Each schedule type has a pre-set schedule template, you can choose to keep it or edit it as needed.

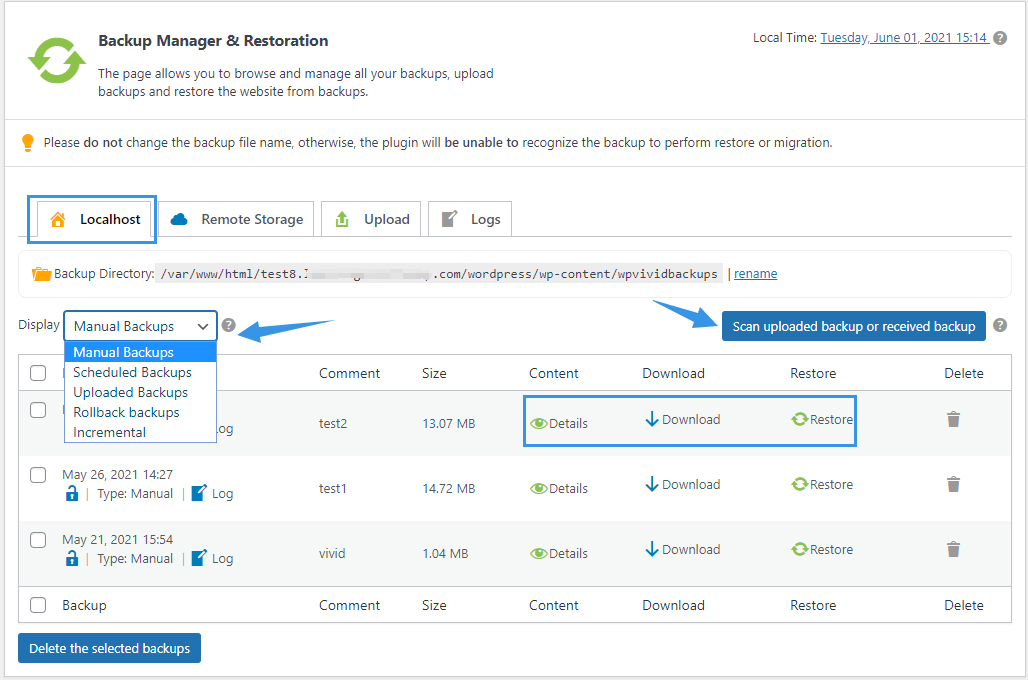
Backups & Restoration
The Backup Manager & Restoration page allows you to browse and manage all your backups and logs, upload backups and restore the site from a backup.
You can select backup types to display the backups in the list. Click on the subtab titles to switch between the subtabs.
Cloud Storage
From the Cloud Storage page, you can add your cloud storage, create a custom folder for storing the site backups in a cloud storage, and set backup retention for the storage.
All you added cloud storage are displayed in the Storage list on the page. Tick the storage(s) to make it/them as default storage for storing your backups. Click the gear icon to edit the storage information – name, backup folder names and retention settings.

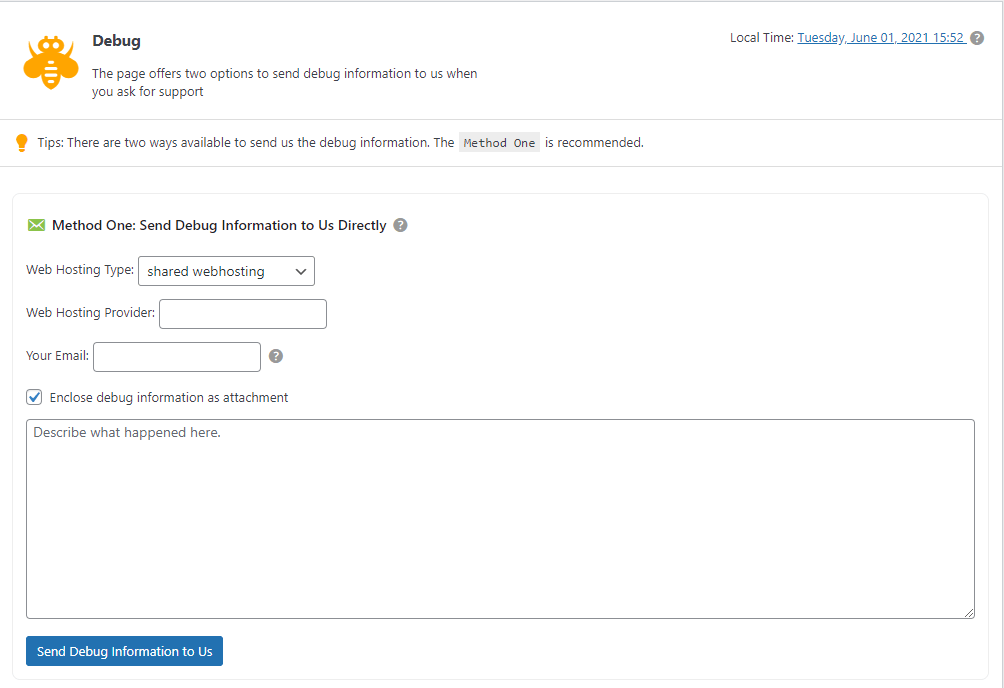
Debug
The Debug tab offers two options for you to send debug zip to us when you ask for support. You can send the debug information to us directly by using your site’s SMTP system or download the debug zip and send it to us manually via email.
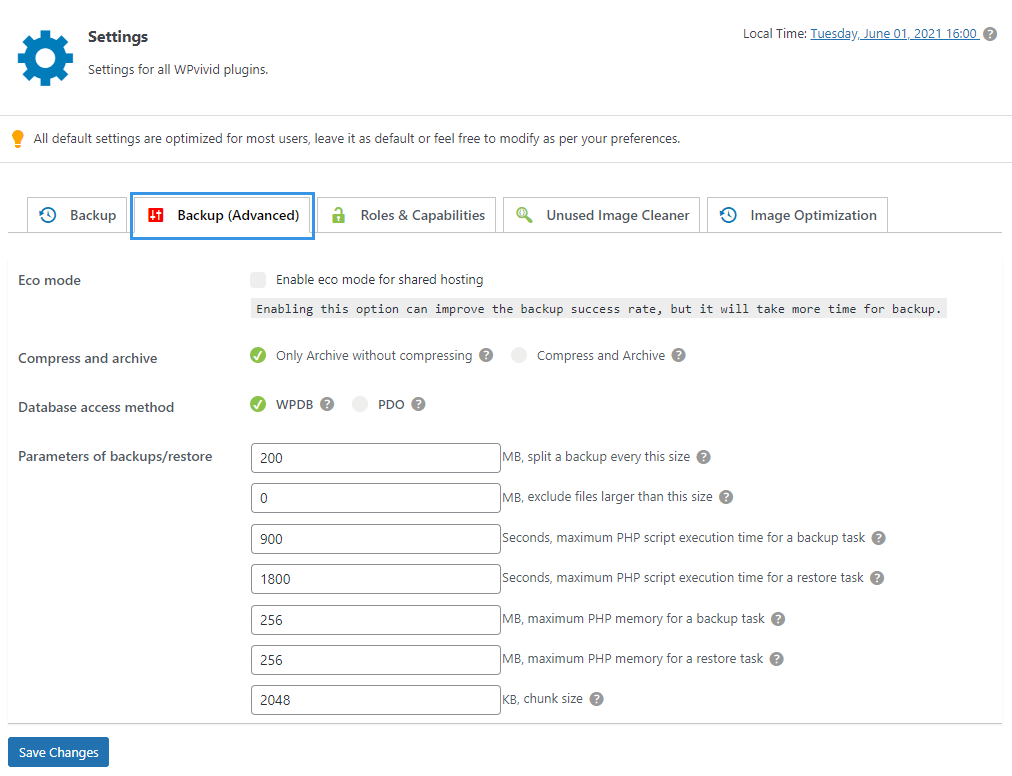
Settings
The Settings page is where you can configure all the settings of WPvivid plugins(addons), including backup, image optimization, roles and capabilities, and unused image cleaner.
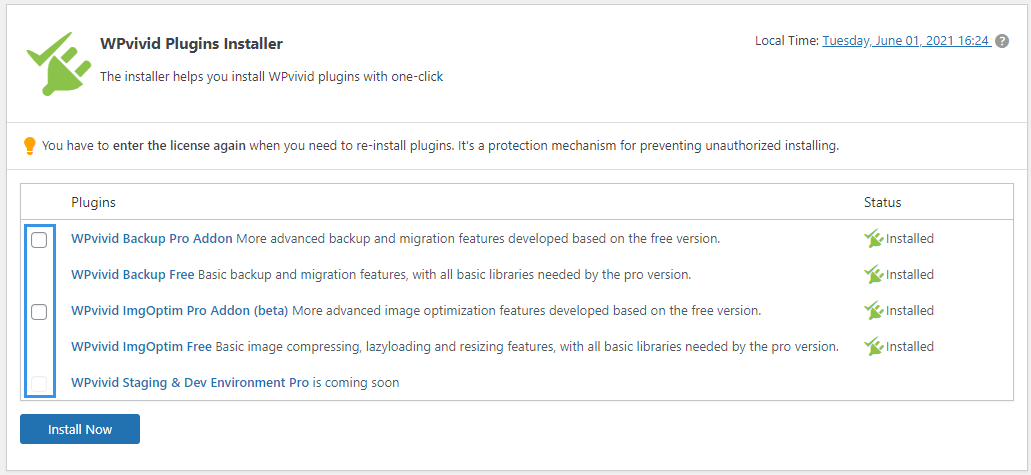
Installer
The Installer page allows you to select and install WPvivid plugins with one-click. Select the plugins you want to install on the site and click the Install Now button to start the process.
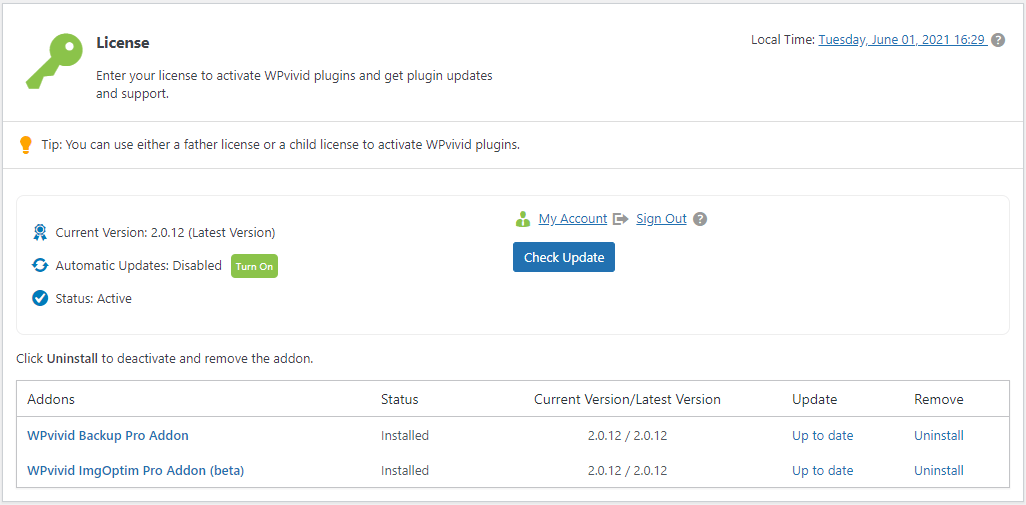
License
From the License page, you can activate your WPvivid license on the site, which is required to install all WPvivid pro addons and update the addons.
There is also a list of WPvivid addons on the page where you can view the addon status and versions. Click Uninstall button to deactivate and remove the addon from the site.